Partitioning the OS with the BIOS Boot Option
Depending on the requirements, you can extend the size of the partitions in a physical volume to accommodate all the logs and other ESA related data. You can utilize the Logical Volume Manager (LVM) to increase the partitions in the physical volume. Using LVM, you can manage hard disk storage to allocate, mirror, or resize volumes.
In an ESA, the physical volume is divided into the following three logical volume groups:
| Partition | Description |
|---|---|
| Boot | Contains the boot information |
| PTYVG | Contains the files and information about OS and logs |
| Data Volume Group | Contains the data that in the /opt directory |
The PTYVG volume partition contains the OS information. You must increase the PTYVG volume group to extend the root partition. The following table describes the different logical volumes in the PTYVG volume group.
| Logical Volume | Description | Default Size |
|---|---|---|
| OS | The root partition |
|
| OS-bak | The backup for the root partition |
|
| LOGS | The logs that are in the /var/log directory |
|
| SWAP | The swap partition |
The swap partition for ESA is 8 GB. |
The following table illustrates the partitioning of all the logical volume groups in a single hard disk system.
Table: Partition of Logical Volume Groups
| Partition | Partition Name | Physical Volume | Volume Group | Directory | Directory Path | Upgraded Appliances Size | ISO and Cloud Installation Size |
| /dev/sda | sda1 | /boot | 400M | ||||
| sda2 | 100M | ||||||
| sda3 | Physical Volume 1 | PTYVG | OS | / | 8G | 16G | |
| OS_bak | 8G | 16G | |||||
| logs | /var/log | 6G | 12 | ||||
| swap | [SWAP] | By default, 2G for appliances
products. The swap partition for ESA is 8G. | |||||
| sda4 | Physical Volume 2 | PTYVG_DATA | opt | /opt/docker/lib | 50% of rest | ||
| opt_bak | 50% of rest | ||||||
- For Cloud-based platforms, the OS_bak directory is not available in the data volume group. The data in the PTYVG partition is available in the OS directory only.
- For Cloud-based platforms, the opt_bak directory is not available in the data volume group. The data in the PTYVG_DATA partition is available in the opt directory only.
If multiple hard disks installed on an ESA, then you can select the required hard disks for configuring the OS volume and the data volume. You can also extend the OS partition or the disk partition across the hard disks that are installed on the appliance.
The following table illustrates an example of partitioning in multiple hard disks.
Table: Partitioning in Multiple Hard Drives
| Partition | Partition Name | Physical Volume | Volume Group | Directory | Directory Path | Upgraded Appliances Size | ISO and Cloud Installation Size |
| /dev/sda | sda1 | /boot | 400M | ||||
| sda2 | 100M | ||||||
| sda3 | Physical Volume 1 | PTYVG | OS | / | 8G | 16G | |
| OS_bak | 8G | 16G | |||||
| logs | /var/log | 6G | 12G | ||||
| swap | [SWAP] | By default, 2G for appliances
products. The swap partition for ESA is 8G. | |||||
| sda4 | Physical Volume 2 | PTYVG_DATA | opt | /opt/docker/lib | 50% of rest | ||
| opt_bak | 50% of rest | ||||||
| Partition | Physical Volume | Volume Group | Directory | Directory Path | Size |
| /dev/sdb | Physical Volume 1 | PTYVG_DATA | opt | /opt/docker/lib | 50% |
| opt_bak | 50% |
- For Cloud-based platforms, the OS_bak directory is not available in the data volume group. The data in the PTYVG partition is available in the OS directory only.
- For Cloud-based platforms, the opt_bak directory is not available in the data volume group. The data in the PTYVG_DATA partition is available in the opt directory only.
The hard disk, sda, contains the partitions for the root and the PTYVG volumes. The hard disk, sdb contains the partition for the data volume group.
Extending the OS partition
The following sections describe the procedures to extend the OS partition.
Before you begin
Before extending the OS partition, it is recommended to back up your ESA. It ensures that you can roll back your changes in case of an error.
When you add a new hard disk to the partition, you should restart the system. This ensures that all the hard disks appear.
- For the Cloud-based platforms, the names of the hard disks may get updated after restarting the system.
- Ensure that the you verify the names of the hard disks before proceeding further.
Starting in Single User Mode
You must load in the Single User Mode to change the kernel command line.
For Cloud-based platforms, the Single User Mode is unavailable. It is recommended to perform the following operations from the OS Console. While performing these operations, ensure that the system is accessible by only a single user.
To boot into Single User Mode:
Install a new hard disk on the ESA.
For more information about installing a new hard disk, refer here.
Boot the ESA in Single User Mode.
If the GRUB Credentials are enabled, the screen to enter the GRUB credentials appears. Enter the credentials and press ENTER.
The following screen appears.
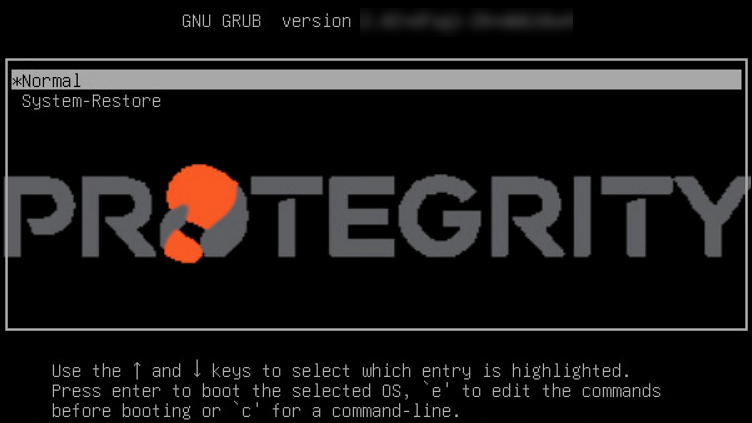
Select Normal and press E.
The following screen appears.

Select the linux/generic line and append <SPACE>S to the end of the line as shown in the following figure.
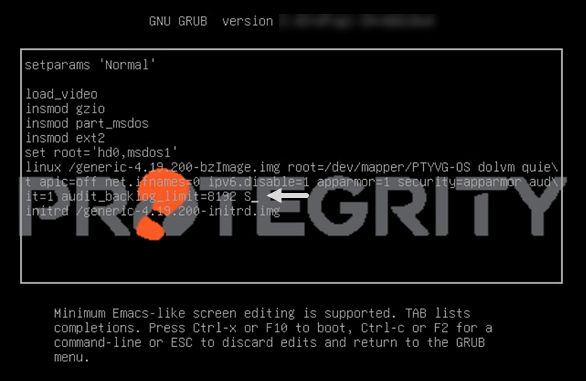
Press F10 to restart the ESA.
After the ESA is restarted, a prompt to enter the root password appears.
Enter the root password and press ENTER.
Creating a Partition
After editing the kernel command line, you must create the required partitions.
The following procedure describes how to create a partition on a new hard disk, sdb. You can add multiple hard disks to the ESA.
If you add multiple hard disks to the ESA, then the devices are created as /dev/sdb, /dev/sdc, /dev/sdd, and so on. You can select the required hard disk based on the storage space available.
For Cloud-based platforms, the names of the hard disk might differ. Based on the cloud platform, the hard disk names may appear as nvme1n1, xvdb, or so on.
To create a partition:
Run the following command to list the hard disks that are available.
lsblkRun the following command to format the partition.
fdisk /dev/sdbType o to create a partition table and press ENTER.
Type n to create a new partition and press ENTER.
Type p to create a primary partition and press ENTER.
In the following prompt, assign a partition number to the new partition.
If you want to enter the default number for the partition, then press ENTER.
Type the required starting partition sector for the partition.
If you want to enter the default sector for the partition, then press ENTER.
Type the last sector for the partition and press ENTER.
If you want to enter the default sector for the partition, then press ENTER.
Type t to change the type of the new partition and press ENTER.
Type 8e to convert the disk partition to Linux LVM and press ENTER.
Type w to save the changes and press ENTER.
A message The partition table has been altered! appears.
Run the following command to initialize the disk partition that is used with LVM.
pvcreate /dev/sdb1For Cloud-based platforms, you should use the name of the disk partition only. For instance, if the name of the hard disk on the Cloud-based platform is nvme0n1, then run the following command to initialize the disk partition that is used with LVM.
pvcreate /dev/nvme0n1If the following confirmation message appears, then press y.
WARNING: dos signature detected on /dev/sdb1 at offset 510. Wipe it? [y/n]: yA message Physical volume “/dev/sdb1” is successfully created appears.
Run the following command to extend the PTYVG volume.
vgextend PTYVG /dev/sdb1A message
Volume group “PTYVG” successfully extendedappears.
Extending the OS and the Backup Volume
After extending the PTYVG volume you can resize the OS and the OS_bak volumes using the lvextend and resize commands.
Ensure that you consider the following points before extending the partitions in the PTYVG volume group:
- Back up the OS partition before extending the partition.
- Back up the policy, LDAP, and other required data to the /opt directory before extending the volume.
The following procedure describes how to extend the OS and the OS_bak volumes by 4 GB.
Ensure that there is enough free space available while extending the size of the OS, the OS_bak, and the log volumes. For instance, if you extend the hard disk by 1 GB and if the space is less than the required level, then the following error appears.
Insufficient free space: 1024 extents needed, but only 1023 available
To resolve this error, you must increase the partition size by 0.9 GB.
To create a partition:
Run the following commands to extend the OS-bak and OS volume.
# lvextend -L +4G /dev/PTYVG/OS_bakA message Logical Volume OS_bak successfully resized appears.
Ensure that the you extend the size of the OS and the OS_bak volumes to the same value.
Run the following command to resize the file system in the OS_bak volume.
# resize2fs /dev/mapper/PTYVG-OS_bakA message resize2fs: On-Line resizing finished successfully appears.
Run the following commands to extend the OS volume.
# lvextend -L +4G /dev/PTYVG/OSA message Logical Volume OS successfully resized appears.
Run the following command to resize the file system in the OS volume.
# resize2fs /dev/mapper/PTYVG-OSA message resize2fs: On-Line resizing finished successfully appears.
Restart the ESA.
Extending the Logs Volume
You can resize the logs volume using the lvextend and resize commands. This ensures that you provision the required space for the logs that are generated. You must back up the current logs to the /opt directory before extending the logs volume.
Before extending the logs volume, ensure that you start the ESA in Single User Mode and create a partition.
For more information about Single User Mode, refer here.
For more information about creating a partition, refer here.
The following procedure describes how to extend the logs volume by 4 GB.
To extend the logs volume:
Run the following commands to create a temporary folder in the /opt directory.
# mkdir /opt/tmp/logsRun the following command to copy the files from the logs volume to the /opt directory.
# /usr/bin/rsync -axzHS --delete-before /var/log/ /opt/tmp/logs/While copying the logs from the /var/log/ directory to the /opt directory, ensure that the space available in the /opt directory is more than the size of the logs.
Run the following commands to extend the logs volume.
# lvextend -L +4G /dev/PTYVG/logsA message Logical Volume logs successfully resized appears.
Run the following command to resize the file system in the logs volume.
# resize2fs /dev/mapper/PTYVG-logsA message resize2fs: On-Line resizing finished successfully appears.
Run the following command to copy the files from /opt directory to the logs volume.
# /usr/bin/rsync -axzHS --delete-before /opt/tmp/logs/ /var/log/Run the following command to remove the temporary folder created in the /opt directory.
# rm -r /opt/tmp/logsRestart the ESA.
Feedback
Was this page helpful?