Working with Administration
Appliance administration is the most important part of the appliance framework. Most of the administrative tools and tasks can be performed using the Administration menu of the CLI Manager.
The following screen illustrates the Administration screen on the CLI Manager.

Some of the administration tasks, such as creating clustered environment or setting up the virtualization can be done only in the CLI Manager by selecting the Administration menu. Most of the administration tasks can be performed using the Web UI.
1 - Working with Services
You can manually start and stop appliance services.
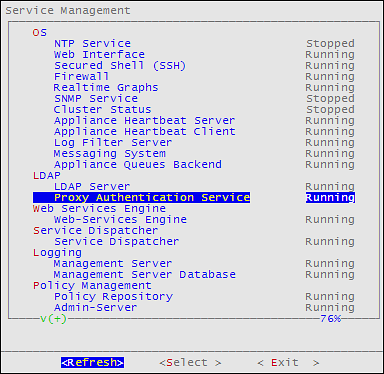
To view all appliance services and their statuses, login to the CLI Manager, navigate to Administration > Services.
Use caution before stopping or restarting a particular service. Make sure that no important actions are being performed by other users using the service that must be stopped or restarted.
Some services, such as, LDAP Proxy auth, member source services, and so on, are available after they have been successfully configured on ESA.
In the Services dialog box, you can start, stop, or restart the following services:
Table 1. Appliance Services
| Services | ESA | DSG |
| OS | ✓ | ✓ |
| Web UI, Secure Shell (SSH), Firewall, Real-time Graphs,
SNMP Service, NTP Service, Cluster Status, Appliance Heartbeat*
Server, Appliance Heartbeat* Client, Log Filter Server, Messaging
System, Appliance Queues Backend, Docker, Rsyslog Service |
| LDAP | ✓ | ✓ |
| LDAP Server, Name Service Cache Daemon |
| Web Services Engine | ✓ | ✓ |
| Web Services Engine |
| Service Dispatcher | ✓ | ✓ |
| Service Dispatcher |
| Logging | ✓ | |
| Management Server, Management Server Database, Reports
Repository, Reporting Engine |
| Policy Management | ✓ | |
Policy Repository, HubController, PIM Cluster, Soft HSM
Gateway, Key Management Gateway, Member Source Service,
Meteringfacade, DevOps, Logfacade For more information about
the Meteringfacade and Logfacade services, refer to the section
Services. |
| Reporting Server | ✓ | |
| Reports repository and reporting engine |
| Distributed Filesystem File Protector | ✓ | |
DFS Cache Refresh |
| ETL Toolkit | | |
| ETL Server |
| Cloud Gateway | | ✓ |
| Cloud Gateway Cluster |
| td-agent | ✓ | ✓ |
| td-agent |
| Audit Store | | ✓ |
| Audit Store Repository |
| Audit Store Management |
| Analytics | | ✓ |
| Analytics, Audit Store Dashboards |
| RPS | ✓ | |
* Heartbeat services are used to discover other appliance nodes present in the network. When Set operations, such as, set ESA communication or TAC are performed, then the available list of nodes are displayed due to this service. If these services are stopped, the available nodes are not visible while performing the above operations. However, the the IP address can be entered manually.For the appliance-heartbeat-server a fixed port is not required. This is because this service is not listening for an incoming message.Appliance-heartbeat-client allows listening the incoming messages and hence needs a fixed port, i.e., 10100.
You can change the status of any service when you select it from the list and choose Select. In the screen that follows the Service Management screen, select stop, start, or restart a service, as required.
When you apply any action on a particular service, the status message appears with the action applied. Press ENTER again to continue.
You can also use the Web UI to start or stop services. In the Web UI Services, you have additional options for stopping/starting services, such as Enable/Disable Auto-start for most of the services.
Important: Although the services can be started or stopped from the Web UI, the start/stop/restart action is restricted for some services, such as, networking, td-agent, docker, exim4, and so on. These services can be operated from the OS Console. Run the following command to start/stop/restart a service.
/etc/init.d/<service_name> stop/start/restart
For example, to start the docker service, run the following command.
2 - Setting Date and Time
You can adjust the date and time settings of ESA by navigating to Administration > Date and Time. You may need to do so if this information was entered incorrectly during initialization.
You can synchronize time with NTP Server using the Time Server (NTP) option (explained in the following paragraph), change time zone using the Set Time Zone option, change date using the Set Date option, or change time using the Set Time option. The information selected during installation is available beside each option.
Use an Up Arrow or Down Arrow key to change the values in the editable fields, such as Month/Year. Use any arrow key to navigate the calendar. Use the Tab key to navigate between the editable fields.

The first column in the calendar shows the corresponding week number
You can set the time and date using the Web UI as well.
For more information about setting the ESA time and date, refer to section Configuring Date and Time.
License, certificates, and date and time modifications
Date and time modifications may affect licenses and certificates. It is recommended to have time synchronized between Appliances and Protectors.
You must enable or disable the NTP settings only from the CLI Manager or Web UI.
You can access the Configure Server NTP Time Server screen by navigating to Administration > Date and Time > Time Server option.

To enable NTP synchronization, you need to specify the NTP Server first and then enable NTP. Once the NTP Server is specified, the new time will be applied immediately.
The NTP synchronization may take some time and while it is in progress, the Synchronization Status displays In Progress. When it is over, the Synchronization Status displays Time Synchronized.
3 - Managing Accounts and Passwords
The ESA CLI Manager includes options to change password and permissions for multiple users through the CLI interface. The options available are listed as follows:
- Change My Password
- Manage Password and Local-Accounts
- Reset directory user-password
- Change OS root account password
- Change OS local_admin account password
- Change OS local_admin account permissions
- Manage internal Service-Accounts
- Manage local OS users
OS Users in Appliances
When you install an appliance, some users are installed to run specific services for the products.
When adding users, ensure that you do not add the OS users as policy users.
The following table describes the OS users that are available in your appliance.
| OS Users | Description |
|---|
| alliance | Handles DSG processes |
| root | Super user with access to all commands and files |
| local_admin | Local administrator that can be used when an LDAP user is not accessible |
| www-data | Daemon that runs the Apache, Service dispatcher, and Web services as a user |
| ptycluster | Handles TAC related services and communication between TAC through SSH. |
| service_admin and service_viewer | Internal service accounts used for components that do not support LDAP |
| clamav | Handles ClamAV antivirus |
| rabbitmq | Handles the RabbitMQ messaging queues |
| epmd | Daemon that tracks the listening address of a node |
| openldap | Handles the openLDAP utility |
| dpsdbuser | Internal repository user for managing policies |
Strengthening Password Policy
Passwords are a common way of maintaining a security of a user account. The strength and complexity of a password are some of the primary requirements of an enterprise to prevent security vulnerability. A weak password increases chances of a security breach. Thus, to ensure a strong password, different password policies are set to enhance the security of an account.
Password policies are rules that enforce validation checks to provide a strong password. You can set your password policy based on the enterprise ordinance. Some requirements of a strong password policy might include use of numerals, characters, special characters, password length, and so on.
The default requirements of a strong password policy for an appliance OS user are as follows.
- The password must have at least 8 characters.
- All the printable ASCII characters are allowed.
- The password must contain at least one character each from any of the following two groups:
- Numeric: Includes numbers from 0-9.
- Alphabets: Includes capitals [A-Z] and small [a-z] alphabets.
- Special characters: Includes ! " # $ % & ( ) * + , - . / : ; < > = ? @ [ \ ] ^ _ ` { | } ~
You can enforce password policy rules for the LDAP and OS users by editing the check_password.py file. This file contains a Python function that validates a user password. The check_password.py file is run before you set a password for a user. The password for the user is applied only after it is validated using this Python function.
For more information about password policy for LDAP users, refer here.
Enforcing Password Policy
The following section describes how to enforce your policy restrictions for the OS and LDAP user accounts.
To enforce password policy:
Login to the CLI Manager.
Navigate to Administration > OS Console.
Enter the root password and select OK.
Edit the check_password.py file using a text editor.
/etc/ksa/check_password.py
Define the password rules as per your organizational requirements.
For more information about the password policy examples, refer here.
Save the file.
The password rules for the users in ESA are updated.
Examples
The following section describes a few scenarios about enforcing validation checks for the LDAP and OS users.
The check_password.py file contains the def check_password (password) Python function. In this function you can define your validations for the user password. This function returns a status code and a status message. In case of successful validation, the status code is zero and the status message is empty. In case of validation failure, the status code is non-zero and the status message contains the appropriate error message.
Scenario 1:
An enterprise wants to implement the following password rules:
- Length of the password should contain atleast 15 characters
- Password should contain digits
You must add the following snippet in the def check_password (password) function:
# Password length check
if len(password)<15: return (1,"Password should contain at least 15 characters")
# Password digits check
password_set=set(password)
digits=set(string.digits)
if ( password_set.intersection(digits) == set([]) ): return (2,"Password must contain digit)
Scenario 2:
An enterprise wants to implement the following password rule:
- Password should not contain 1234.
You must add the following snippet in the def check_password (password) function:
if password==1234:
return (1,"Password must not contain 1234")
return (0,None)
Scenario 3:
An enterprise wants to implement the following password rules:
- Password should contain a combination of uppercase, lowercase, and numbers.
You must add the following snippet in the def check_password (password) function:
digits=set(string.digits)
if ( password_set.intersection(digits) == set([]) ): return (2,"Password must contain numbers, upper, and lower case characters.")
# Force lowercase
lower_letters=set(string.ascii_lowercase)
if ( password_set.intersection(lower_letters) == set([]) ): return (2,"Password must contain numbers, upper, and lower case characters")
# Force uppercase
upper_letters=set(string.ascii_uppercase)
if ( password_set.intersection(upper_letters) == set([]) ): return (2,"Password must contain numbers, upper ,and lower case characters")
Changing Current Password
In situations where you need to change your current password due to suspicious activity or reasons other than password expiration, you can use the following steps.
For more information about appliance users, refer here.
To change the current password:
Login to the CLI Manager.
Navigate to Administration > Accounts and Passwords > Change My Password.
In the Current password field, type the current password.
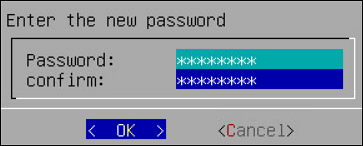
In the New Password field, type the new password.
In the Retype Password field, retype the new password.
Select OK and press ENTER to save the changes.
Resetting Directory Account Passwords
You can change the password for any user existing in the internal LDAP directory. The user accounts and their security privileges as well as passwords are defined in the LDAP directory.
To be able to change the password for any LDAP user, you need to provide Administrative LDAP user credentials. You can also provide the old credentials of the LDAP user.
The LDAP Administrator is an admin user or the Directory Administrator assigned by admin. Admin can define Directory Administrators in the LDAP directory.
For more information about the internal LDAP directory, refer here.
To change a directory account password:
Login to the CLI Manager.
Navigate to Administration > Accounts and Passwords > Manage Passwords and Local-Accounts > Reset directory user-password.
In the displayed dialog box, in the Administrative LDAP user name or local_admin and Administrative user password fields, enter the Administrative LDAP user name and password. You can also use the local_admin credentials.
In the Target LDAP user field, enter the LDAP user name you wish to change the password for.
In the Old password field, enter the old password for the selected LDAP user. This step is optional.
In the New password field, enter a new password for the selected LDAP user.
In the Confirm new password field, re-enter a new password for the selected LDAP user.
Select OK and press ENTER to save the changes.
Changing the Root User Password
You may want to change the root user password due to security reasons, and this can only be done using the Appliance CLI Manager.
To change the root password:
Login to the CLI Manager.
Navigate to Administration > Accounts and Passwords > Manage Passwords and Local-Accounts > Change OS root account password.
In the Administrative user name and Administrative user password fields, enter the administrative user name and its valid password. You can also use the local_admin credentials.
In the Old root password field, enter the old password for the root user.
In the New root password field, enter the new password for the root user.
In the Confirm new password field, re-enter the new password for the root user.
Select OK and press ENTER to save the changes.
Changing the Local Admin Account Password
You can log into CLI Manager as a local_admin user if the LDAP is down or for LDAP maintenance. It is recommended that the local_admin account is not used for standard operations since it is primarily intended for maintenance tasks.
To change local_admin account password:
Login to the CLI Manager.
Navigate to Administration > Accounts and Passwords > Manage Passwords and Local-Accounts > Change OS local_admin account password.
In the Administrative user name and Administrative user password fields, enter the administrative user name and the old password for the local_admin. You can also use the Directory Server Administrator credentials.
In the New local_admin password field, enter new local_admin password.
In the Confirm new password filed, re-enter the new local_admin password.
Select OK and press ENTER to save changes.
Changing the Local Admin Account Permission
By default, the local_admin user cannot log into CLI Manager using SSH or log into the Web UI. However, you can configure this access using the tool, which changes the local_admin account permissions.
To change local_admin account permissions:
Login to the CLI Manager.
Navigate to Administration > Accounts and Passwords > Manage Passwords and Local-Accounts > Change OS local_admin account permissions.
In the dialog box displayed, in the Password field, enter the local_admin password.
Select OK.
Specify the permissions for the local_admin. You can either select SSH Access, Web-Interface Access, or both.
Select OK.
Changing Service Accounts Passwords
Service Account users are service_admin and service_viewer. They are used for internal operations of components that do not support LDAP, such as Management Server internal users, and Management Server Postgres database. You cannot log into the Appliance Web UI, Reports Management (for ESA), or CLI Manager using service accounts users. Since service accounts are internal OS accounts, they must be modified only in special cases.
To change service accounts:
Login to the CLI Manager.
Navigate to Administration > Accounts and Passwords > Manage Passwords and Local-Accounts > Manage internal ‘Service-Accounts’.
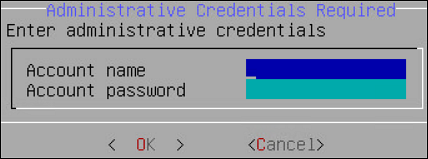
In the Account name and Account password fields, enter the Administrative user name and password.
Select OK.
In the dialog box displayed, in the Admin Service Account section, in the New password field, enter the new admin service account password.
In the Confirm field, re-enter the new admin service account password.
In the Viewer Service Account section, in the New password field, enter the new viewer service account password.
In the Confirm field, re-enter the new viewer service account password.
Select OK.
In the Service Account details dialog box, click Generate-Random to generate the new passwords randomly. Select OK.
Managing Local OS Users
Managing local OS user option provides you the ability to create users that need direct OS shell access. These users are allowed to perform non-standard functions, such as schedule remote operations, backup agents, run health monitoring, etc. This option also lets you manage passwords and permissions for the dpsdbuser, which is available by default when ESA is installed.
The password restrictions for OS users are as follows:
- For all OS users, you cannot repeat the last 10 passwords used.
- If an OS user signs in three times using an incorrect password, the account is locked for five minutes. You can unlock the user by providing the correct credentials after five minutes. If an incorrect password is provided in the subsequent sign-in attempt, the account is again locked for five minutes.
To manage local OS users:
Login to the CLI Manager.
Navigate to Administration > Accounts and Passwords > Manage Passwords and Local-Accounts > Manage local OS users.
Enter the root password and select OK.
In the dialog box displayed, select Add to add a new user or select an existing user as explained in following steps.
Select Add to create a new local OS user.
In the dialog box displayed, in the User name and Password fields, enter a user name and password for the new user. The & character is not supported in the Username field.
In the Confirm field, re-enter the password for the new user.
Select OK.
Select an existing user from the displayed list.
- You can select one of the following options from the displayed menu.
Table: User Options
| Check password | Validate entered password. | - In the dialog box displayed, enter the password
for the local OS user.
A Validation succeeded
message appears. |
| Update password | Change password for the user. | - In the dialog box displayed, in the
Old password field, enter the
Old password for the local OS user.
This step is
optional. - In the New Password
field, enter the New Password for the local OS
user.
- In the Confirm field,
re-enter the New Password for the local OS
user.
|
| Update shell | Define shell access for the user. | - In the dialog box displayed, select one of the
following options.
- No login access
/bin/fasle - Linux Shell -
/bin/bash - Custom
NoteThe default shell is set as No
login access
(/bin/false). |
| Toggle SSH access | Set SSH access for the user. | Select the Toggle SSH
access option and press
ENTER to set SSH access to
Yes.NoteThe default is set
as No when a user is
created. |
| Delete user | Delete the local OS user and related home
directory. | Select the Delete user
option and select Yes to confirm
the selection. |
Select Close to exit.
4 - Working with Backup and Restore
Using the Backup/Restore Center tool, you can create backups of configuration files and settings. Use the backups to restore a stable configuration if changes have caused problems. Before the Backup Center dialog box appears you will be prompted to enter the root password. You can select from a list of packages to be backed up.

When you import files or configurations, ensure that each component is selected individually.
For more information about using backup and restore, refer here.
Exporting Data Configuration to Local File
Select the configurations to export to a local file. When you select Administration > Backup/Restore Center > Export data/configurations to a local file in the Backup Center screen, you will be asked to specify the packages to export. Before the Backup Center dialog box appears, you will be prompted to enter the root password.
Table: List of Appliance Specific Services
| Services | Description | Appliance
Specific |
| ESA | DSG |
Appliance OS Configuration | Export the OS configuration (networking, passwords, and
others) but not the security modules data. NoteIn the OS
configuration, the certificates component is classified as
follows: - Certificates that include
Consul-related certificates, Insight certificates, and
certificates of the Protegrity products installed on the
appliance. Ensure that this option is not selected if the configurations must be imported on a different system in the cluster.
- Management and Web Service
Certificates that are used by the Management and
Web Services engine for authenticating client and server.
| ✓ | ✓ |
Directory Server And Settings | Export the local directory server and authentication
settings. | ✓ | ✓ |
| Export Consul Configuration and Data | Export Consul configuration and data | ✓ | ✓ |
Backup Policy-Management *2 | Export policy management configurations and data, such
as, policies, data stores, data elements, roles, certificates,
keys, logs, Key Store-specific files and certificates among others
to a file. | ✓ | |
Backup Policy-Management Trusted Appliances
Cluster*2 | Export policy management configurations and data, such
as, policies, data stores, data elements, roles, certificates,
keys, logs, Key Store-specific files and certificates among others
to a specific cluster node for a Trusted Appliances
Cluster. NoteIt is recommended to use this option with
cluster export only. | ✓ | |
Backup Policy-Management Trusted Appliances Cluster
without Key Store*1 | Export policy management configurations and data, such
as, policies, data stores, data elements, roles, certificates,
keys, logs among others, but excluding the Key Store-specific
files and certificates to a specific cluster node for a Trusted
Appliances Cluster. NoteThis option excludes the backup of
the Key Store-specific files and certificates. It is
recommended to use this option with cluster export
only. | ✓ | |
Policy Manager Web UI Settings | Export the Policy Management Web UI settings that
includes the Delete permissions specified for
content and audit logs. | ✓ | |
Export All PEP Server Configuration, Logs, Keys,
Certs | Export the data (.db files, license, token elements,
etc.), configuration files, keys, certificates and log
files. | | ✓ |
Export PEP Server Configuration Files | Export all PEP Server configuration files
(.cfg). | | ✓ |
Export PEP Server Log Files | Export PEP Server log files (.log and .dat). | | ✓ |
Export PEP Server Key and Certificate Files | Export PEP Server Key and Certificate files (.bin, .crt,
and .key). | | ✓ |
Export PEP Server Data Files | Export all PEP Server data files (.db), license, token
elements and log counter files. | | ✓ |
Application Protector Web Service | Export Application Protector Web Service configuration
files. | | |
Export Storage and Share Configuration Files | Export all configuration files including NFS, CIFS, FTP,
iSCSI, Webdav. | | |
Export File Protector Configuration Files | Export all File Protector configuration
files. | | |
Export ETL Jobs | Export all ETL job configuration files. | | |
Export Gateway Configuration Files | | | ✓ |
Export Gateway Log Files | | | ✓ |
Cloud Utility AWS | Exports Cloud Utility AWS CloudWatch configuration
files. | ✓ | ✓ |
*1 Ensure that only one backup-related option is selected among the options Backup Policy-Management, Backup Policy-Management Trusted Appliances Cluster, and Backup Policy-Management Trusted Appliances Cluster without Key Store. The Backup Policy-Management option must be used to back up the data to a file. In this case, this backup file is used to restore the data to the same machine, at a later point in time.
*2The Backup Policy-Management Trusted Appliances Cluster option must be used to replicate the data to a specific cluster node in the Trusted Appliances Cluster (TAC). This option excludes the backup of the metering data. It is recommended to use this option with cluster export only.
If you want to exclude the Key Store-specific files during the TAC replication, then the Backup Policy-Management Trusted Appliances Cluster without Key Store option must be used to replicate the data. Doing this excludes the Key Store-specific files and certificates, to a specific cluster node in the TAC.
This option excludes the backup of the metering data and the Key Store-specific files and certificates.
It is recommended to use this option with cluster export only.
For more information about the Backup Policy-Management Trusted Appliances Cluster option or the Backup Policy-Management Trusted Appliances Cluster without Key Store option, refer to the section ** TAC Replication of Key Store-specific Files and Certificates** in the Protegrity Key Management Guide 9.1.0.0.
If the OS configuration export is selected, then only the network setting and passwords, among others, are exported. The data and configuration of the security modules are not included. This data is mainly used for replication or recovery.
Before you import the data, note the OS and network settings of the target machine. Ensure that you do not import the saved OS and network settings to the target machine as this creates two machines with the same IP address in your network.
If you need to import all appliance configuration and settings, then perform a full restore for the system configuration. The following will be imported:
- OS configuration and network
- SSH and certificates
- Firewall
- Services status
- Authentication settings
- File Integrity Monitor Policy and settings
To export data configurations to a local file:
Login to the CLI Manager.
Navigate to Administration > Backup/Restore Center.
Enter the root password and select OK.
The Backup Center dialog box appears.
From the menu, select the Export data/configurations to a local file option.
Select the packages to export and select OK.
In the Export Name field, enter the required export name.
In the Password field, enter the password for the backup file.
In the Confirm field, re-enter the specified password.
If required, then enter description for the file.
Select OK.
You can optionally save the logs for the export operation when the export is done:
Click the More Details button.
The export operation log will display.
Click the Save button to save the export log.
In the following dialog box, enter the export log file name.
Click OK.
Click Done to exit the More Details screen.
The newly created configuration file will be saved into /products/exports. It can be accessed from the CLI Manager, the Exported Files and Logs menu, or the Import tab available in the Backup/Restore page, available in the Web UI.
The export log file can be accessed from the CLI Manager, the Exported Files and Logs menu, or the Log Files tab available in the Backup/Restore page, available in the Web UI.
Exporting Data/Configuration to Remote Appliance
You can export backup configurations to a remote appliance.
Important : When assigning a role to the user, ensure that the Can Create JWT Token permission is assigned to the role.If the Can Create JWT Token permission is unassigned to the role of the required user, then exporting data/configuration to a remote appliance fails.To verify the Can Create JWT Token permission, from the ESA Web UI navigate to Settings > Users > Roles.
Follow the steps in this scenario for a successful export of the backup configuration:
Login to the CLI Manager.
Navigate to Administration > Backup/Restore Center.
Enter the root password and select OK.
The Backup Center dialog box appears.
From the menu, select the Export data/configurations to a remote appliance(s) option and select OK.
From the Select file/configuration to export dialog box, select Current (Active) Appliance Configuration package to export and select OK.
In the following dialog box, select the packages to export and select OK.
Enter the password for this backup file.
Select the Import method.
For more information on each import method, select Help.
Type the IP address or hostname for the destination appliance.
Type the admin user credentials of the remote appliance and select Add.
In the information dialog box, press OK.
The Backup Center screen appears.
Exporting Appliance OS Configuration
When you import the appliance core configuration from the other appliance, the second machine will receive all network settings, such as, IP address, and default gateway, among others.
You should not import all network settings to another machine since it will create two machines with the same IP in your network. It is recommended to restart the appliance after receiving an appliance core configuration backup.
This item shows up only when exporting to a file.
Importing Data/Configurations from a File
You can import (restore) data from a file if you need to restore a specific configuration that you have previously saved. When you import files or configurations, ensure that each component is selected individually. During data configurations import, you are asked to enter the file password set during the backup file creation. Export and import Insight certificates on the same ESA. If the configurations must be imported on a different ESA, then do not import Certificates. For copying Insight certificates across systems, refer to Rotating Insight certificates.
To import data configurations from file:
Login to the CLI Manager.
Navigate to Administration > Backup/Restore Center.
Enter the root password and select OK.
The Backup Center dialog box appears.
From the menu, select the Import data/configurations from a file option and select OK.
In the following dialog box, select a file from the list which will be used for the configuration import.
Select OK.
In the following dialog box, enter the password for this backup file.
Select Import method.
Select OK.
In the information dialog box, select OK.
The Import Operation Has Been Completed Successfully message appears.
Consider a scenario when importing a policy management backup that includes the external Key Store data. If the external Key Store is not working, then the HubController service does not start post the restore process.
Select Done.
The Backup Center screen appears.
Reviewing Exported Files and Logs
You can review the exported files and logs.
To review exported files and logs:
Login to the CLI Manager.
Navigate to Administration > Backup/Restore Center.
Enter the root password and select OK.
The Backup Center dialog box appears.
From the menu, select the Exported Files and Logs option.
In the Exported Files and Logs dialog box, select Main Logfile to view the logs.
Select Review.
To view the Operation Logs or Exported Files, select it from the list of available exported files.
Select Review.
Select Back to return to the Backup Center dialog box.
Deleting Exported Files and Logs
To delete exported files and logs:
Login to the CLI Manager.
Navigate to Administration > Backup/Restore Center.
Enter the root password and select OK.
The Backup Center dialog box appears.
From the menu, select the Exported Files and Logs option.
In the Exported Files and Logs dialog box, select the Operation Logs and Exported Files.
Select Delete.
To confirm the deletion, select Yes.
Alternatively, to cancel the deletion, select No.
Backing Up/Restoring Local Backup Partition
The backup is created on the second partition of the local machine.
Thus, for example, if you make an OS full backup in the PVM mode (both Appliance and Xen Server are set to PVM), enable HVM mode, and then reboot the Appliance, you will not be able to boot the system in system-restore mode.
XEN Virtualization
If you are using virtualization, and have backed up the OS in HVM/PVM mode, then you can to restore only in the mode you backed it up (refer here).
Backing up Appliance OS from CLI
It is recommended to perform the full OS back up before any important system changes, such as appliance upgrade or creating a cluster, among others.
To back up the appliance OS from CLI Manager:
Login to the Appliance CLI Manager.
Proceed to Administration > Backup/Restore Center.
The Backup Center screen appears.
Select Backup all to a local backup-partition.
The following screen appears.

Select OK.
The Backup Center screen appears and the OS backup process is initiated.
Login to the Appliance Web UI.
Navigate to Dashboard.
The following message appears after the OS backup completes.

CAUTION: The Restore from backup-partition option appears in the Backup Center screen, after the OS backup is complete.
Restoring Appliance OS from Backup
To restore the appliance OS from backup:
Login to the Appliance CLI Manager.
Navigate to the Administration > Reboot and Shutdown > Reboot.
The Reboot screen appears.
Enter the reason and select OK.
Enter the root password and select OK.
The appliance reboots and the following screen appears.

Select System-Restore.
The Welcome to System Restore Mode screen appears.

Select Initiate OS-Restore Procedure.
The OS restore procedure is initiated.
5 - Setting Up the Email Server
You can set up an email server that supports the notification features in Protegrity Reports. The Protegrity Appliance Email Setup tool guides you through the setup.
Keep the following information available before the setup process:
- SMTP server details.
- SMTP user credentials.
- Contact email account: This email address is used by the Appliance to send user notifications.
Remember to save the email settings before you exit the Email Setup tool.
To set up the Email Server:
Login to the ESA CLI Manager.
Navigate to Administration > Email (SMTP) Settings.
The Protegrity Appliance Email Setup wizard appears.
Enter the root password and select OK.
The Protegrity Appliance Email Setup screen appears.
Select OK to continue. You can select Cancel to skip the Email Setup.
In the SMTP Server Address field, type the address to the SMTP server and the port number that the mail server uses.
For SMTP Server, the default port is 25.
In the SMTP Username field, enter the name of the user in the mail server.
Protegrity Reporting requires a full email address in the Username.
In the SMTP Password and Confirm Password fields, enter the password of the mail server user. SMTP Username/Password settings are optional. If your SMTP does not require authentication, then you can leave these fields empty.
In the Contact address field, enter the email recipient address.
In the Host identification field, enter the name of the computer hosting the mail server.
Select OK.
The tool tests the connectivity and the Secured SMTP screen appears.
Specify the encryption method. Select StartTLS or disable encryption. SSL/TLS is not supported.
Click OK.
In the SMTP Settings screen that appears, you can:
| To… | Follow these steps… |
| Send a test email | - Select Test.
- At the prompt, type the recipient email
address.
- Select OK.
A dialog box
appears. - To view diagnostics while testing, follow these
steps:
- Select Yes.
A running
status appears until the process completes. - At the prompt, press ENTER.
A message
box appears. - Select OK to return to
the email tool.
- To test without diagnostics, follow these steps:
- Select No.
A message
box appears when the process completes. - Select OK to return to
the email tool.
|
| Save the settings | - Select Save.
A message box
appears. - Select EXIT.
- The Tools screen
appears.
|
| Change the settings | Select Reconfigure. The
SMTP Configuration screen
appears. |
| Exit the tool without saving | - Select Cancel.
- At the prompt, select
Yes.
The
Tools screen appears.
|
6 - Working with Azure AD
Azure Active Directory (Azure AD) is a cloud-based identity and access management service. It allows access to external (Azure portal) and internal resources (corporate appliances). Azure AD manages your cloud and on-premise applications and protects user identities and credentials.
When you subscribe to Azure AD, it automatically creates an Azure AD tenant. After the Azure AD tenant is created, register your application in the App Registrations module. This acts like an end-point for the appliance to connect to the tenant.
Using the Azure AD configuration tool, you can:
- Enable the Azure AD Authentication and manage user access to the ESA.
- Import the required users or groups to the ESA, and assign specific roles to them.
6.1 - Configuring Azure AD Settings
Before configuring Azure AD Settings on the ESA, you must have the following values that are required to connect the ESA with the Azure AD:
- Tenant ID
- Client ID
- Client Secret or Thumbprint
For more information about the Tenant ID, Client ID, Authentication Type, and Client Secret/Thumbprint, search for the text Register an app with Azure Active Directory on Microsoft’s Technical Documentation site at:
https://learn.microsoft.com/en-us/docs/
The following are the list of the API permissions that must be granted.
- Group.Read.All
- GroupMember.Read.All
- User.Read
- User.Read.All
To assign API permissions in Microsoft Azure, contact your Microsoft Azure administrator.
For more information about configuring the application permissions in the Azure AD, please refer https://learn.microsoft.com/en-us/graph/auth-v2-service?tabs=http.
Ensure that the Allow public client flows setting is Enabled. To enable the Allow public client flows setting, navigate to Authentication > Advanced settings, click the toggle button, and select Yes.
To configure Azure AD settings:
On the ESA CLI Manager, navigate to Administration > Azure AD Configuration.
Enter the root password.
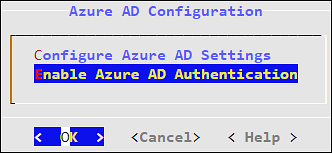
The Azure AD Configuration dialog box appears.
Select Configure Azure AD Settings.
The Azure AD Configuration screen appears.

Enter the information for the following fields.
Table: Azure AD Settings
| Setting | Description |
| Set Tenant ID | Unique identifier of the Azure AD instance |
| Set Client ID | Unique identifier of an application created in Azure
AD |
| Set Auth Type | Select one of the Auth Type:SECRET indicates a
password-based authentication. In this authentication
type, the secrets are symmetric keys, which the client
and the server must know.CERT indicates a
certificate-based authentication. In this authentication
type, the certificates are the private keys, which the
client uses. The server validates this certificate using
the public key.
|
| Set Client Secret/Thumbprint | The client secret/thumbprint is the password of the
Azure AD application.- If the Auth Type selected is
SECRET, then enter
Client Secret.
- If the Auth type selected is
CERT, then enter Client
Thumbprint.
|
For more information about the Tenant ID, Client ID, Authentication Type, and Client Secret/Thumbprint, search for the text Register an app with Azure Active Directory on Microsoft’s Technical Documentation site at: https://learn.microsoft.com/en-us/docs/
Click Test to check the configuration/settings.
The message Successfully Done appears.
Click OK.
Click Apply to apply and save the changes.
The message Configuration saved successfully appears.
Click OK.
6.2 - Enabling/Disabling Azure AD
Using the Enable/Disable Azure AD option, you can enable or disable the Azure AD settings. You can import users or groups and assign roles when you enable the Azure AD settings.
7 - Accessing REST API Resources
User authentication is the process of identifying someone who wants to gain access to a resource. A server contains protected resources that are only accessible to authorized users. When you want to access any resource on the server, the server uses different authentication mechanism to confirm your identity.
There are different mechanisms for authenticating and authorizing users in a system. In the ESA, REST API services are only accessible to authorized users. You can authorize or authenticate users using one of the following authentication mechanisms:
- Basic Authentication with username and password
- Client Certificates
- Tokens
7.1 - Using Basic Authentication
In the Basic Authentication mechanism, you provide only the user credentials to access protected resources on the server. You provide the user credentials in an authorization header to the server. If the credentials are accurate, then the server provides the required response to access the APIs.
If you want to access the REST API services on ESA, then the IP address of ESA with the username and password must be provided. The ESA matches the credentials with the LDAP or AD. On successful authentication, the roles of the users are verified. The following conditions are checked:
- If the role of the user is Security Officer, then the user can run GET, POST, and DELETE operations on the REST APIs.
- If the role of the user is Security Viewer, then the user can only run GET operation on the REST APIs.
When the Basic Authentication is disabled, then a list of APIs are affected.
For more information about the list of APIs, refer here.
The following Curl snippet provides an example to access an API on ESA.
curl -i -X <METHOD> "https://<ESA IP address>:8443/<path of the API>" -d "loginname=<username>&password=<password>"
This command uses an SSL connection. If the server certificates are not configured on ESA, you can append --insecure to the curl command.
For example,
curl -i -X <METHOD> "https://<ESA IP address>:8443/<path of the API>" -d "loginname=<username>&password=<password>" --insecure
You must provide the username and password every time you access the REST APIs on ESA.
7.2 - Using Client Certificates
The Client Certificate authentication mechanism is a secure way of accessing protected resources on a server. In the authorization header, you provide the details of the client certificate. The server verifies the certificate and allows you to access the resources. When you use certificates as an authentication mechanism, then the user credentials are not stored in any location.
Note: As a security feature, it is recommended to use the client certificates that are protected with a passphrase.
On ESA, the Client Certificate authentication includes the following steps:
- In the authorization header, you must provide the details, such as, client certificate, client key, and CA certificate.
- The ESA retrieves the name of the user from the client certificate and authenticates it with the LDAP or AD.
- After authenticating the user, the role of that user is validated:
- If the role of the user is Security Officer, then the user can run read and write operations on the REST APIs.
- If the role of the user is Security Viewer, then the user can only run read operations on the REST APIs.
- On successful authentication, you can utilize the API services.
The following Curl snippet provides an example to access an API on ESA.
curl -k https://<ESA IP Address>/<path of the API> -X <METHOD> --key <client.key> --cert <client.pem> --cacert <CA.pem> -v --insecure
You must provide your certificate every time you access the REST APIs on ESA.
7.3 - Using JSON Web Token (JWT)
Tokens are reliable and secure mechanisms for authorizing and authenticating users. They are stateless objects created by a server that contain information to identify a user. Using a token, you can gain access to the server without having to provide the credentials for every resource. You request a token from the server by providing valid user credentials. On successive requests to the server, you provide the token as a source of authentication instead of providing the user credentials.
There are different mechanisms for authenticating and authorizing users using tokens. Authentication using JSON Web Tokens (JWT) is one of them. The JWT is an open standard that defines a secure way of transmitting data between two entities as JSON objects.
One of the common uses of JWT is as an API authentication mechanism that allows you to access the protected API resources on your server. You present the JWT generated from the server to access the protected APIs. The JWT is signed using a secret key. Using this secret key, the server verifies the token provided by the client. Any modification to the JWT results in an authentication failure. The information about tokens are not stored on the server.
Only a privileged user can create a JWT. To create a token, ensure that the Can Create JWT Token permission/privilege is assigned to the user role.
The JWT consists of the following three parts:
- Header: The header contains the type of token and the signing algorithm, such as, HS512, HS384, or HS256.
- Payload: The payload contains the information about the user and additional data.
- Signature: Using a secret key, you create the signature to sign the encoded header and payload.
The header and payload are encoded using the Base64Url encoding. The following is the format of JWT:
<encoded header>.<encoded payload>.<signature>
Implementing JWT
On Protegrity appliances, you must have the required authorization to access the REST API services. The following figure illustrates the flow of JWT on the appliances.

As shown in the figure, login with your credentials to access the API. The credentials are validated against a local or external LDAP. A verification is performed to check the API access for the username. After the credentials are validated, a JWT is created and sent to the user as an authentication mechanism. Using JWT, information can be verified and trusted as it is digitally signed. The JWTs can be signed using a secret with the HMAC algorithm or a private key pair using RSA. After you successfully login using your credentials, a JWT is returned from the server. When you want to access a protected resource on the server, you must send the JWT with the request in the headers.
Working with the Secret Key
The JWT is signed using a private secret key and sent to the client to ensure message is not changed during transmission. The secret key encodes that token sent to the client. The secret key is only known to the server for generating new tokens. The client presents the token to access the APIs on the server. Using the secret key, the server validates the token received by the client.
The secret key is generated when you install or upgrade your appliance. You can change the secret key from the CLI Manager. This secret key is stored in the appliance in a scrambled form.
For more information about setting the secret key, refer to section Configuring JWT
For appliances in a TAC, the secret key is shared between appliances in the cluster. Using the export-import process for a TAC, secret keys are exported and imported between the appliances.
If you want to export the JWT configuration to a file or another machine, ensure that you select the Appliance OS Configuration option, in the Export screen. Similarly, if you want to import the JWT configurations between appliances in a cluster, from the Cluster Export Wizard screen, select the Appliances JWT Configuration check box, under Appliance OS Configuration.
For example, consider ESA 1 and ESA 2 in a TAC setup.
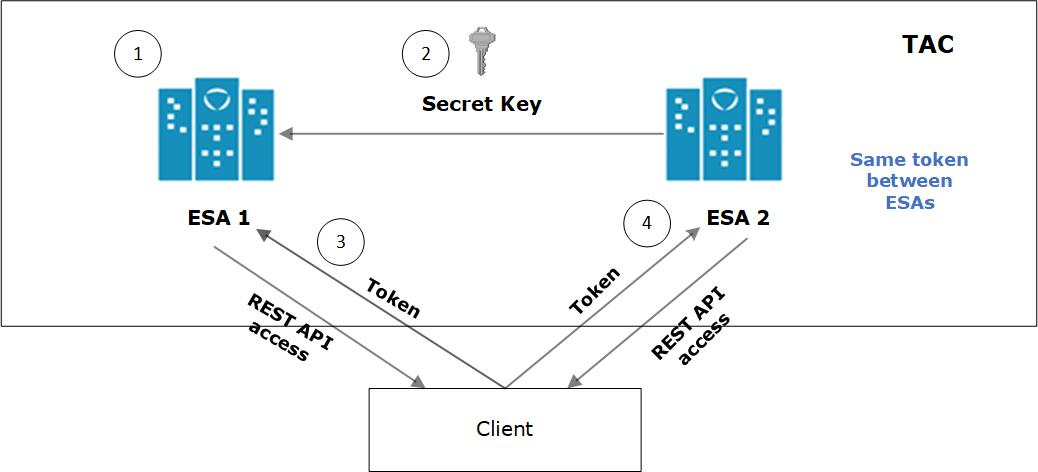
- JWT is created on ESA 1 for appliance using a secret key.
- ESA 1 and ESA 2 are added to TAC. The secret key of ESA 1 is shared with ESA 2.
- Client application requests API access from ESA 1. A JWT is generated and shared with the client application. The client accesses the APIs available in ESA 1.
- To access the APIs of ESA 2, the same token generated by ESA1 is applicable for authentication.
Configuring JWT
You can configure the encoding algorithm, secret key, and JWT token expiry.
To configure the JWT settings:
On the CLI Manager, navigate to Administration > JWT Configuration.
A screen to enter the root credentials appears.
Enter the root credentials and select OK.
The JWT Settings screen appears.
Select Set JWT Algorithm to set the algorithm for validating a token.
The Set JWT Algorithm screen appears.
Select the one of the following algorithms:
Select OK.
Select Set JWT Secret to set the secret key.
The Set JWT Secret screen appears.
Enter the secret key in the New Secret and Confirm Secret fields.
Select OK.
Select Set Token Expiry to set the token expiry period.
In the Set Token Expiry field, enter the token expiry value and select OK.
Select Set Token Expiry Unit to set the unit for token expiry value.
Select second(s), minute(s), hour(s), day(s), week(s), month(s), or year(s) option and select OK.
Select Done.
Refreshing JWT
Tokens are valid for certain period. When a token expires, you must request a new token by providing the user credentials. Instead of providing your credentials on every request, you can extend your access to the server resources by refreshing the token.
In the refresh token process, you request a new token from the server by presenting your current token instead of the username and password. The server checks the validity of the token to ensure that the current token is not expired. After the validity check is performed, a new token is issued to you for accessing the API resources.
In the Protegrity appliances, you can refresh the token by executing the REST API for token refresh.
8 - Securing the GRand Unified Bootloader
When a system is powered on, it goes through a boot process before loading the operating system, where an initial set of operations are performed for the system to function normally. The boot process consists of different stages, such as, checking the system hardware, initializing the devices, and loading the operating system.
When the system is powered on, the BIOS performs the Power-On Self-Test (POST) process to initialize the hardware devices attached to the system. It then executes the Master Boot Record (MBR) that contains information about the disks and partitions. The MBR then executes the GRand Unified Bootloader (GRUB).
The GRUB is an operation that identifies the file systems and loads boot images. The GRUB then passes control to the kernel for loading the operating system. The entries in the GRUB menu can be edited by pressing e or c to access the GRUB command-line. Some of the entries that you can modify using the GRUB are listed below:
- Loading kernel images.
- Switching kernel images.
- Logging into single user mode.
- Recovering root password.
- Setting default boot entries.
- Initiating boot sequences.
- Viewing devices and partition, and so on.
In the Protegrity appliances, GRUB version 2 (GRUB 2) is used for loading the kernel. If the GRUB menu settings are modified by an unauthorized user with malicious intent, it can induce threat to the system. Additionally, as per CIS Benchmark, it is recommended to secure the boot settings. Thus, to enhance security of the Protegrity appliances, the GRUB menu can be protected by setting a username and password.
- This feature available only for on-premise installations.
- It is recommended to reset the credentials at regular intervals to secure the system.
The following sections describe about setting user credentials for accessing the GRUB menu on the appliance.
8.1 - Enabling the Credentials for the GRUB Menu
You can set a username and password for the GRUB menu from the ESA CLI Manager.
The user created for the GRUB menu is neither a policy user nor an ESA user.
Note: It is recommended you ensure a backup of the system has completed before performing the following operation.
To enable access to GRUB menu:
Login to the ESA CLI manager as an administrative user.
Navigate to Administration > GRUB Credentials Settings.
The screen to enter the root credentials appears.
Enter the root credentials and select OK.
The screen to Grub Credentials screen appears.
Select Enable and press ENTER.
The following screen appears.

Enter a username in the Username text box.
The requirements for the Username are as follows:
- It should contain a minimum of three and maximum of 16 characters
- It should not contain numbers and special characters
Enter a password in the Password and Re-type Password text boxes.
The requirements for the Password are as follows:
- It must contain at least eight characters
- It must contain a combination of alphabets, numbers, and printable characters
Select OK and press ENTER.
A message Credentials for the GRUB menu has been set successfully appears.
Restart the system.
The following screen appears.
Press e or c.
The screen to enter the credentials appears.
Enter the credentials provided in steps 4 and 5 to modify the GRUB menu.
8.2 - Disabling the GRUB Credentials
You can disable the username and password that is set for accessing the GRUB menu. When you disable access to the GRUB, then the username and password that are set get deleted. You must enable the GRUB Credentials Settings option and set new credentials to secure the GRUB again.
To disable access to the GRUB menu:
Login to the ESA CLI Manager as an administrative user.
Navigate to Administration > GRUB Credentials Settings.
The screen to enter the root credentials appears.
Enter the root credentials and select OK.
The GRUB credentials screen appears.
Select Disable and press ENTER.
A message Credentials for the GRUB menu has been disabled appears.
9 - Working with Installations and Patches
Using the Installations and Patches menu, you can install or uninstall products. You can also view and manage patches from this menu.
9.1 - Add/Remove Services
Using Add/Remove Services tool, you can install the necessary products or remove already installed ones, such as, Consul, Cloud-utility product, among others.
To install services:
Login to the ESA CLI Manager.
Navigate to Administration > Installations and Patches > Add/Remove Services.
Enter the root password to execute the install operation and select OK.

Select Install applications and select OK.

Select products to install and select OK.
- If a new product is selected, the installation process starts.
- If the product is already installed, then refer to step 6.
Select an already installed product to upgrade, uninstall, or reinstall, and select OK.
The Package is already installed screen appears. This step is not applicable for the DSG appliance.

Select any one of the following options:
| Option | Description |
|---|
| Upgrade | Installs a newer version of the selected product. |
| Uninstall | Removes the selected product. |
| Reinstall | Removes and installs the product again. |
| Cancel | Returns to the Administration menu. |
Select OK.
9.2 - Uninstalling Products
To uninstall products:
Login the ESA CLI Manager.
Proceed to Administration > Installations and Patches > Add or Remove Services.
Enter the root password to execute the uninstall operation and select OK.
Select Remove already installed applications and select OK.
The Select products to uninstall screen appears.
Select the necessary products to uninstall and select OK.
The selected products are uninstalled.
9.3 - Managing Patches
You can install and manage your patches from the Patch Management screen.
It allows you to perform the following tasks.
| Option | Description |
|---|
| List installed patches | Displays the list of all the patches which are installed in the system |
| Install a patch | Allows you to install the patches |
| Display log | Displays the list of logs for the patches |
Installing Patches
To install a patch:
Log in to the ESA CLI Manager.
Navigate to Administration > Patch Management.
Enter the root password and select OK.
The Patch Management screen appears.
Select Install a patch and select OK.
The Install Patch screen appears.
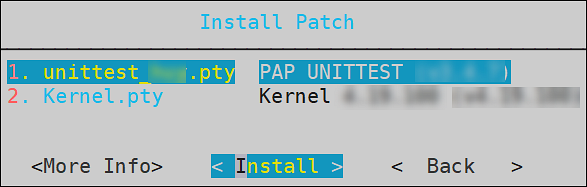
Select the required patch and select Install.
To view information of a patch:
Login to the ESA CLI Manager.
Navigate to Administration > Patch Management.
Enter the root password and select OK.
Select Install a patch and select OK.
The Install Patch screen appears.
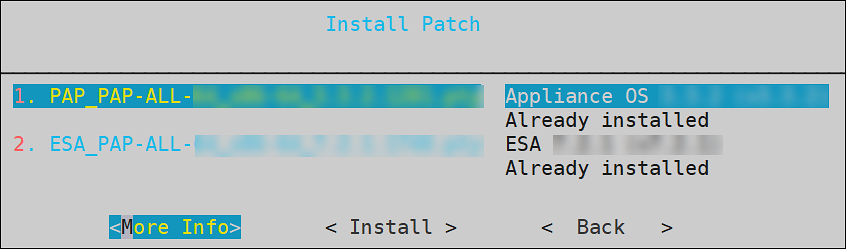
Select the required patch and select More Info.
The information for the selected patch appears.
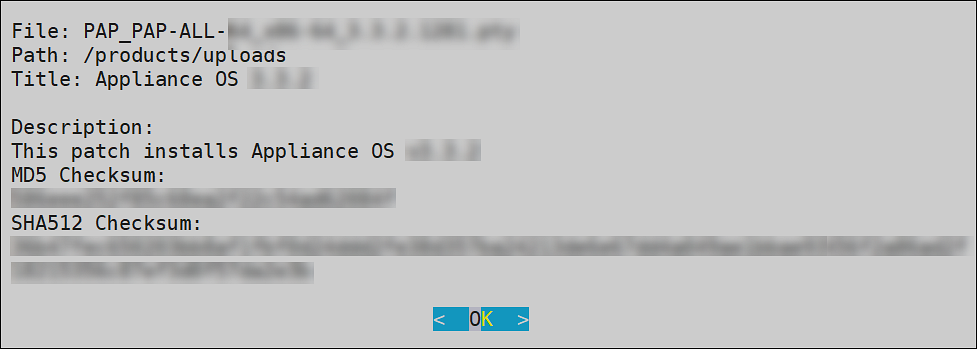
Select OK.
10 - Managing LDAP
LDAP is an open industry standard application protocol that is used to access and manage directory information over IP. You can consider it as a central repository of username and passwords, thus providing applications and services the flexibility to validate users by connecting with the LDAP.
The security system of the Appliance distinguishes between two types of users:
End users with specific access or no access to sensitive data. These users are managed through the User Management screen in the Web UI. For more information about user management, refer here.
Administrative users who manage the security policies, for example, “Admin” users who grant or deny access to end users.
In this section, the focus is on managing administrative users. The Administrative users connect to the management interfaces in Web UI or CLI, while the end users connect to the specific security modules they have been allowed access to. For example, a database table may need to be accessed by the end users, while the security policies for access to the table are specified by the Administrative users.
LDAP Tools available in the Administration menu include three tools explained in the following table.
| Tool | Description |
|---|
| Specify LDAP Server | Reconfigure all client-side components to use a specific LDAP. To authenticate users, the data security platform supports three modes for integration with directory services: Protegrity LDAP Server, Proxy Authentication, and Local LDAP Server.
- Protegrity LDAP: In this mode, all administrative operations such as policy management, key management, etc. are handled by users that are part of the Protegrity LDAP. This mode can be used to configure or authenticate with either local or remote appliance product.
- Proxy Authentication: In this mode, you can import users from an external LDAP to ESA. ESA is responsible for authorization of users, while the external LDAP is responsible for authentication of users.
- Reset LDAP Server Settings: In this mode, an administrative user can reset the configuration to the default configuration using admin credentials. |
| Configure Local LDAP settings | Configure your LDAP to be accessed from the other machines. |
| Local LDAP Monitor | Examine how many LDAP operations per second are running. |
10.1 - Working with the Protegrity LDAP Server
Every appliance includes an internal directory service. This service can be utilized by other appliances for user authentication.
For example, a DSG instance might utilize the ESA LDAP for user authentication. In such cases, you can configure the LDAP settings of the DSG in the Protegrity LDAP Server screen. In this screen, you can specify the IP address of the ESA with which you want to connect.
You can add IP addresses of multiple appliances to enable fault tolerance. In this case, if connection to the first appliance fails, connection is transferred to next appliance in the list.
If you are adding multiple appliances in the LDAP URI, ensure that the values of the Bind DN, Bind Password, and Base DN is same for all the appliances in the list.
To specify Protegrity LDAP server:
Login to the Appliance CLI Manager.
Navigate to Administration > Specify LDAP Server.
Enter the root password and select OK.
In the LDAP Server Type screen, select Protegrity LDAP Server and select OK.
The following screen appears.

Enter information for the following fields.
Table 1. LDAP Server Settings
| Setting | Description |
| LDAP URI | Specify the IP address of the LDAP server you want to
connect to in the following format.
ldap://host:port. You can configure to
connect Protegrity Appliance LDAP. For
example,ldap://192.168.3.179:389.
For
local LDAP, enter the following IP address:
ldap://127.0.0.1:389. If you
specify multiple appliances, ensure that the IP addresses
are separated by the space character. For
example,ldap://192.1.1.1 ldap://10.1.0.0
ldap://127.0.0.1:389 |
| Base DN | The LDAP Server Base distinguished name. For
example: ESA LDAP Base DN:
dc=esa,dc=protegrity,dc=com. |
| Group DN | Distinguished name of the LDAP Server group
container. For example: ESA LDAP Group
DN: ou=groups,dc=esa,dc=protegrity,dc=com. |
| Users DN | Distinguished name of the user container. For
example: ESA LDAP Users
DN: ou=people,dc=esa,dc=protegrity,dc=com. |
| Bind DN | Distinguished name of the LDAP Bind User. For
example: ESA LDAP Bind User DN cn=admin, ou=people, dc=esa,
dc=protegrity, dc=com. |
| Bind Password | The password of the specified LDAP Bind User. If
you modify the bind user password, ensure that you use the
Specify LDAP Server tool to update the changes in the
internal LDAP. Bind User The bind user account
password allows you to specify the user credentials used for
LDAP communication. This user should have full read access
to the LDAP entries in order to obtain
accounts/groups/permissions. If you are using the
internal LDAP, and you change the bind username/password,
using Change a directory account option, then you must
update the actual LDAP user. Make sure that a user with the
specified username/password exists. Run Specify LDAP Server
tool with the new password to update all the products with
the new password. Refer to section Protegrity LDAP Server for details. |
Click Test to test the connection.
If the connection is established, then a Successfully Done message appears.
10.2 - Changing the Bind User Password
The following section describe the steps to change the password for the ldap_bind_user using the CLI manager.
To change the ldap_bind_user password:
Login to the ESA CLI Manager.
Navigate to Administration > Specify LDAP server/s.
Enter the root password and select OK.
Select Reset LDAP Server settings and select OK.
The following screen appears.
Enter the admin username and password and select OK.
The following screen appears.

Select OK.
The following screen appears.

Select Manually enter a new password and select OK.
The following screen appears.
Enter the new password, confirm it, and select OK.
The following screen appears.
Select OK.
The password is successfully changed.
10.3 - Working with Proxy Authentication
Simple Authentication and Security Layer (SASL) is a framework that provides authentication and data security for Internet protocols. The data security layer offers data integrity and confidentiality services. It provides a structured interface between protocols and authentication mechanisms.
SASL enables ESA to separate authentication and authorization of users. The implementation is such that when users are imported, a user with the same name is recreated in the internal LDAP. When the user accesses the data security platform, ESA authorizes the user and communicates with the external LDAP for authenticating the user. This implementation ensures that organizations are not forced to modify their LDAP configuration to accommodate the data security platform. SASL is referred to as Proxy authentication in ESA CLI and Web UI.
To enable proxy authentication:
Login to the Appliance CLI Manager.
Navigate to Administration > LDAP Tools > Specify LDAP Server.
Enter the root password and select OK.
Select Set Proxy Authentication.
Specify the LDAP Server settings for proxy authentication with the external LDAP as shown in the following figure.

For more information about the LDAP settings, refer to Proxy Authentication Settings.
Select Test to test the settings provided. Select Test to test the settings provided. When Test is selected, ESA verifies if the connection to the external LDAP works, as per the Proxy Authentication settings provided.
The Bind Password is required when Bind DN is provided message appears.
Select OK.
Enter the LDAP user name and password provided as the bind user.
You can provide username and password of any other user from the LDAP as long as the LDAP Filter field exists in both the bind user name and any other user.
A Testing Proxy Authentication-Completed successfully message appears.
Select OK in the following message screen.
The following confirmation message appears.

Select Apply to apply the settings. In ESA CLI, only one user is allowed to be imported. This user is granted admin privileges, such that importing users and managing users can be performed by the user in the User Management screen. The User Management Web UI is used to import users from the external LDAP.
In the Select user to grant administrative privileges screen, select a user and confirm selection.
In the Setup administrator privileges screen, enter the ESA admin user name and password and select OK.
The following message appears.
Navigate to Administration > Services to verify that the Proxy Authentication Service is running.
10.4 - Configuring Local LDAP Settings
The local LDAP settings are enabled on port 389 by default.
To specify local LDAP server configuration:
Login to the ESA CLI Manager.
Navigate to Administration > Configure local LDAP settings.
Enter the root password and select OK.
The following screen appears.

In the LDAP listener IP address field, enter the LDAP listener IP address for local access. By default, it is 127.0.0.1.
In the LDAPS (SSL) listener IP address field, enter the LDAPS SSL listener IP address for remote access. It is 0.0.0.0 or a specific valid address for your remote LDAP directory.
Select OK.
10.5 - Monitoring Local LDAP
Local LDAP Monitor tool allows you to examine, in real time, how many LDAP operations per second are currently running, which is very useful to enhance the performance. You can use this tool to monitor the following tasks:
- Check LDAP Connectivity for LDAP Bind and LDAP Search.
- Modify or optimize LDAP cache, threading, and memory settings to improve performance and remove bottlenecks.
- Measure “number of changes” and “last modified date and time” on the LDAP server, which can be useful, for example, for verifying export/import operations.

10.6 - Optimizing Local LDAP Settings
When the Local LDAP receives excessive requests, the requests are cached. However, if the the cache is overloaded, it causes the LDAP to become unresponsive. From v9.1.0.3, a standard set of values for the cache that is required for optimal handling of the LDAP requests is set in the system. After you upgrade to v9.1.0.3, you can tune the cache parameters for the Local LDAP configuration. The default values for the cache parameters is shown in the following list.
- The slapd.conf file in the /etc/ldap directory contains the following cache values:
- cachesize 10000 (10,000 entries)
- idlcachesize 30000 (30,000 entries)
- dbconfig set_cachesize 0 209715200 0 (200 MB)
- The DB_CONFIG file in the /opt/ldap/db* directory contains the following the cache values:
- set_cachesize 0 209715200 0 (200 MB)
Based on the setup and the environment in the organization, you can choose to increase the parameters.
Ensure that you back up the files before editing the parameters.
- On the CLI Manager, navigate to Administration > OS Console.
- Edit the values for the required parameters.
- Restart the slapd service using the /etc/init.d/slapd restart command.
11 - Rebooting and Shutting down
You can reboot or shut down your appliance if necessary using Administration > Reboot and Shutdown. Make sure the Data Security Platform users are aware that the system is being rebooted or turned off and no important tasks are being performed at this time.
For cloud platforms, it is recommended to shut down or power off the CLI Manager or Appliance Web UI. With cloud platforms, such as Azure, AWS, or GCP, the instances run the appliance.
12 - Accessing the OS Console
You can access OS console using Administration > OS Control. You require root user credentials to access the OS console.
If you have System Monitor settings enabled in the Preferences menu, then the OS console will display the System Monitor screen upon entering the OS console.
To enable the System Monitor setting:
Login to the ESA CLI Manager.
Navigate to Preferences.
Enter the root password and select OK.
The Preferences screen appears.
Select Show System-Monitor on OS-Console.
Press Select.
Select Yes and select OK.
Select Done.