Installing ESA on Amazon Web Services (AWS)
Amazon Web Services (AWS) is a cloud-based computing service. It provides several services, such as, computing power through Amazon Elastic Compute Cloud (EC2), storage through Amazon Simple Storage Service (S3), and so on.
The AWS stores Amazon Machine Images (AMIs), which are templates or virtual images containing an operating system, applications, and configuration settings.
Protegrity appliances offer flexibility and can run in the following environments:
- On-premise: The ESA is installed and runs on dedicated hardware.
- Virtualized: The ESA is installed and runs on a virtual machine.
- Cloud: The ESA is installed and runs on or as part of a Cloud-based service.
Protegrity provides AMIs that contain the ESA image, running on a customized and hardened Linux distribution.
1 - Verifying Prerequisites
This section describes the prerequisites and tasks for installing Protegrity appliances on AWS. In addition, it describes some best practices for using the Protegrity ESA appliances on AWS effectively.
The Full OS Backup/Restore features of the Protegrity appliances is not available on the AWS platform.
Prerequisites
The following prerequisites are essential to install the Protegrity ESA appliances on AWS:
- Login URL for the AWS account
- AWS account with the authentication credentials
- Access to the My.Protegrity portal
Hardware Requirements
As the Protegrity ESA appliances are hosted and run on AWS, the hardware requirements are dependent on the configurations provided by Amazon. However, these requirements can autoscale as per customer requirements and budget.
The minimum recommendation for an ESA appliance is 8 CPU cores and 32 GB memory. On AWS, this configuration is available in the t3a.2xlarge option.
For more information about the hardware requirements of the ESA, refer to the section System Requirements.
Network Requirements
Protegrity ESA appliances on AWS are provided with an Amazon Virtual Private Cloud (VPC) networking environment. Amazon VPC enables you to access other AWS resources, such as other instances of Protegrity appliances on AWS.
You can configure the Amazon VPC by specifying its usable IP address range. You can also create and configure subnets, network gateways, and the security settings.
For more information about the Amazon VPC, refer to the Amazon VPC documentation at: http://docs.aws.amazon.com/AmazonVPC/latest/UserGuide/VPC_Introduction.html.
If you are using the ESA or the DSG appliance with AWS, then ensure that the inbound and outbound ports of the appliances are configured in the Amazon Virtual Private Cloud (VPC). This ensures that they are able to interact with the other required components.
For more information about the list of inbound and outbound ports to be configured based on the ESA or the DSG, refer Open Listening Ports.
Accessing the Internet
The following points list the ways in which you can provide or limit Internet access for an ESA instance in the VPC:
- If you need to connect the ESA to the Internet, then ensure that the ESA is on the default subnet so that it uses the Internet gateway that is included in the VPC.
- If you need to allow the ESA to initiate outbound connections to, and prevent inbound connections from the Internet, then ensure that you use a Network Address Translation (NAT) device.
- If you want to block the connection of the ESA to the Internet, then ensure that the ESA is on a private subnet.
Accessing a Corporate Network
If you need to connect the ESA to a corporate network, then ensure that you use an IPSec hardware VPN connection.
2 - Obtaining the AMI
Before creating the instance on AWS, you must obtain the image from the My.Protegrity portal. On the portal, you select the required ESA version and choose AWS as the target cloud platform. You then share the product to your cloud account. The following steps describe how to share the AMI to your cloud account.
To obtain and share the AMI:
Log in to the My.Protegrity portal with your user account.
Click Product Management > Explore Products > Data Protection.
Select the required ESA Platform Version from the drop-down.
The Product Family table will update based on the selected ESA Platform Version.
The ESA Platform Versions listed in drop-down menu reflect all versions. These include versions that were either previously downloaded or shipped within the organization along with any newer versions available thereafter. Navigate to Product Management > My Product Inventory to check the list of products previously downloaded.
The images in this section consider the ESA as a reference. Ensure that you select the required image.
Select the Product Family.
The description box will populate with the Product Family details.

Click View Products to advance to the product listing screen.

| Callout | Element Name | Description |
|---|
| 1 | Target Platform Details | Shows details about the target platform. |
| 2 | Product Name | Shows the product name. |
| 3 | Product Family | Shows the product family name. |
| 4 | OS Details | Shows the operating system name. |
| 5 | Version | Shows the product version. |
| 6 | End of Support Date | Shows the final date that Protegrity will provide support for the product. |
| 7 | Action | Click the View icon ( ) to open the Product Detail screen. ) to open the Product Detail screen. |
| 8 | Export as CSV | Downloads a .csv file with the results displayed on the screen. |
| 9 | Search Criteria | Type text in the search field to specify the search filter criteria or filter the entries using the following options:- OS- Target Platform |
| 10 | Request one here | Opens the Create Certification screen for a certification request. |
Select the AWS cloud target platform you require and click the View icon () from the Action column.
The Product Detail screen appears.

| Callout | Element Name | Description |
|---|
| 1 | Product Detail | Shows the following information about the product:- Product name- Family name- Part number- Version- OS details- Hardware details- Target platform details- End of support date
- Description |
| 2 | Product Build Number | Shows the product build number. |
| 3 | Release Type Name | Shows the type of build, such as, release, hotfix, or patch. |
| 4 | Release Date | Shows the release date for the build. |
| 5 | Build Version | Shows the build version. |
| 6 | Actions | Shows the following options for download:- Click the Share Product icon ( ) to share the product through the cloud.- Click the Download Signature icon ( ) to share the product through the cloud.- Click the Download Signature icon ( ) to download the product signature file.- Click the Download Readme icon ( ) to download the product signature file.- Click the Download Readme icon ( ) to download the Release Notes. ) to download the Release Notes. |
| 7 | Download Date | Shows the date when the file was downloaded. |
| 8 | User | Shows the user name who downloaded the build. |
| 9 | Active Deployment | Select the check box to mark the software as active. Clear the check box to mark the software as inactive. |
This option is available only after you download a product.|
|10|Product Build Number|Shows the product build number.|
Click the Share Product icon () to share the desired cloud product.
If the access to the cloud products is restricted and the Customer Cloud Account details are not available, then a message appears. The message displays the information that is required and the contact information for obtaining access to cloud share.
A dialog box appears and your available cloud accounts will be displayed.

Select your required cloud account in which to share the Protegrity product.
Click Share.
A message box is displayed with the command line interface (CLI) instructions with the option to download a detailed PDF containing the cloud web interface instructions. Additionally, the instructions for sharing the cloud product are sent to your registered email address and to your notification inbox in My.Protegrity.

Click the Copy icon ( ) to copy the command for sharing the cloud product and run the command in CLI. Alternatively, click Instructions to download the detailed PDF instructions for cloud sharing using the CLI or the web interface.
The cloud sharing instruction file is saved in a .pdf format. You need a reader, such as, Acrobat Reader to view the file.
The Cloud Product will be shared with your cloud account for seven (7) days from the original share date in the My.Protegrity portal.
After the seven (7) day time period, you need to request a new share of the cloud product through My.Protegrity.com.
3 - Loading the Protegrity Appliance from an Amazon Machine Image (AMI)
This section describes the tasks that need to be performed for loading the ESA appliance from an AMI, which is provided by Protegrity.
3.1 - Creating an ESA Instance from the AMI
Perform the following steps to create an ESA instance using an AMI.
Access AWS at the following URL:
https://aws.amazon.com/
The AWS home screen appears.
Click the Sign In to the Console button.
The AWS login screen appears.
On the AWS login screen, enter the following details:
- Account Number
- User Name
- Password
Click the Sign in button.
After successful authentication, the AWS Management Console screen appears.
Click Services.
Navigate to Compute > EC2
The EC2 Dashboard screen appears.
Contact Protegrity Support and provide your Amazon Account Number so that the required Protegrity AMIs can be made accessible to the account.
Click on AMIs under the Images section.
The AMIs that are accessible to the user account appear in the right pane.
Select the AMI of the required ESA in the right pane.
Click the Launch instance from AMI button to launch the selected ESA appliance.
The Launch an instance screen appears.
Depending on the performance requirements, choose the required instance type.
For the ESA appliance, an instance with 32 GB RAM is recommended.
If you need to configure the details of the instance, then click the Next: Configure Instance Details button.
The Configure Instance Details screen appears.
Specify the following parameters on the Configure Instance Details screen:
Number of Instances: The number of instances that you want to launch at a time.
Purchasing option: The option to request Spot instances, which are unused EC2 instances. If you select this option, then you need to specify the maximum price that you are willing to pay for each instance on an hourly basis.
Network: The VPC to launch the ESA in. If you need to create a VPC, then click the Create new VPC link. For more information about creating a VPC, refer to the section Configuring VPC.
Subnet: The Subnet to be used to launch the ESA. A subnet resides in one Availability zone.
If you need to create a Subnet, then click the Create new subnet link.
For more information about creating a subnet, refer to the section Adding a Subnet to the Virtual Private Cloud (VPC).
Auto-assign Public IP: The IP address from where your instance can be accessed over the Internet. You need to select Enable from the list.
Availability Zone: A location within a region that is designed to be isolated from failures in other Availability Zones.
IAM role: This option is disabled by default.
Shutdown behaviour: The behaviour of the ESA when an OS-level shut down command is initiated.
Enable Termination Protection: The option to prevent accidental termination of the ESA instance.
Monitoring: The option to monitor, collate, and analyze the metrics for the instance of your ESA.
If you need to add additional storage to the ESA instance, then click the Next: Add Storage button.
The Add Storage screen appears.
You can provision additional storage for the ESA by clicking the Add New Volume button. Root is the default volume for your instance.
Alternatively, you can provision additional storage for the ESA later too.
For more information on configuring the additional storage on the instance of the ESA, refer to the section Increasing Disk Space on the Appliance.
If you need to create a key-value pair, then click the Add additional tags button.
Enter the Key and Value information and select the Resource types from the drop-down.
Select the Existing Key Pair option and choose a key from the list of available key pairs.
- Alternatively, you can select the Create a new Key Pair, to create a new key pair.
- If you proceed without a key pair, then the system will not be accessible.
If you need to configure the Security Group, then click the Next: Configure Security Group button.
The Configure Security Group screen appears.
You can assign a security group from the available list.
Alternatively, you can create security group with rules for the required inbound and outbound ports.
The Summary section lists all the details related to the ESA instance. You can review the required sections before you launch your instance.
Click the Launch instance button.
The ESA instance is launched and the Launch Status screen appears.
Click the View Instances button.
The Instances screen appears listing the ESA instance.
If you need to use the instance, then access the ESA CLI Manager using the IP address of the ESA.
3.2 - Configuring the Virtual Private Cloud (VPC)
If you need to connect two Protegrity appliances, or to the Internet, or a corporate network using a Private IP address, then you might need to configure the VPC.
For more information about the various inbound and outbound ports to be configured in the VPC, refer to section Open Listening Ports.
Perform the following steps to configure the VPC for the instance.
Ensure that you are logged in to AWS and at the AWS Management Console screen.
On the AWS Management Console, click VPC under the Networking section.
The VPC Dashboard screen appears.
Click on Your VPCs under the Virtual Private Cloud section.
The Create VPC screen appears listing all available VPCs in the right pane.
Click the Create VPC button.
The Create VPC dialog box appears.
Specify the following parameters on the Create VPC dialog box:
- Name tag: The name of the VPC.
- CIDR block: The range of the IP addresses for the VPC in x.x.x.x/y form where x.x.x.x is the IP address and y is the /16 and /28 netmask.
- Tenancy: This parameter can be set to Default or Dedicated. If the value is set to Default, then it selects the tenancy attribute specified while launching the instance of the appliance for the VPC.
Click the Yes, Create button.
The VPC is created.
3.3 - Adding a Subnet to the Virtual Private Cloud (VPC)
You can add Subnets to your VPC. A subnet resides in an Availability zone. When you create a subnet, you can specify the CIDR block.
Perform the following steps to create the subnet for your VPC.
Ensure that you are logged in to AWS and at the AWS Management Console screen.
On the AWS Management Console, click VPC under the Networking section.
The VPC Dashboard screen appears.
Click Subnets under the Virtual Private Cloud section.
The create subnet screen appears listing all available subnets in the right pane.
Click the Create Subnet button.
The Create Subnet dialog box appears.
Specify the following parameters on the Create Subnet dialog box.
- Name tag: The name for the Subnet.
- VPC: The VPC for which you want to create a subnet.
- Availability Zone: The Availability zone where the subnet resides.
- CIDR block: The range of the IP addresses for the VPC in x.x.x.x/y form where x.x.x.x is the IP address and y is the /16 and /28 netmask.
Click the Yes, Create button.
The subnet is created.
3.4 - Finalizing the Installation of Protegrity Appliance on the Instance
When you install the ESA appliance, it generates multiple security identifiers such as, keys, certificates, secrets, passwords, and so on. These identifiers ensure that sensitive data is unique between two appliances in a network. When you receive a Protegrity appliance image, the identifiers are generated with certain values. If you use the security identifiers without changing their values, then security is compromised and the system might be vulnerable to attacks.
Rotating Appliance OS keys to finalize installation
Using the Rotate Appliance OS Keys tool, you can randomize the values of these security identifiers for an appliance. During the finalization process, you run the key rotation tool to secure your appliance.
If you do not complete the finalization process, then some features of the appliance may not be functional including the Web UI.
For example, if the OS keys are not rotated, then you might not be able to add appliances to a Trusted Appliances Cluster (TAC).
For information about the default passwords, refer to the section Launching the ESA instance on Amazon Web Services in the Release Notes 10.0.x from the My.Protegrity.
3.4.1 - Logging to the AWS Instance using the SSH Client
After installing the ESA on AWS, you must log in to the AWS instance using the SSH Client.
To login to the AWS instance using the SSH Client:
Start the local SSH Client.
Perform the SSH operation on the AWS instance using the key pair utilizing the following command. Ensure that you use the local_admin user to perform the SSH operation.
ssh -i <path of the private key pair> local_admin@<IP address of the AWS instance>
Press Enter.
3.4.2 - Finalizing an AWS Instance
You can finalize the installation of the ESA after signing in to the CLI Manager.
Before you begin
“Before finalizing the AWS instance, consider the following:
The SSH Authentication Type by default, is set to Public key. Ensure that you use the Public key for accessing the CLI. You can change the authentication type from the ESA Web UI, once the finalization is completed.
Ensure that the finalization process is initiated from a single session only. If you start finalization simultaneously from a different session, then the “Finalization is already in progress.” message appears. You must wait until the finalization of the ESA instance is successfully completed.
Ensure that the session is not interrupted. If the session is interrupted, then the ESA becomes unstable and the finalization process is not completed on that instance.
Finalizing the AWS instance
Perform the following steps to finalize the AWS instance:
Sign in to the ESA CLI Manager of the instance created using the default local admin credentials.
The following screen appears.

Select Yes to initiate the finalization process.
If you select No, then the finalization process is not initiated.
To manually initiate the finalization process, navigate to Tools > Finalize Installation and press ENTER.
A confirmation screen to rotate the appliance OS keys appears. Select OK to rotate the appliance OS keys.
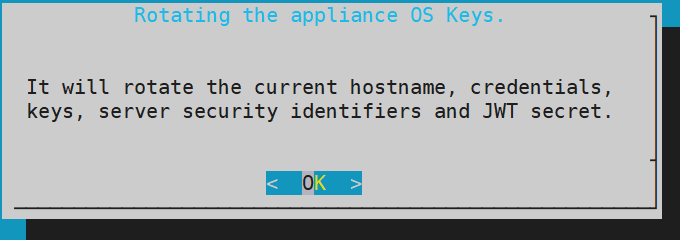
The following screen appears.
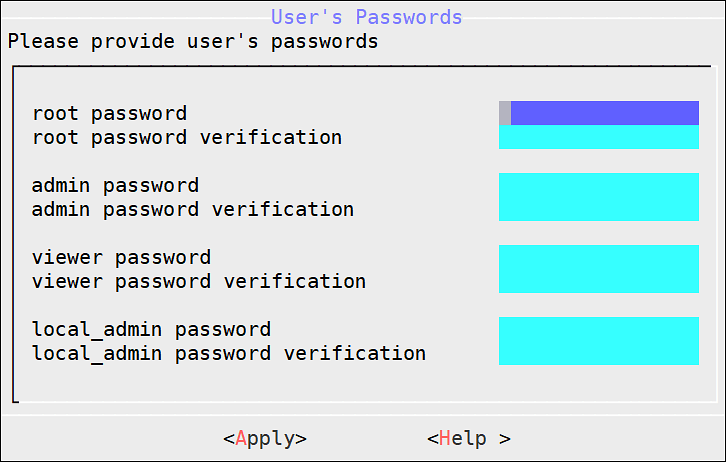
To update the user passwords, provide the credentials for the following users:
- root
- admin
- viewer
- local_admin
Select Apply.
The user passwords are updated and the appliance OS keys are rotated.
The finalization process is completed.
4 - Backing up and Restoring Data on AWS
A snapshot represents a state of an instance or disk at a point in time. You can use a snapshot of an instance or a disk to backup or restore information in case of failures.
Creating a Snapshot of a Volume on AWS
In AWS, you can create a snapshot of a volume.
To create a snapshot on AWS:
On the EC2 Dashboard screen, click Volumes under the Elastic Block Store section.
The screen with all the volumes appears.
Right click on the required volume and select Actions > Create Snapshot.
The Create Snapshot screen for the selected volume appears.
Enter the required description for the snapshot in the Description text box.
Select Add tag to add a tag.
Enter the tag in the Key and Value text boxes.
Click Add Tag to add additional tags.
Click Create Snapshot.
A message Create Snapshot Request Succeeded appears, along with the snapshot ID.
Restoring a Snapshot on AWS
On AWS, you can restore data by creating a volume of a snapshot. You then attach the volume to an EC2 instance.
Before you begin
Restoring a Snapshot
To restore a snapshot on AWS:
On the EC2 Dashboard screen, click Snapshots under the Elastic Block Store section.
The screen with all the snapshots appears.
Right-click on the required snapshot and select Create Volume.
The Create Volume screen form appears.
Select the type of volume from the Volume Type drop-down list.
Enter the size of the volume in the Size (GiB) textbox.
Select the availability zone from the Availability Zone* drop-down list.
Click Add Tag to add tags.
Click Create Volume.
A message Create Volume Request Succeeded along with the volume id appears. The volume with the snapshot is created.
Ensure that you note the volume id.
Under the EBS section, click Volume.
The screen displaying all the volumes appears.
Right-click on the volume that is created.
The pop-up menu appears.
Select Attach Volume.
The Attach Volume dialog box appears.
Enter the Instance ID or name of the instance in the Instance text box.
Enter /dev/xvda in the Device text box.
Click Attach to add the volume to an instance.
The snapshot is added to the EC2 instance as a volume.
5 - Increasing Disk Space on the Appliance
After an ESA instance is created, you can increase the disk space on the appliance.Ensure that the instance is powered off before performing the following steps.
To increase disk space for the ESA on AWS:
On the EC2 Dashboard screen, click Volumes under the Elastic Block Store section.
The Create Volume screen appears.
Click the Create Volume button.
The Create Volume dialog box appears.
Enter the required size of the additional disk space in the Size (GiB) text box.
Enter the snapshot ID of the instance, for which the additional disk space is required in the Snapshot ID text box.
Click the Create button.
The required additional disk space is created as a volume.
Right-click on the additional disk, which is created.
The pop-up menu appears.
Select Attach Volume.
The Attach Volume dialog box appears.
Enter the Instance ID or name tag of the ESA to add the disk space in the Instance text box.
Click the Attach button to add the disk space to the required ESA instance.
The disk space is added to the ESA instance.
After the disk space on the ESA instance is added, navigate to Instances under the Instances section.
Right-click on the ESA instance in which the disk space was added.
Select Instance State > Start.
The ESA instance is started.
After the ESA instance is started, configure the additional storage using the CLI Manager.
For more information on configuring the additional storage on the ESA, refer to section Installation of Additional Hard Disks.
6 - Best Practices for Using Protegrity Appliances on AWS
There are recommended best practices for using Protegrity appliances on AWS.
Force SSH Keys
Configure the ESA to enable SSH keys and disable SSH passwords for all users.
If you need to create or join a Trusted Appliance cluster, then ensure that SSH passwords are enabled when you are creating or joining the cluster, and then disabled.
For more information about the SSH keys, refer to section Working with Secure Shell (SSH) Keys.
Install Upgrades
After you run the Appliance-rotation tool, it is recommended that you install all the latest Protegrity updates.
To ensure successful communication between the ESA and the other entities connected to it.
For more information about the list of inbound and outbound ports for the ESA, refer to section Open Listening Ports.
7 - Running the Appliance-Rotation-Tool
The Appliance-rotation-tool modifies the required keys, certificates, credentials, and passwords for the appliance. This helps to differentiate the sensitive data on the appliance from other similar instances.
Before you begin
If you are configuring an ESA appliance instance, then you must run the Appliance-rotation-tool after creating the instance of the appliance.
Ensure that you do not run the appliance rotation tool when the ESA appliance OS keys are in use.
For example, you must not run the appliance rotation tool when a cluster is enabled, two-factor authentication is enabled, external users are enabled, and so on.
Perform the following steps to rotate the required keys, certificates, credentials, and passwords for the appliance.
To use the Appliance-rotation-tool:
On the ESA, navigate to CLI Manager > Tools > Rotate Appliance OS Keys.
The root password dialog box appears.
Enter the root password.
Press ENTER.
The Appliance OS Key Rotation dialog box appears.

Select Yes.
Press ENTER.
The administrative credentials dialog box appears.

Enter the Account name and Account password on the ESA appliance.
Select OK.
To update the user passwords, provide the credentials for the users on the User’s Passwords screen. If default users such as root, admin, viewer, and local_admin have been manually deleted, they will not be listed on the User’s Passwords screen. Otherwise, to update the passwords, provide credentials for the following default users:
- root
- admin
- viewer
- local_admin
Select Apply. The user passwords are updated.
The process to rotate the required keys, certificates, credentials, and other identifiers on the ESA starts.

8 - Working with Cloud-based Applications
Cloud-based applications are products or services for storing data on the cloud. In cloud-based applications, the computing and processing of data is handled on the cloud. Local applications interact with the cloud services for various purposes, such as, data storage, data computing, and so on. Cloud-based applications are allocated resources dynamically and aim at reducing infrastructure cost, improving network performance, easing information access, and scaling of resources.
AWS offers a variety of cloud-based products for computing, storage, analytics, networking, and management. Using the Cloud Utility product, services such as, CloudWatch and AWS CLI are leveraged by the Protegrity appliances.
Prerequisites
The following prerequisites are essential for AWS Cloud Utility.
The Cloud Utility AWS v2.3.0 product must be installed.
From 8.0.0.0, if an instance is created on the AWS using the cloud image, then Cloud Utility AWS is preinstalled on this instance.
For more information about installing the Cloud Utility AWS v2.3.0, refer to the Protegrity Installation Guide.
If you are launching a Protegrity appliance on an AWS EC2 instance, then you must have a valid IAM Role.
For more information about IAM Role, refer to Configuring Access for AWS Resources.
If you are launching a Protegrity appliance on a non-AWS instance, such as on-premise, Microsoft Azure, or GCP instance, then the AWS Configure option must be set up.
For more information about configuring AWS credentials, refer to AWS Configure.
The user accessing the Cloud Utility AWS Tools must have AWS Admin permission assigned to the role.
For more information about AWS admin, refer to Managing Roles.
8.1 - Configuring Access for AWS Resources
A server might contain resources that only the authorized users can access. For accessing a protected resource, you must provide valid credentials to utilize the services of the resource. Similarly, on the AWS platform, only privileged users can access and utilize the AWS cloud applications. The Identity and Access Management (IAM) is the mechanism for securing access to your resources on AWS.
The two types of IAM mechanisms are as follows:
IAM user is an entity that represents users on AWS. To access the resources or services on AWS, the IAM user must have the privileges to access these resources. By default, you have to set up all required permissions for a user. Each IAM user can have specific defined policies. An IAM user account is beneficial as it can have special permissions or privileges associated for a user.
For more information about creating an IAM user, refer to the following link:
https://docs.aws.amazon.com/IAM/latest/UserGuide/id_users_create.html
An IAM user can access the AWS services on the required Protegrity appliance instances with the access keys. The access keys are the authentication mechanisms that authorize AWS CLI requests. The access keys can be generated when you create the IAM user account. Similar to the username and password, the access keys consist of access key ID and the secret access key. The access keys validate a user to access the required AWS services.
For more information about setting up an IAM user to use AWS Configure, refer to AWS Configure.
IAM role is the role for your AWS account and has specific permissions associated with it. An IAM role has defined permissions and privileges which can be given to multiple IAM users. For users that need same permissions to access the AWS services, you should associate an IAM role with the given user account.
If you want a Protegrity appliance instance to utilize the AWS resources, the instance must be provided with the required privileges. This is achieved by attaching an IAM role to the instance. The IAM role must have the required privileges to access the AWS resources.
For more information about creating an IAM role, refer to the following link:
https://docs.aws.amazon.com/IAM/latest/UserGuide/id_roles_create.html
For more information about IAM, refer to the following link.
https://docs.aws.amazon.com/IAM/latest/UserGuide/introduction.html
The AWS Configure operation is a process for configuring an IAM user to access the AWS services on the Protegrity appliance instance. These AWS services include CloudWatch, CloudTrail, S3 bucket, and so on.
To utilize AWS resources and services, you must set up AWS Configure if you have an IAM User.
To set up AWS Configure on a non-AWS instance, such as on-premise, Microsoft Azure, or GCP instance, you must have the following:
A valid IAM User
Secret key associated with the IAM User
Access key ID for the IAM User
The AWS Region on whose servers you want to send the default service requests
For more information about the default region name, refer to the following link.
https://docs.aws.amazon.com/cli/latest/userguide/cli-chap-configure.html
If the access keys or the IAM role do not have the required privileges, then the user cannot utilize the corresponding AWS resources.
For AWS Configure, only one IAM user can be configured for an appliance at a time.
Configuring AWS Services
Below are instructions for configuring AWS services.
Before you begin
It is recommended to configure the AWS services from the Tools > Cloud Utility AWS Tools > AWS Configure menu.
On the Appliance Web UI, ensure that the AWS Admin privilege is assigned to the user role for configuring AWS on non-AWS instance.
To configure the AWS services:
Login to the Appliance CLI Manager.
To configure the AWS services, navigate to Tools > Cloud Utility AWS Tools > AWS Configure.
Enter the root credentials.
The following screen appears.
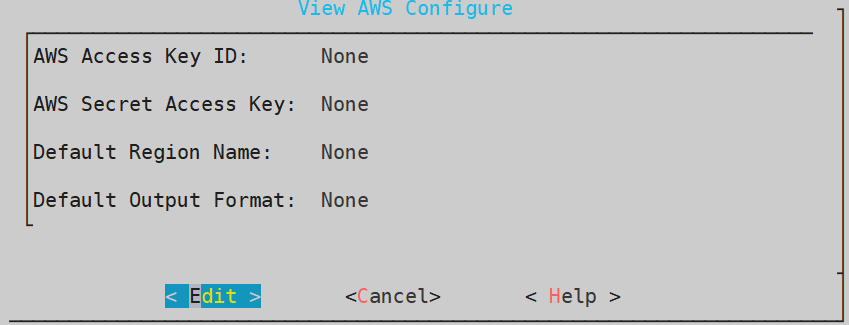
Select Edit and press ENTER.
Enter the AWS credentials associated with your IAM user in the AWS Access Key ID and AWS Secret Access Key text boxes.
Enter the region name in the Default Region Name text box. This field is case sensitive. Ensure that the values are entered in small-case.
For more information about the default region name, refer to the following link:
https://docs.aws.amazon.com/cli/latest/userguide/cli-chap-configure.html
Enter the output format in the Default Output Format text box. This field is case sensitive. Ensure that the values are entered in small-case.
If the field is left empty, the Default Output Format is json. However, the supported Default Output Formats are json, table, and text.
For more information about the default output format, refer to the following link:
https://docs.aws.amazon.com/cli/latest/userguide/cli-chap-configure.html
Select OK and press ENTER.
A validation screen appears.
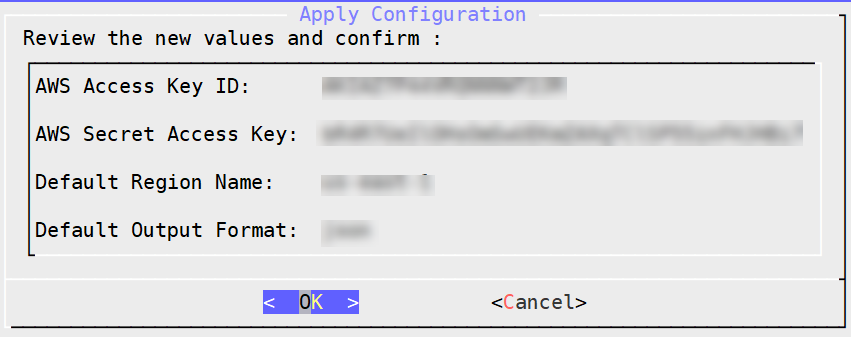
Select OK and press ENTER.
A confirmation screen appears.
Select OK.
The configurations are applied successfully.
8.2 - Working with CloudWatch Console
AWS CloudWatch tool is used for monitoring applications. Using CloudWatch, you can monitor and store the metrics and logs for analyzing the resources and applications.
CloudWatch allows you to collect metrics and track them in real-time. Using this service you can configure alarms for the metrics. CloudWatch provides visibility into the various aspects of your services including the operational health of your device, performance of the applications, and resource utilization.
For more information about AWS CloudWatch, refer to the following link:
https://docs.aws.amazon.com/AmazonCloudWatch/latest/monitoring/WhatIsCloudWatch.html
CloudWatch logs help you to monitor a cumulative list of all the logs from different applications on a single dashboard. This provides a central point to view and search the logs which are displayed in the order of the time when they were generated. Using CloudWatch you can store and access your log files from various sources. CloudWatch allows you to query your log data, monitor the logs which are originating from the instances and events, and retain and archive the logs.
For more information about CloudWatch logs, refer to the following link:
https://docs.aws.amazon.com/AmazonCloudWatch/latest/logs/WhatIsCloudWatchLogs.html
Prerequisites
For using AWS CloudWatch console, ensure that the IAM role or IAM user that you want to integrate with the appliance must have CloudWatchAgentServerPolicy policy assigned to it.
For more information about using the policies with the IAM Role or IAM User, refer to the following link:
https://docs.aws.amazon.com/AmazonCloudWatch/latest/monitoring/create-iam-roles-for-cloudwatch-agent.html
8.2.1 - Integrating CloudWatch with Protegrity Appliance
You must enable CloudWatch integration to use the AWS CloudWatch services. This helps you to send the metrics and the logs from the appliances to the AWS CloudWatch Console.
The following section describes the steps to enable CloudWatch integration on Protegrity appliances.
To enable AWS CloudWatch integration:
Login to the ESA CLI Manager.
To enable AWS CloudWatch integration, navigate to Tools > Cloud Utility AWS Tools > CloudWatch Integration.
Enter the root credentials.
The following screen appears.
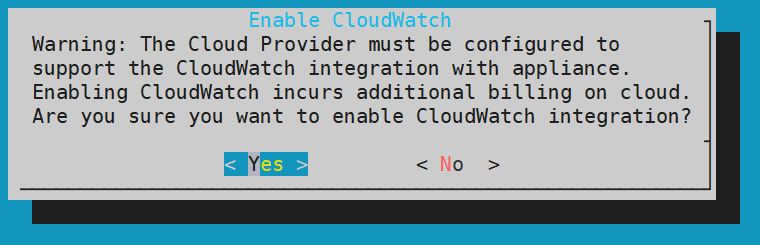
The warning message is displayed due to the cost involved from AWS.
For more information about the cost of integrating CloudWatch, refer to the following link:
https://aws.amazon.com/cloudwatch/pricing/
Select Yes and press ENTER.
A screen listing the logs that are being sent to the CloudWatch Console appears.
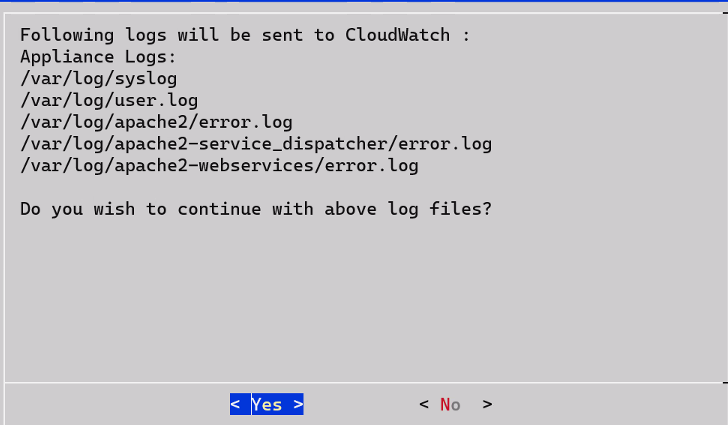
Select Yes.
Wait till the following screen appears.
Select OK.
CloudWatch integration is enabled successfully. The CloudWatch service is enabled on the Web UI and CLI.
8.2.2 - Configuring Custom Logs on AWS CloudWatch Console
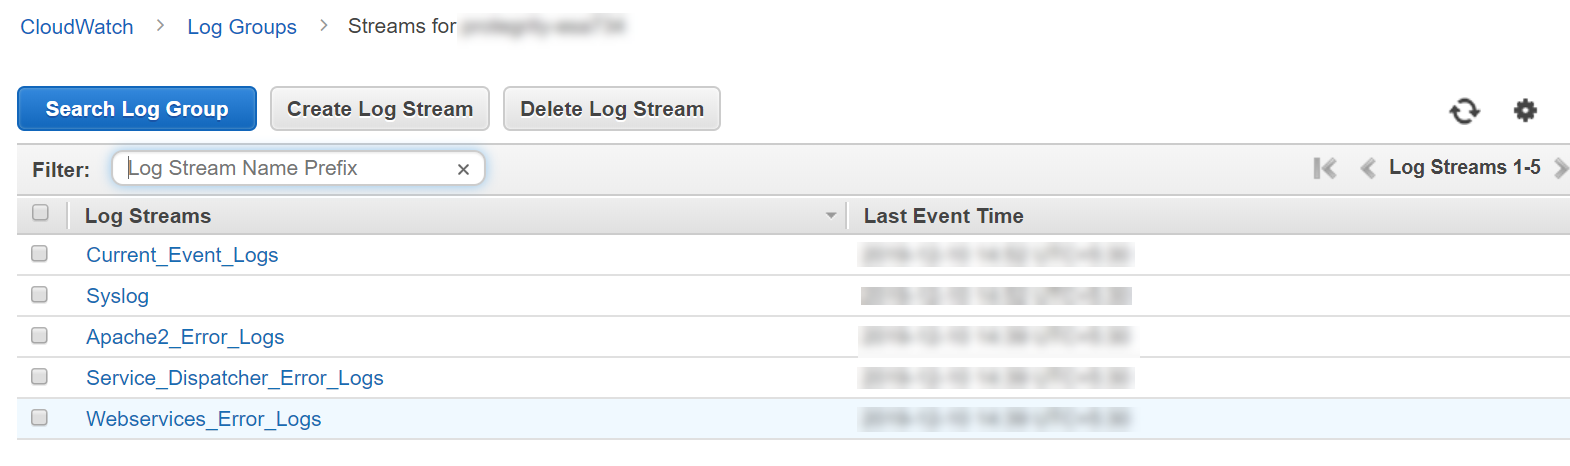
You can send logs from an appliance which is on-premise or launched on any of the cloud platforms, such as, AWS, GCP, or Azure. The logs are sent from the appliances and stored on the AWS CloudWatch Console. By default, the following logs are sent from the appliances:
- Syslogs
- Current events logs
- Apache2 error logs
- Service dispatcher error logs
- Web services error logs
You can send custom log files to the AWS CloudWatch Console. To send custom log files to the AWS CloudWatch Console, you must create a file in the /opt/aws/pty/cloudwatch/config.d/ directory. You can add or edit the log streams in this file to generate the custom logs with the following parameters.
You must not edit the default configuration file, appliance.conf, in the /opt/aws/pty/cloudwatch/config.d/ directory.
The following table explains the parameters that you must use to configure the log streams.
| Parameter | Description | Example |
|---|
| file_path | Location where the file or log is stored | “/var/log/appliance.log” |
| log_stream_name | Name of the log that will appear on the AWS CloudWatch Console | “Appliance_Logs” |
| log_group_name | Name under which the logs are displayed on the CloudWatch Console | - On the CloudWatch Console, the logs appear under the hostname of the ESA instance.- Ensure that you must not modify the parameter log_group_name and its value {hostname}. |
Sample configuration files
Do not edit the appliance.conf configuration file in the /opt/aws/pty/cloudwatch/config.d/ directory.
If you want to configure a new log stream, then you must use the following syntax:
[
    {
            "file_path": "<path_of_the_first_log_file>",
            "log_stream_name": "<Name_of_the_log_stream_to_be_displayed_in_CloudWatch>",
            "log_group_name": "{hostname}"
    },
                .
                .
                .
    {
            "file_path": "<path_of_the_nth_log_file>",
            "log_stream_name": "<Name_of_the_log_stream_to_be_displayed_in_CloudWatch>",
            "log_group_name": "{hostname}"
    }
]
The following snippet displays the sample configuration file, configuration_filename.conf, that sends appliance logs to the AWS CloudWatch Console.
[
    {
            "file_path": "/var/log/syslog",
            "log_stream_name": "Syslog",
            "log_group_name": "{hostname}"
    },
    {
            "file_path": "/var/log/user.log",
            "log_stream_name": "Current_Event_Logs",
            "log_group_name": "{hostname}"
    }
]
If you configure custom log files to send to CloudWatch Console, then you must reload the CloudWatch integration or restart the CloudWatch service. Also, ensure that the CloudWatch integration is enabled and running.
For more information about Reloading AWS CloudWatch Integration, refer to Reloading AWS CloudWatch Integration.
8.2.3 - Toggling the CloudWatch Service
In the Protegrity appliances, the Cloudwatch service enables the transmission of logs from the appliances to the AWS CloudWatch Console. Enabling the AWS Cloudwatch Integration also enables this service with which you can start or stop the logs from being sent to the AWS CloudWatch Console. The following sections describe how to toggle the CloudWatch service for pausing or continuing log transmission. The toggling can be performed in either the CLI Manager or the Web UI.
Before you begin
Ensure that the valid AWS credentials are configured before toggling the CloudWatch service.
For more information about
Starting or Stopping the CloudWatch Service from the Web UI
If you want to temporarily stop the transmission of logs from the appliance to the AWS Console, then you can stop the CloudWatch Service.
To start or stop the AWS CloudWatch service from the Web Ui:
Login to the Appliance Web UI.
Navigate to System > Services.
Locate the CloudWatch service to start or stop. Select the appropriate icon, either Start or Stop, to perform the desired action.
- Select Stop to stop the transmission of logs and metrics.
- Select Start or Restart to start the CloudWatch service.
Starting or Stopping the CloudWatch Service from the CLI Manager
If you want to temporarily stop the transmission of logs from the appliance to the AWS Console, then you can stop the CloudWatch Service.
To start or stop the AWS CloudWatch service from the CLI Manager:
Login to the appliance CLI Manager.
Navigate to Administration > Services.
Locate the CloudWatch service to start or stop. Select the appropriate icon, either Start or Stop, to perform the desired action.
- Select Stop to stop the transmission of logs and metrics.
- Select Start to start the CloudWatch service.
8.2.4 - Reloading the AWS CloudWatch Integration
If you want to update the existing configurations in the /opt/aws/pty/cloudwatch/config.d/ directory, then you must reload the CloudWatch integration.
To reload the AWS CloudWatch integration:
Login to the ESA CLI Manager.
To reload CloudWatch, navigate to Tools > Cloud Utility AWS Tools > CloudWatch Integration.
Enter the root credentials.
The following screen appears.
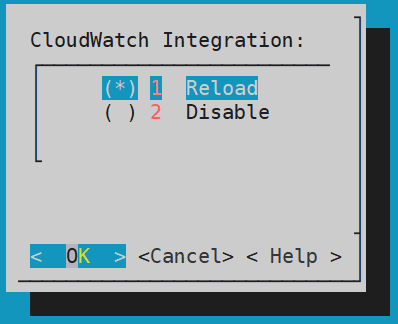
Select Reload and press ENTER.
The logs are updated and sent to the AWS CloudWatch Console.
8.2.5 - Viewing Logs on AWS CloudWatch Console
After performing the required changes on the CLI Manager, the logs are visible on the CloudWatch Console.
To view the logs on the CloudWatch console:
Login to the AWS Web UI.
From the Services tab, navigate to Management & Governance > CloudWatch.
To view the logs, from the left pane navigate to Logs > Log groups.
Select the required log group. The name of the log group is the same as the hostname of the appliance.
To view the logs, select the required log stream from the following screen.
8.2.6 - Working with AWS CloudWatch Metrics
The metrics for the following entities in the appliances are sent to the AWS CloudWatch Console.
| Metrics | Description |
|---|
| Memory Use Percent | Percentage of the memory that is consumed by the appliance. |
| Disk I/O | Bytes and packets read and written by the appliance.You can view the following parameters:- write_bytes- read_bytes- writes- reads |
| Network | Bytes and packets sent and received by the appliance.You can view the following parameters:- bytes_sent- bytes_received- packets_sent- packets_received |
| Disk Used Percent | Percentage of the disk space that is consumed by the appliance. |
| CPU Idle | Percentage of time for which the CPU is idle. |
| Swap Memory Use Percent | Percentage of the swap memory that is consumed by the appliance. |
Unlike logs, you cannot customize the metrics that you want to send to CloudWatch. If you want to customize these metrics, then contact Protegrity Support.
8.2.7 - Viewing Metrics on AWS CloudWatch Console
To view the metrics on the CloudWatch console:
Login to the AWS Web UI.
From the Services tab, navigate to Management & Governance > CloudWatch.
To view the metrics, from the left pane navigate to Metrics > All metrics.
Navigate to AWS namespace.
The following screen appears.
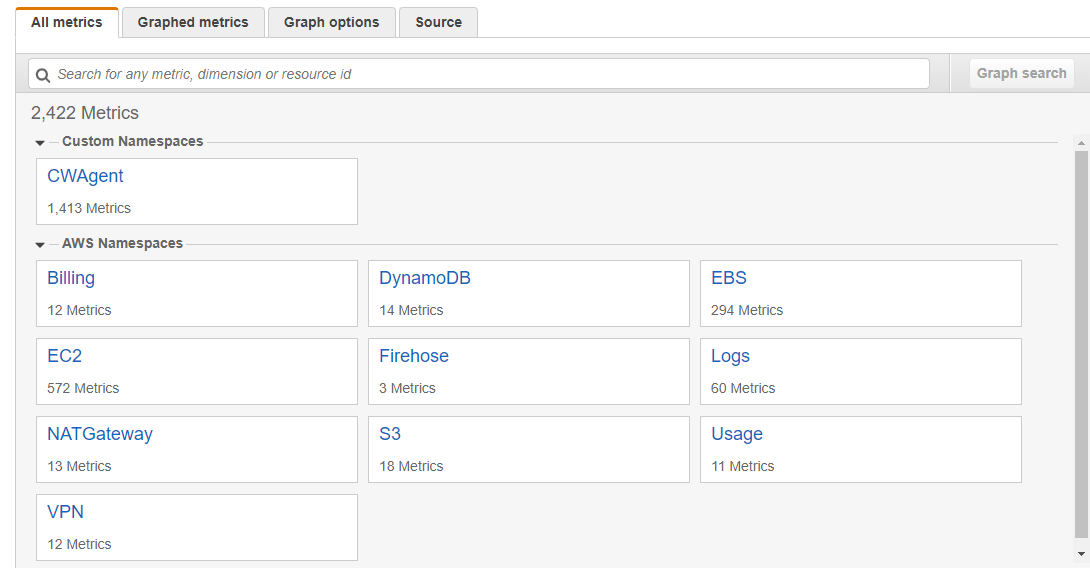
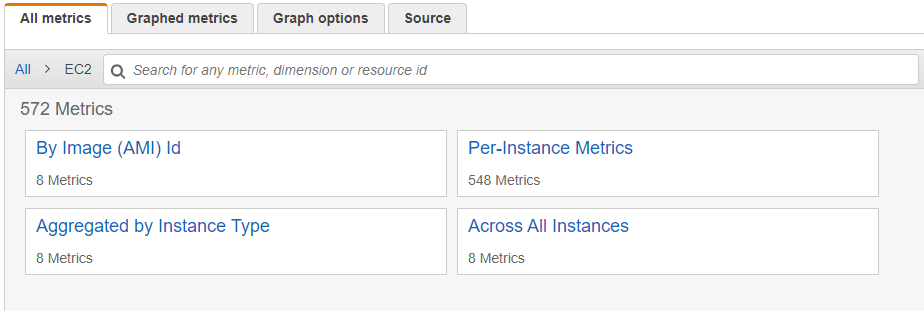
Select EC2.
Select the required metrics from the following screen.
To view metrics of the Protegrity appliances that are on-premise or other cloud platforms, such as Azure or GCP, navigate to Custom namespace > CWAgent.
The configured metrics appear.
8.2.8 - Disabling AWS CloudWatch Integration
If you want stop the logs and metrics that are being sent to the AWS CloudWatch Console. To disintegrate the Cloudwatch removing the service from the appliance. Then, disable the AWS CloudWatch integration from the appliance. As a result, the CloudWatch service is removed from the Services screen of the Web UI and the CLI Manager.
To disable the AWS CloudWatch integration:
Login to the ESA CLI Manager.
To disable CloudWatch, navigate to Tools > Cloud Utility AWS Tools > CloudWatch Integration.
The following screen appears.
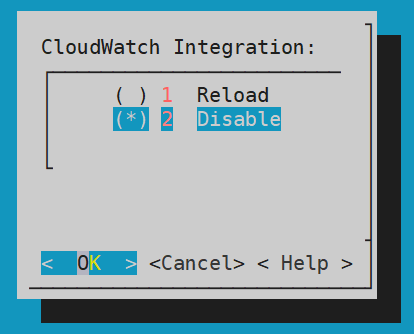
Select Disable and press ENTER.
The logs from the appliances are not updated in the AWS CloudWatch Console and the CloudWatch Integration is disabled.
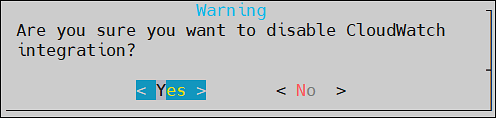
A warning screen with message Are you sure you want to disable CLoudWatch integration? appears. Select Yes and press Enter.
The CloudWatch integration disabled successfully message appears. Click Ok.
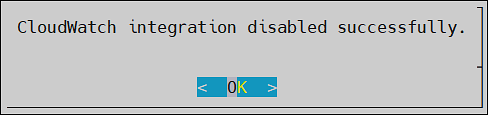
The AWS CloudWatch integration is disabled.
After disabling CloudWatch integration, you must delete the Log groups and Log streams from the AWS CloudWatch console.
8.3 - Working with the AWS Cloud Utility
You can work with the AWS Cloud Utility in various ways. This section contains usage examples for using the AWS Cloud Utility. However, the scope of working with Cloud Utility is not limited to the scenarios covered in this section.
The following scenarios are explained in this section:
- Encrypting and storing the backed up files on the AWS S3 bucket.
- Setting metrics-based alarms using the AWS Management Console.
8.3.1 - Storing Backup Files on the AWS S3 Bucket
If you want to store backed up files on the AWS S3 bucket, you can use the Cloud Utility feature. You can transit these files from the Protegrity appliance to the AWS S3 bucket.
The following tasks are explained in this section:
- Encrypting the backed up .tgz files using the AWS Key Management Services (KMS).
- Storing the encrypted files in the AWS S3 bucket.
- Retrieving the encrypted files stored in the S3 bucket.
- Decrypting the retrieved files using the AWS KMS.
- Importing the decrypted files on the Protegrity appliance.
About the AWS S3 bucket and usage
The AWS S3 bucket is a cloud resource which helps you to securely store your data. It enables you to keep the data backup at multiple locations, such as, on-premise and on cloud. For easy accessibility, you can backup and store data of one machine and import the same data to another machine, using the AWS S3 bucket. It also provides an additional layer of security by helping you encrypt the data before uploading it to the cloud.
Using the OS Console option in the CLI Manager, you can store your backed up files in the AWS S3 bucket. You can encrypt your files using the the AWS Key Management Services (KMS) before storing it in the AWS S3 bucket.
The following figure shows the flow for storing your data on the AWS S3 bucket.


Prerequisites
Ensure that you complete the following prerequisites for uploading the backed up files to the S3 bucket:
Encrypting and Storing Files
To encrypt and upload the exported file from /products/exports to the S3 bucket:
Login to the Appliance CLI manager.
To encrypt and upload files, navigate to Administration > OS Console.
Enter the root credentials.
Change the directory to /products/exports using the following command.
Encrypt the required file using the aws-encryption-cli command.
aws-encryption-cli --encrypt --input <file_to_encrypt> --master-keys key=<Key_ID> region=<region-name> --output <encrypted_output_filename> --metadata-output <metadata_filename> --encryption-context purpose=<purpose_for_performing encryption>
| Parameter | Description |
|---|
| file_to_encrypt | The backed up file that needs to be encrypted before uploading to the S3 bucket. |
| Key_ID | The key ID of the KMS key that needs to be used for encrypting the file. |
| region-name | The region where the KMS key is stored. |
| encrypted_output_filename | The name of the file after encryption. |
| metadata_filename | The name of the file where the metadata needs to be stored. |
| purpose_for_performing encryption | The purpose of encrypting the file. |
For more information about encrypting data using the KMS, refer to the following link.
https://docs.aws.amazon.com/cli/latest/reference/kms/encrypt.html
The file is encrypted.
Upload the encrypted file to the S3 bucket using the following command.
aws s3 cp <encrypted_output_filename> <s3Uri>
The file is uploaded in the S3 bucket.
For example, if you have an encrypted file test.enc and you want to upload it to your personal bucket, mybucket, in s3 bucket, then use the following command:
aws s3 cp test.enc s3://mybucket/test.enc
For more information about the S3 bucket, refer to the following link:
https://docs.aws.amazon.com/cli/latest/reference/s3/
Decrypting and Importing Files
To decrypt and import the files from the S3 bucket:
Login to the Appliance CLI manager.
To decrypt and import the file, navigate to Administration > OS Console.
Enter the root credentials.
Change the directory to /products/exports using the following command:
Download the encrypted file using the following command:
aws s3 cp <s3Uri> <local_file_name(path)>
For example, if you want to download the file test.txt to your local machine as test2.txt, then use the following command:
aws s3 cp s3://mybucket/test.txt test2.txt
Decrypt the downloaded file using the following command:
aws-encryption-cli --decrypt --input <file_to_decrypt> --output <decrypted_file_name>
 --metadata-output <metadata_filename>
| Parameter | Description |
|---|
| file_to_decrypt | The backed up file that needs to be decrypted after downloading from the S3 bucket. |
| decrypted_output_filename | The name with which the file is saved after decryption. |
| metadata_filename | The name of the file where the metadata needs to be stored. |
Ensure that the metadata_filename must be the same filename which is used during encryption of the file.
The file is decrypted.
For more information about decrypting the downloaded file, refer to the following link.
https://aws.amazon.com/blogs/security/how-to-encrypt-and-decrypt-your-data-with-the-aws-encryption-cli/
Import the decrypted file to the local machine.
For more information about importing the decrypted file, refer to Import Data/Configurations from a File.
8.3.2 - Set Metrics Based Alarms Using the AWS Management Console
If you want to set alarms and alerts for your machine, using Protegrity appliances, you can send logs and metrics to the AWS Console. The AWS Management Console enables you to set alerts and configure SNS events as per your requirements.
You can create alerts based on the following metrics:
- Memory Use Percent
- Disk I/O
- Network
- Disk Used Percent
- CPU Idle
- Swap Memory Use Percent
Prerequisite
Ensure that the CloudWatch integration is enabled.
For more information about enabling the CloudWatch integration, refer to Enabling AWS CloudWatch Integration.
Creating an SNS Event
The following steps explain how to create an SNS event for an email-based notification.
To create an SNS event:
Login to the Amazon Management Console.
To create an SNS event, navigate to Services > Application Integration > Simple Notification Services > Topics.
Select Create topic.
The following screen appears.
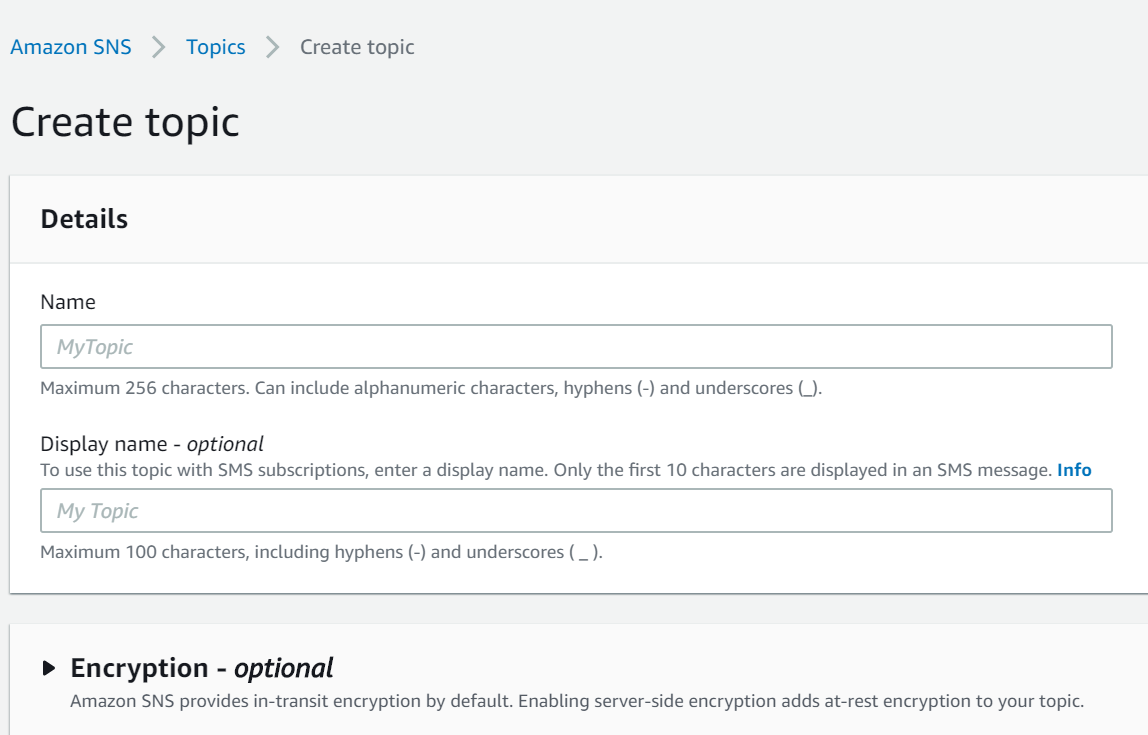
Enter the required Details.
Click Create topic.
The following screen appears.
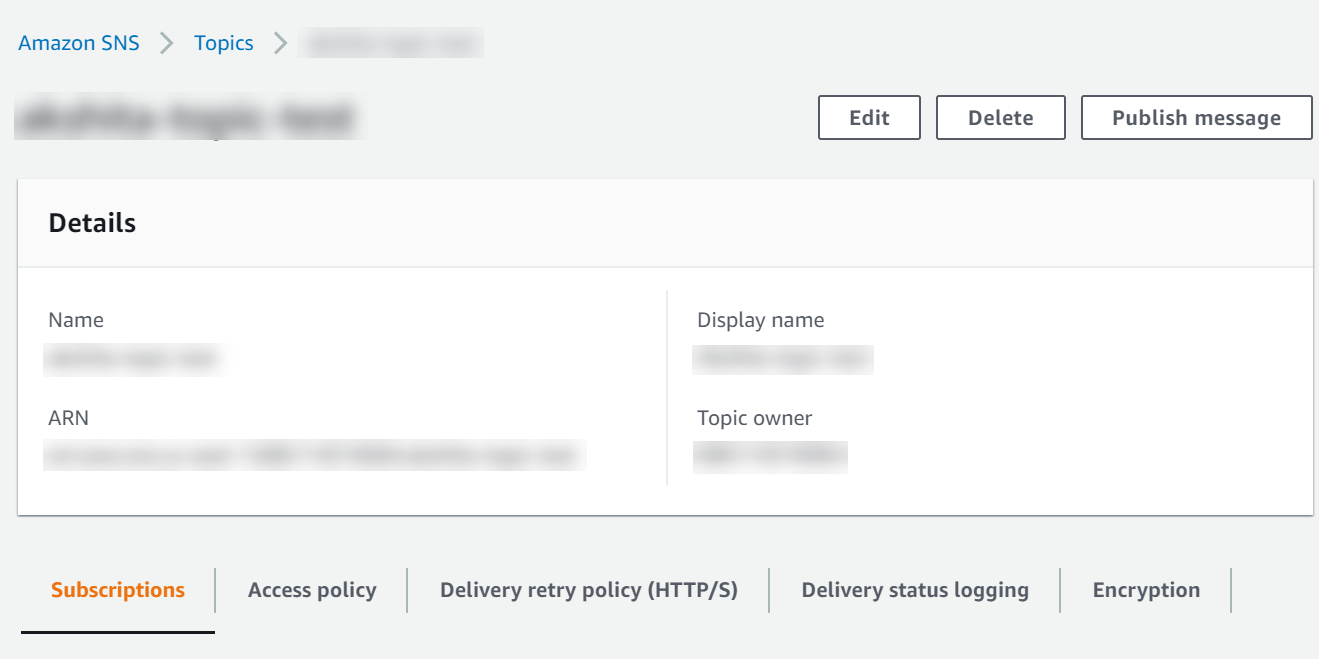
Ensure that you remember the Amazon Resource Name (ARN) associated to your topic.
For more information about the ARN, refer to the following link.
https://docs.aws.amazon.com/general/latest/gr/aws-arns-and-namespaces.html
The topic is created.
From the left pane, click Subscriptions.
Click Create subscription.
Enter the Topic ARN of the topic created in the above step.
From the Protocol field, select Email.
In the Endpoint, enter the required email address where you want to receive the alerts.
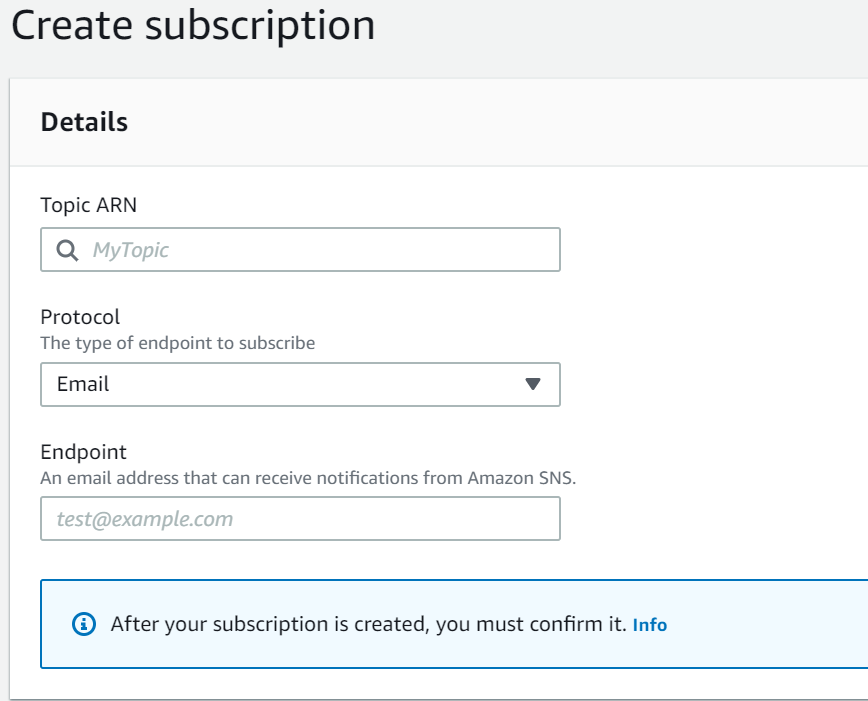
Enter the optional details.
Click Create subscription.
An SNS event is created and a confirmation email is sent to the subscribed email address.
To confirm the email subscription, click the Confirm Subscription link from the email received on the registered email address.
Creating Alarms
The following steps explain the procedure to set an alarm for CPU usage.
To create an alarm:
Login to the Amazon Management Console.
To create an alarm, navigate to Services > Management & Governance > CloudWatch.
From the left pane, select Alarms > In alarm.
Select Create alarm.
Click Select metric.
The Select metric window appears.
From the Custom Namespaces, select CWAgent.
Select cpu, host.
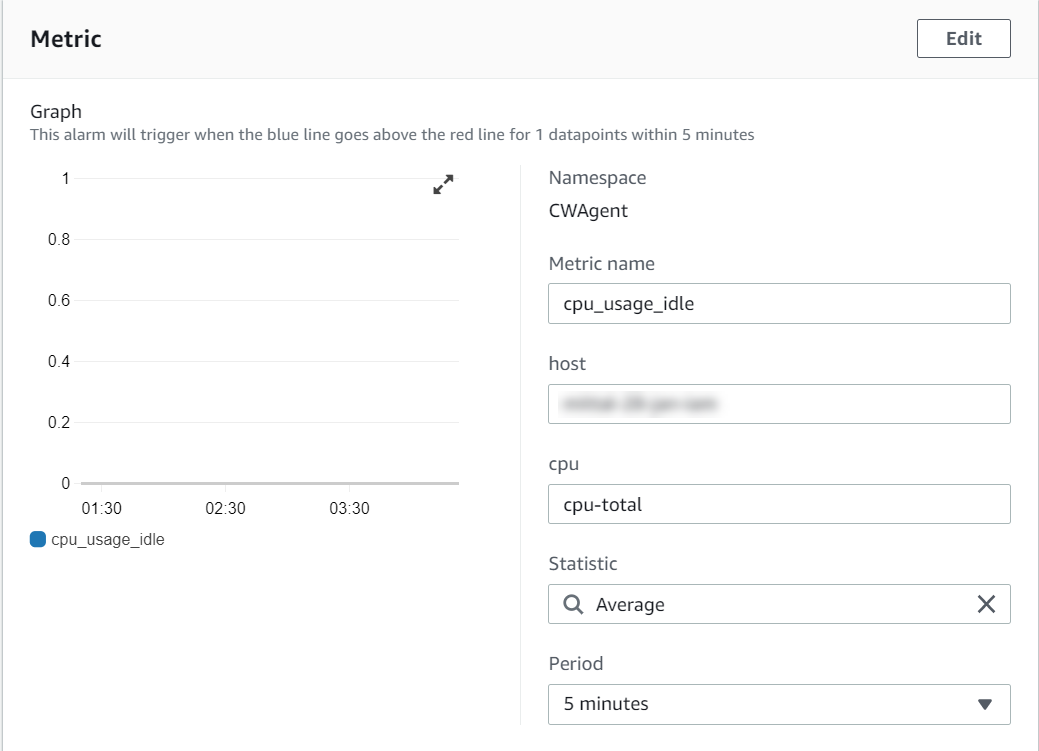
Select the required metric and click Select metric.
Configure the required metrics.
Configure the required conditions.
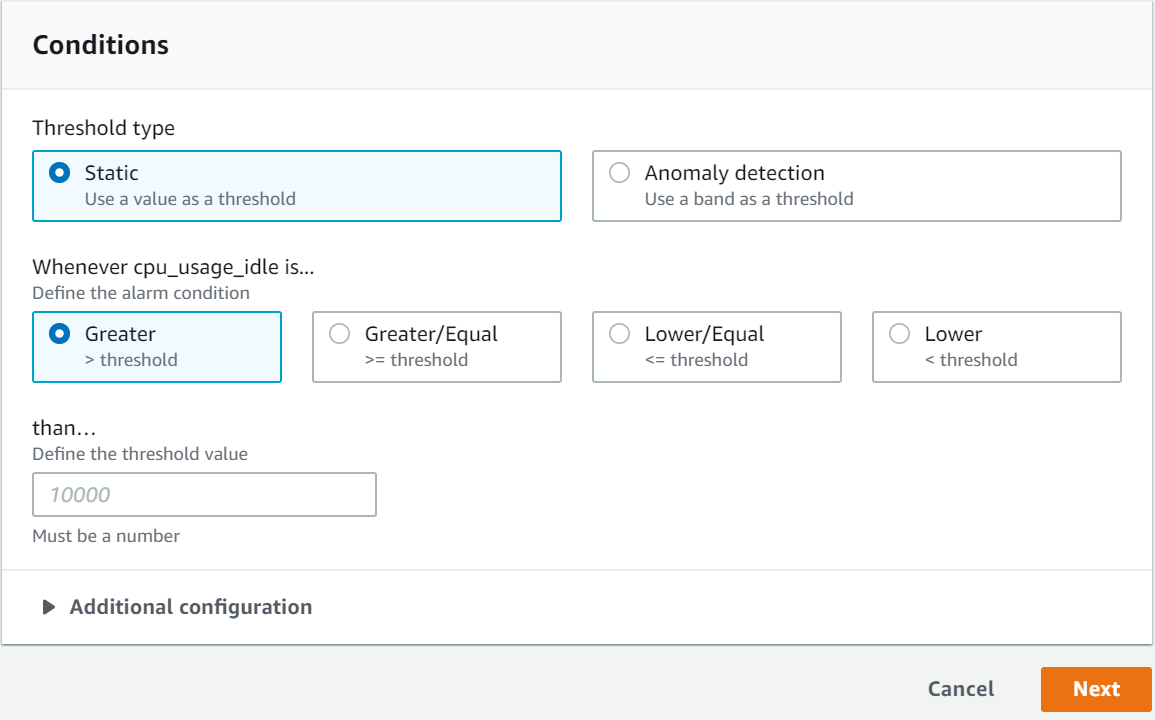
Click Next.
The Notification screen appears.
Select the alarm state.
From Select SNS topic, choose Select an existing SNS topic.
Enter the required email type in Send a notification to… dialog box.
Select Next.
Enter the Name and Description.
Select Next.
Preview the configuration details and click Create alarm.
An alarm is created.
8.4 - FAQs for AWS Cloud Utility
This section lists the FAQs for the AWS Cloud Utility.
Where can I install the AWS Cloud/CloudWatch/Cloud Utilities?
AWS Cloud Utility can be installed on any appliance-based product. It is compatible with the ESA and the DSG that are installed on-premise or on cloud platforms, such as, AWS, Azure, or GCP.
If an instance is created on the AWS using the cloud image, then Cloud Utility AWS is preinstalled on this instance.
Which version of AWS CLI is supported by the AWS Cloud Utility product v2.3.0?
AWS CLI 2.15.41 is supported by the Cloud Utility AWS product v2.3.0.
What is the Default Region Name while configuring AWS services?
The Default Region Name on whose servers you want to send the default service requests.
For more information about Default Region Name, refer to the following link:
https://docs.aws.amazon.com/cli/latest/userguide/cli-chap-configure.html
No, you cannot configure multiple accounts for AWS on a single appliance.
How to determine the Log group name?
The Log group name is same as the hostname of the appliance.
Can I change the Log group name?
No, you cannot change the Log group name.
Can I change the appliance hostname after enabling CloudWatch integration?
If you change the appliance hostname after enabling CloudWatch integration, then:
- A new Log Group is created with the updated hostname.
- Only the new logs will be present in the updated Log Group.
- The new Log Group consists of only the updated logs files.
- It is recommended to manually delete the previous Log Group from the AWS CloudWatch Console.
Are there any configuration files for AWS CloudWatch?
Yes, there are configuration files for CloudWatch. The configuration files are present in /opt/aws/pty/cloudwatch/config.d/ directory.
The config.json file for cloud watch is present in /opt/aws/pty/cloudwatch/config.json file.
It is recommended not to edit the default configuration files.
What happens if I enable CloudWatch integration with a corrupt file?
The invalid configuration file is listed in a dialog box.
The logs corresponding to all other valid configurations will be sent to the AWS CloudWatch Console.
What happens if I edit the only default configuration files, such as, /opt/aws/pty/cloudwatch/config.d/, with invalid data for CloudWatch integration?
In this case, only metrics will be sent to the AWS CloudWatch Console.
How can I export or import the CloudWatch configuration files?
You can export or import the CloudWatch configuration files either through the CLI Manager or through the Web UI.
For more information about exporting or importing the configuration files through the CLI manager, refer to Exporting Data Configuration to Local File.
For more information about exporting or importing the configuration files through the Web UI, refer to Backing Up Data.
The following Default Output Formats are compatible:
The Default Output Format is json.
If I disable the CloudWatch integration, why do I need to delete Log Groups and Log Streams manually?
You should delete Log Groups and Log Streams manually because this relates to the billing cost.
Protegrity will only disable sending logs and metrics to the CloudWatch Console.
How can I check the status of the CloudWatch agent service?
You can view the status of the of the CloudWatch service using one of the following.
On the Web UI, navigate to System > Services.
On the CLI Manager, navigate to Administration > Services.
On the CLI Manager, navigate to Administration > OS Console and run the following command:
/etc/init.d/cloudwatch_service status
Can I customize the metrics that i want to send to the CloudWatch console?
No, you cannot customize the metrics to send to the CloudWatch console. If you want to customize the metrics, then contact Protegrity Support.
How often are the metrics collected from the appliances?
The metrics are collected at 60 seconds intervals from the appliance.
How much does Amazon CloudWatch cost?
For information about the billing and pricing details, refer to https://aws.amazon.com/cloudwatch/pricing/.|
Can I provide the file path as <foldername/>* to send logs to the folder?
No, you can not provide the file path as <foldername/>*.
Regex is not allowed in the CloudWatch configuration file. You must specify the absolute file path.
No, you can not. If you configure AWS from the OS Console it will change the expected behaviour of the AWS Cloud Utility.
What happens to the custom configurations if I uninstall or remove the AWS Cloud Utility product?
The custom configurations are retained.
What happens to CloudWatch if I delete AWS credentials from ESA after enabling CloudWatch integration?
You can not change the status of the CloudWatch service. You must reconfigure the ESA with valid AWS credentials to perform the CloudWatch-related operations.
Why some of the log files are world readable?
The files with the .log extension present in the /opt/aws/pty/cloudwatch/logs/state folder are not log files. These files are used by the CloudWatch utility to monitor the logs.
Why is the CloudWatch service stopped when the patch is installed? How do I restart the service?
As the CloudWatch service is stopped when the patch is installed, it remains in the stopped state after the Cloud Utility Patch (CUP) installation. So, we must restart the CloudWatch service manually.To restart the CloudWatch service manually, perform the following steps.
- Login to the OS Console.
- Restart the CloudWatch service using the following command.
/etc/init.d/cloudwatch_service restart
8.5 - Working with AWS Systems Manager
The AWS Systems Manager allows you to manage and operate the infrastructure on AWS. Using the Systems Manager console, you can view operational data from multiple AWS services and automate operational tasks across the AWS services.
For more information about AWS Systems Manager, refer to the following link:
https://docs.aws.amazon.com/systems-manager/latest/userguide/what-is-systems-manager.html
Prerequisites
Before using the AWS Systems Manager, ensure that the IAM role or IAM user to integrate with the appliance has a policy assigned to it. You can attach one or more IAM policies that define the required permissions for a particular IAM role.
For more information about the IAM role, refer to section Configuring Access for AWS Instances.
For more information about creating an IAM instance profile for Systems Manager, refer to the following link:
https://docs.aws.amazon.com/systems-manager/latest/userguide/setup-instance-profile.html
8.5.1 - Setting up AWS Systems Manager
You must set up AWS Systems Manager to use the Systems Manager Agent (SSM Agent).
You can set up Systems Manager for:
- An AWS instance
- A non-AWS instance or an on-premise platform
After the SSM Agent is installed in an instance, ensure that the auto-update option is disabled, as we do not support auto-update. If the SSM Agent gets auto updated, the service will get corrupted.
For more information about automatic updates for SSM Agent, refer to the following link:
SSM Agent Automatic Updates
Setting up Systems Manager for AWS Instance
To set up Systems Manager for an AWS instance:
Assign the IAM Role created in the section Prerequisites.
For more information about attaching an IAM role to an instance, refer to the following link:
https://docs.aws.amazon.com/AWSEC2/latest/UserGuide/iam-roles-for-amazon-ec2.html#attach-iam-role
Start the Amazon SSM-Agent from the Services menu or run the following command to start the SSM-Agent.
/etc/init.d/amazon-ssm-agent start
Setting up Systems Manager for non-AWS Instance
To set up Systems Manager for non-AWS instance:
Create a hybrid activation for the Linux instances.
For more information about creating a managed instance activation for a hybrid environment, refer to the following link:
https://docs.aws.amazon.com/systems-manager/latest/userguide/sysman-managed-instance-activation.html
Important: After you successfully complete the activation, an Activation Code and Activation ID appears. Copy this information and save it. If you lose this information, then you must create a new activation.
Login to the CLI as an admin user and open the OS Console.
Using the Activation Code and Activation ID obtained in Step 1, run the following command to activate and register the SSM-Agent.
amazon-ssm-agent -register -code <activation-code> -id <activation-id> -region <region>
Here <region> is the identifier of the instance region.
Note the instance-id. This will be used to perform operations from SSM-Agent.
For more information on how to register a managed instance, refer to the following link:
https://docs.aws.amazon.com/systems-manager/latest/userguide/sysman-install-managed-linux.html#systems-manager-install-managed-linux-deregister-reregister
Start the Amazon SSM-Agent from the Services menu or run the following command to start the SSM-Agent.
/etc/init.d/amazon-ssm-agent start
8.5.2 - FAQs on AWS Systems Manager
This section lists the FAQs on AWS Systems Manager.
What can I do when there is a problem with starting the service or the service is automatically updated?
Uninstall and reinstall the Cloud Utility AWS product.
For more information on installing and uninstalling the services, refer Add/Remove Services.
What is the name of the service?
The service name is Amazon SSM-Agent.
What can I do if the AWS Systems Manager shows a permission denied message after attaching the correct IAM Role?
Restart the service after attaching the IAM role for new permissions to take effect.
Is the Amazon SSM-Agent service available in the Services menu in the Web UI and the CLI?
Yes.
Yes, you can start or stop and restart the Amazon SSM Agent service from the Menu option in the Web UI.
8.6 - Troubleshooting for the AWS Cloud Utility
This section lists the troubleshooting for the AWS Cloud Utility.
While using AWS services the following error appears: UnknownRegionError("No default region found...”)
Issue: The service is unable to retrieve the AWS Region from the system.
Workaround: The service is region specific.
Include the region name in the command.
The CloudWatch service was running and the service has stopped after restarting the system.
Issue: The CloudWatch Service Mode is set to Manual
Workaround: You should restart the service manually.
If the CloudWatch Service Mode is set to Automatic, then wait until all the services start.
The CloudWatch integration is enabled, but the log group/log stream is not created or logs are not being updated.
Issue: This issue occurs because the associated IAM Role or IAM User does not have required permissions to perform CloudWatchrelated operations.
To verify the error, check the log file by using a text editor.
/var/log/amazon/amazoncloudwatch-agent/amazoncloudwatch-agent.log
You can see one of the following errors:
E! WriteToCloudWatch failure, err: AccessDenied: User: arn:aws:sts:**** is not authorized to perform: cloudwatch:PutMetricDataE! cloudwatchlogs: code: AccessDeniedException, message: User: arn:aws:sts:**** is not authorized to perform: logs:PutLogEventsE! CreateLogStream / CreateLogGroup AccessDeniedException: User: arn:aws:sts:**** is not authorized to perform: logs:CreateLogStream
Workaround: Assign CloudWatchAgentServerPolicy permissions to the associated IAM Role or IAM User and restart the service.
I can see the error message: Unable to locate valid credentials for CloudWatch
Issue: The error message can be because of one of the following reasons:
- If you are using an AWS instance, then the IAM Role is not configured for the AWS instance.
- If you are using a non-AWS instance, then the IAM User is configured with invalid AWS
Workaround: On AWS instance, navigate to the AWS console and attach the IAM role to the instance.
For more information about attaching the IAM role, refer https://aws.amazon.com/blogs/security/easily-replace-or-attach-an-iam-role-to-an-existing-ec2-instance-by-using-the-ec2-console/.
On non-AWS instance, to configure the IAM user with valid credentials, navigate to Tools > CloudWatch Utility AWS Tools > AWS Configure.
Issue: The AWS Admin role is not assigned to the instance.
Workaround: For more information about the AWS Admin role, refer Managing Roles.
I can see one of the following error messages: CloudWatch Service started failed or CloudWatch Service stopped failed
Issue: The ESA is configured with invalid AWS credentials.
Workaround: You must reconfigure the ESA with valid AWS credentials.