NIC Bonding
The Network Interface Card (NIC) is a device through which appliances, such as ESA or DSG, on a network connect to each other. If the NIC stops functioning or is under maintenance, the connection is interrupted, and the appliance is unreachable. To mitigate the issues caused by the failure of a single network card, Protegrity leverages the NIC bonding feature for network redundancy and fault tolerance. In NIC bonding, multiple NICs are configured on a single appliance. You then bind the NICs to increase network redundancy. NIC bonding ensures that if one NIC fails, the requests are routed to the other bonded NICs. Thus, failure of a NIC does not affect the operation of the appliance. You can bond the configured NICs using different bonding modes.
Bonding Modes
The bonding modes determine how traffic is routed across the NICs. The MII monitoring (MIIMON) is a link monitoring feature that is used for inspecting the failure of NICs added to the appliance. The frequency of monitoring is 100 milliseconds. The following modes are available to bind NICs together:
- Mode 0/Balance Round Robin
- Mode 1/Active-backup
- Mode 2/Exclusive OR
- Mode 3/Broadcast
- Mode 4/Dynamic Link Aggregation
- Mode 5/Adaptive Transmit Load Balancing
- Mode 6/Adaptive Load Balancing
The following two bonding modes are supported for appliances:
- Mode 1/Active-backup policy: In this mode, multiple NICs, which are slaves, are configured on an appliance. However, only one slave is active at a time. The slave that accepts the requests is active and the other slaves are set as standby. When the active NIC stops functioning, the next available slave is set as active.
- Mode 6/Adaptive load balancing: In this mode, multiple NICs are configured on an appliance. All the NICs are active simultaneously. The traffic is distributed sequentially across all the NICs in a round-robin method. If a NIC is added or removed from the appliance, the traffic is redistributed accordingly among the available NICs. The incoming and outgoing traffic is load balanced and the MAC address of the actual NIC receives the request. The throughput achieved in this mode is high as compared to Mode 1/Active-backup policy.
Prerequisites
Ensure that you complete the following pre-requisites when binding interfaces:
- The IP address is assigned only to the NIC on which the bond is initiated. You must not assign an IP address to the other NICs.
- The NIC is not configured on an HA setup.
- The NICs are on the same network.
Creating a Bond
The following procedure describes the steps to create a bond between NICs. For more information about the bonding nodes, refer here.
Ensure that the IP address of the slave nodes are static.
Perform the following steps to create a bond.
On the Web UI, navigate to Settings > Network > Network Settings.The Network Settings screen appears.
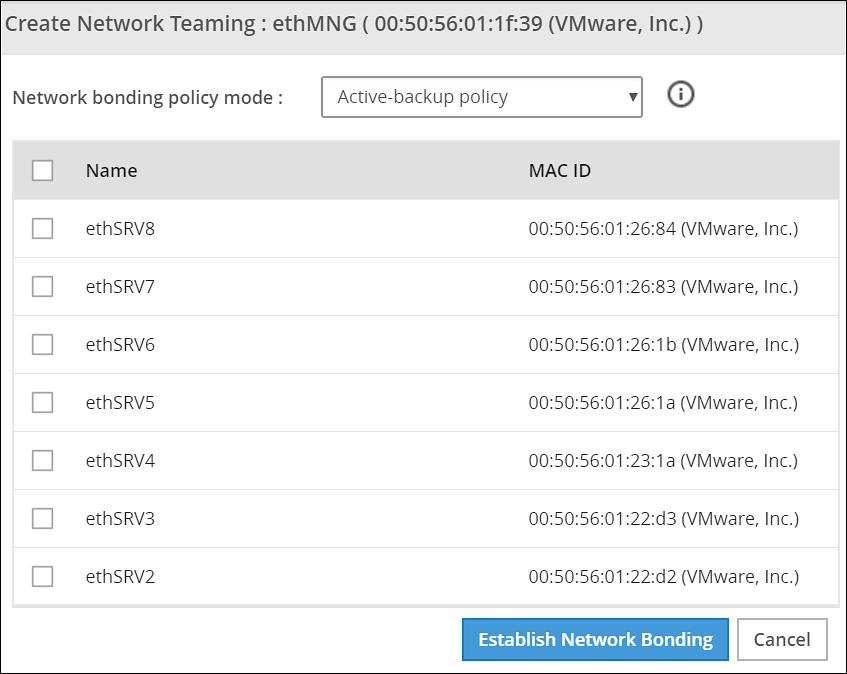
Under the Network Interfaces area, click Create Bond corresponding to the interface on which you want to initiate the bond.The following screen appears.
Ensure that the IP address is assigned to the interface on which you want to initiate the bond.
Select the following modes from the drop-down list:
- Active-backup policy
- Adaptive Load Balancing
Select the interfaces with which you want to create a bond.
Select Establish Network Bonding.A confirmation message appears.
Click OK.The bond is created, and the list appears on the Web UI.
Removing a Bond
Perform the following steps to remove a bond:
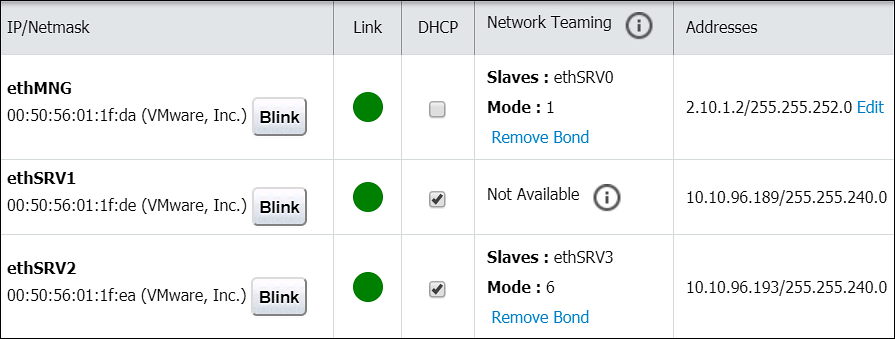
- On the Web UI, navigate to Settings > Network > Network Settings.The Network Settings screen appears with all the created bonds as shown in the following figure.

Under the Network Interfaces area, click Remove Bond corresponding to the interface on which the bonding is created.A confirmation screen appears.
Select OK.The bond is removed and the interfaces are visible on the IP/Network list.
Viewing a Bond
Using the DSG CLI Manager, you can view the bonds that are created between all the interfaces.
Perform the following steps to view a bond:
On the DSG CLI Manager, navigate to Networking > Network Settings.The Network Configuration Information Settings screen appears.
Navigate to Interface Bonding and select Edit.The Network Teaming screen displaying all the bonded interfaces appears as shown in the following figure.
Resetting the Bond
You can reset all the bonds that are created for an appliance. When you reset the bonds, all the bonds created are disabled. The slave NICs are reset to their initial state, where you can configure the network settings for them separately.
Perform the following steps to reset all the bonds:
On the DSG CLI Manager, navigate to Networking > Network Settings.The Network Configuration Information Settings screen appears.
Navigate to Interface Bonding and select Edit.The Network Teaming screen displaying all the bonded interfaces appears.
Select Reset.The following screen appears.
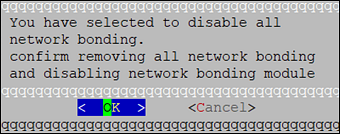
- Select OK.The bonding for all the interfaces is removed.
Feedback
Was this page helpful?