Backing up the data
Using the Export tab, you can create backups of the product configurations and/or appliance OS core configuration.
Before you begin
Starting from the Big Data Protector 7.2.0 release, the HDFS File Protector (HDFSFP) is deprecated. The HDFSFP-related sections are retained to ensure coverage for using an older version of Big Data Protector with the ESA 7.2.0.
If you plan to use ESAs in a Trusted Appliances Cluster, and you are using HDFSFP with the DFSFP patch installed on the ESA, then ensure that you clear the DFSFP_Export check box when exporting the configurations from the ESA, which will be designated as the Master ESA.
In addition, for the Slave ESAs, ensure that the HDFSFP datastore is not defined and the HDFSFP service is not added.
The HDFSFP data from the Master ESA should be backed up to a file and moved to a backup repository outside the ESA. This will help in retaining the data related to HDFSFP, in cases of any failures.
Backing up configuration to local file
Perform the following steps to backup the configuration to local file.
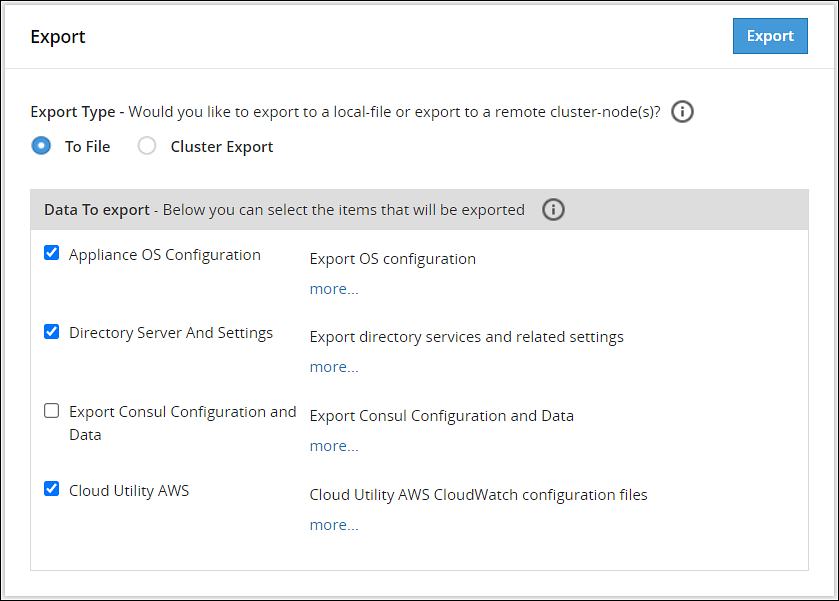
- Navigate to System > Backup & Restore > Export.
- In the Export Type area, select To File radio button.
- In the Data To export area, select the items to be exported.Click more.. for the description of every item.
- Click Export.The Output File screen appears.
- Enter information in the following fields:
- Output File: Name of the file.
If you want to replace an existing file on the system with this file, click the Overwrite existing file check box. - Password: Password for the file.
- Export Description: Information about the file.
- Output File: Name of the file.
- Click Confirm.A message
Export operation has been completed successfullyappears. The created configuration is saved to your system.
Exporting Configuration to Cluster
You can export your appliance configuration to the trusted appliances cluster, which your appliance belongs to. The procedure of creating the backup is almost the same as exporting to a file.
You need to define what configurations to export, and which nodes in the cluster receive the configuration. You do not need to import the files as is required when backing up the selected configuration. The configuration will be automatically replicated on the selected nodes when you export the configuration to the cluster.
When you are exporting data from one ESA to other, ensure that you run separate tasks to export the LDAP settings first and then the OS settings.
When exporting configurations to cluster nodes (from primary ESA to secondary ESAs), ensure to not select the following options in the Data To Export section:
- SSH Settings
- Certificates
- Management and WebService Certificates
- Import All Policy-Management Configs, Keys, Certs, Data but without Key Store files for Trusted Appliance Cluster
Important: Scheduled tasks are not replicated as part of cluster export.
For information about copying Insight certificates across systems, refer to Rotating Insight certificates.
Perform the following steps to export a configuration to a trusted appliances cluster.
Log in to the primary ESA using the admin credentials.
Navigate to System > Backup & Restore > Export.
In the Export Type area, select the To Cluster radio button.
In the Data to Export, select the items that you want to export from your machine and import to the cluster nodes.
Click Next.
In the Source Cluster Nodes, select the nodes that will run this task.
Specify the nodes by label or select individual nodes.
Click Next.
In the Target Cluster Nodes, select the nodes where the configuration needs to be exported. Specify them by label or select individual nodes. Select to show command line, if necessary.
Click Review.
The New Task screen appears.
Enter the required information in the following sections.
- Basic Properties
- Frequencies
- Restriction
- Logging
Click Save.
A dialog box to enter the root password appears.
Enter the root password and click OK.
The scheduled task is created.
Navigate to System > Task Scheduler.
Select the created task and click Run Now! to run the scheduled task immediately.
A confirmation dialog box appears. Click Ok.
The configurations are exported to the selected cluster nodes.
Feedback
Was this page helpful?