Manage a Tunnel
From the Tunnels tab, a tunnel can be created, edited, or deleted.
Create a tunnel
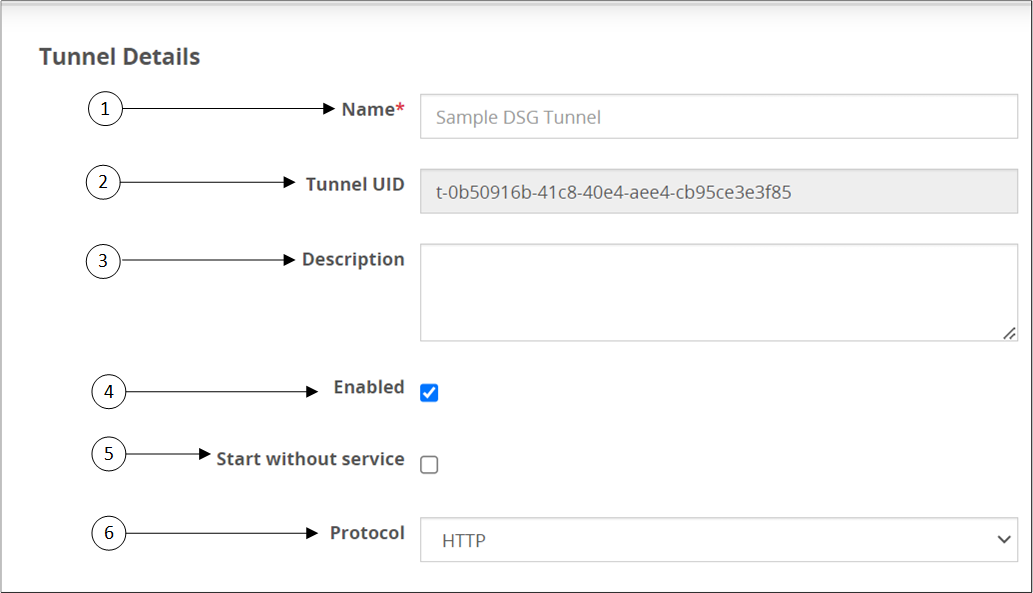
You can create tunnels for custom ports that are not predefined in the DSG using the Create Tunnel option in the Tunnels tab. The Create Tunnel screen is as seen in the following figure.

The following table provides the description for each option available on the UI.
| Callout | Column/Textbox | Description |
|---|---|---|
| 1 | Name | Name of the tunnel. |
| 2 | Tunnel ID | Unique ID of the tunnel. |
| 3 | Description | Unique description that describes port supported by the tunnel. |
| 4 | Enabled | Select to enable the tunnel. The check box is selected as a default. Uncheck the check box to disable the tunnel. |
| 5 | Start without service | Select to start the tunnel if no service is configured or if no services are enabled. |
| 6 | Protocol | Protocol type supported by the tunnel. |
The following types of tunnels can be created.
- HTTP
- SFTP
- SMTP
- Amazon S3
- CIFS/NFS
Edit a tunnel
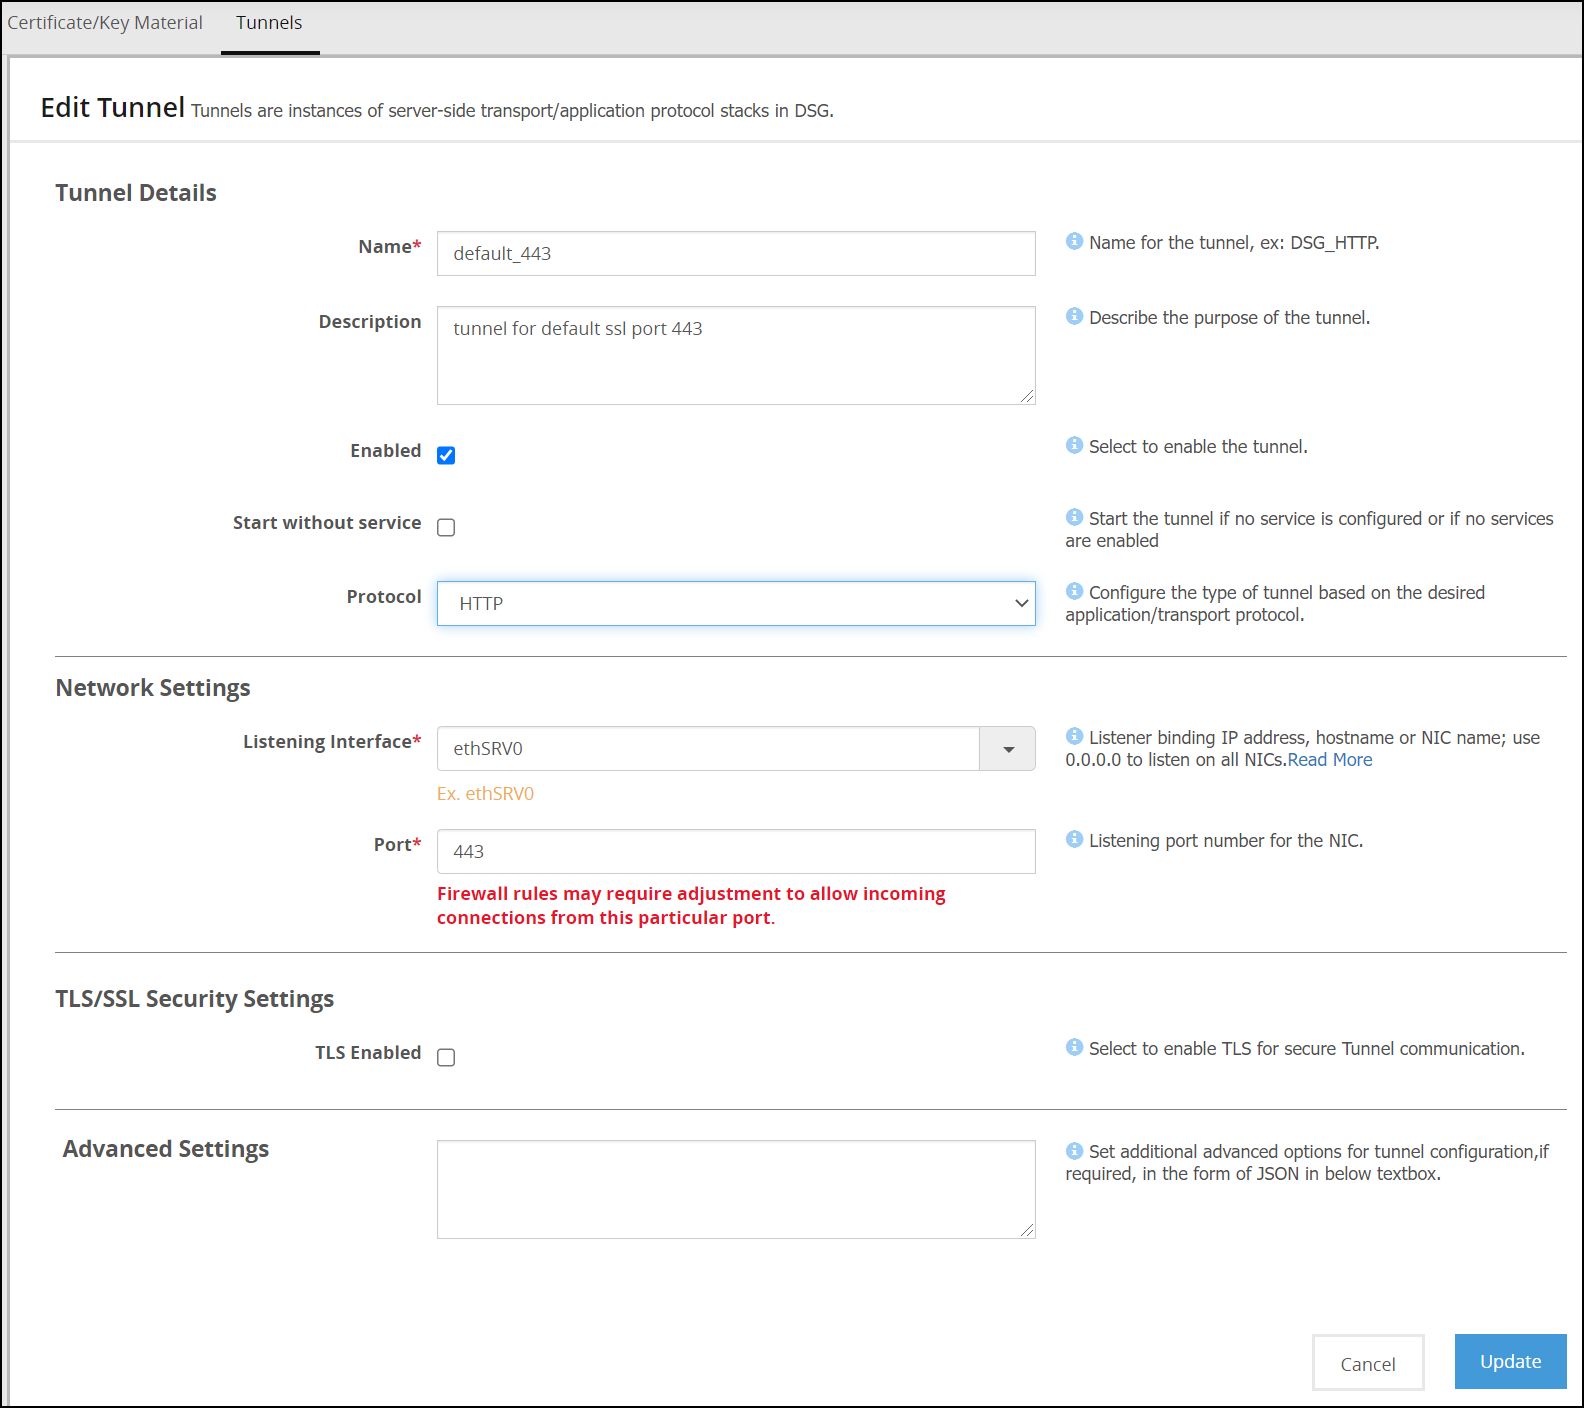
Edit an existing tunnel configuration using the Edit option in the Tunnels tab. The Edit Tunnel screen is as seen in the following figure.

After editing the required field, click Update to save your changes.
Delete a tunnel
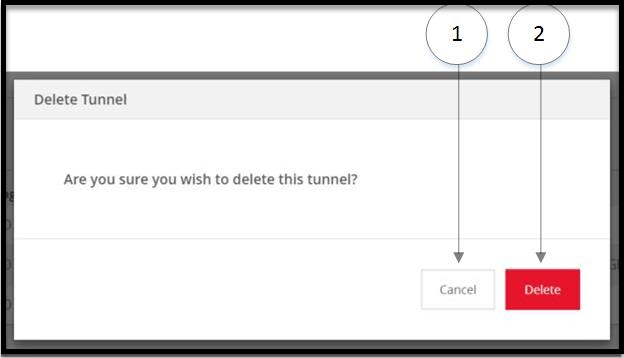
Delete an existing tunnel using the Delete option in the Tunnels tab. The Delete Tunnel screen is shown in the following figure.

The following table provides the description for each option available on the UI.
| Callout | Column/Textbox/Button | Description |
|---|---|---|
| 1 | Cancel | Cancel the process of deleting a tunnel. |
| 2 | Delete | Delete the existing tunnel from the Tunnels tab. |