Working with Azure AD
Azure Active Directory (Azure AD) is a cloud-based identity and access management service. It allows access to external (Azure portal) and internal resources (corporate appliances). Azure AD manages your cloud and on-premise applications and protects user identities and credentials.
When you subscribe to Azure AD, it automatically creates an Azure AD tenant. After the Azure AD tenant is created, register your application in the App Registrations module. This acts like an end-point for the appliance to connect to the tenant.
Using the Azure AD configuration tool, you can:
- Enable the Azure AD Authentication and manage user access to the ESA.
- Import the required users or groups to the ESA, and assign specific roles to them.
1 - Configuring Azure AD Settings
Before configuring Azure AD Settings on the ESA, you must have the following values that are required to connect the ESA with the Azure AD:
- Tenant ID
- Client ID
- Client Secret or Thumbprint
For more information about the Tenant ID, Client ID, Authentication Type, and Client Secret/Thumbprint, search for the text Register an app with Azure Active Directory on Microsoft’s Technical Documentation site at:
https://learn.microsoft.com/en-us/docs/
The following are the list of the API permissions that must be granted.
- Group.Read.All
- GroupMember.Read.All
- User.Read
- User.Read.All
To assign API permissions in Microsoft Azure, contact your Microsoft Azure administrator.
For more information about configuring the application permissions in the Azure AD, please refer https://learn.microsoft.com/en-us/graph/auth-v2-service?tabs=http.
Ensure that the Allow public client flows setting is Enabled. To enable the Allow public client flows setting, navigate to Authentication > Advanced settings, click the toggle button, and select Yes.
To configure Azure AD settings:
On the ESA CLI Manager, navigate to Administration > Azure AD Configuration.
Enter the root password.
The Azure AD Configuration dialog box appears.
Select Configure Azure AD Settings.
The Azure AD Configuration screen appears.

Enter the information for the following fields.
Table: Azure AD Settings
| Setting | Description |
| Set Tenant ID | Unique identifier of the Azure AD instance |
| Set Client ID | Unique identifier of an application created in Azure
AD |
| Set Auth Type | Select one of the Auth Type:SECRET indicates a
password-based authentication. In this authentication
type, the secrets are symmetric keys, which the client
and the server must know.CERT indicates a
certificate-based authentication. In this authentication
type, the certificates are the private keys, which the
client uses. The server validates this certificate using
the public key.
|
| Set Client Secret/Thumbprint | The client secret/thumbprint is the password of the
Azure AD application.- If the Auth Type selected is
SECRET, then enter
Client Secret.
- If the Auth type selected is
CERT, then enter Client
Thumbprint.
|
For more information about the Tenant ID, Client ID, Authentication Type, and Client Secret/Thumbprint, search for the text Register an app with Azure Active Directory on Microsoft’s Technical Documentation site at: https://learn.microsoft.com/en-us/docs/
Click Test to check the configuration/settings.
The message Successfully Done appears.
Click OK.
Click Apply to apply and save the changes.
The message Configuration saved successfully appears.
Click OK.
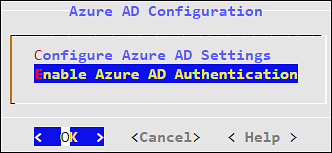
2 - Enabling/Disabling Azure AD
Using the Enable/Disable Azure AD option, you can enable or disable the Azure AD settings. You can import users or groups and assign roles when you enable the Azure AD settings.