Increasing the Appliance Disk Size
If you need to increase the total disk size of the Appliance, then you can add additional hard disks to the Appliance. The Appliance refers to the added hard disks as logical volumes, or partitions, which offer additional disk capacity.
As required, partitions can be added, removed, or moved from one hard disk to another. It is possible to create smaller partitions on a hard disk and combine multiple hard disks to form a single large partition.
Configuration of Appliance for Adding More Disks
Hard disks or volumes can be added to the appliance at two different times:
Add the hard disk during installation of the Appliance.
For more information about adding and configuring the hard disk, refer to the Protegrity Installation Guide.
Add the hard disks later when required.
Steps have been separately provided for a single hard disk installation and more than one hard disk installation later in this section.
Installation of Additional Hard Disks
Ensure that the Appliance is installed and working and the hard disks to be added are readily available.
To install one or more hard disks:
If the Appliance is working, then log out of the Appliance and turn it off.
Add the required hard disk.
Turn on the appliance.
Login to the CLI console with admin credentials.
Navigate to Tools > Disk Management.
Search for the new device name, for example, :/dev/sda, and note down the capacity and the partitions in the device.
Select Refresh.
The system recognizes any added hard disks.
Select Extend to add more hard disks to the existing disk size.
Select the newly added hard disk.
Click Extend again to confirm that the newly added hard disk has been added to the Appliance disk size.
A dialog appears asking for confirmation with the following message.
Warning! All data on the /dev/sda will be removed! Press YES to continue…
Select Continue.
The newly added hard disk is added to the existing disk size of the Appliance.
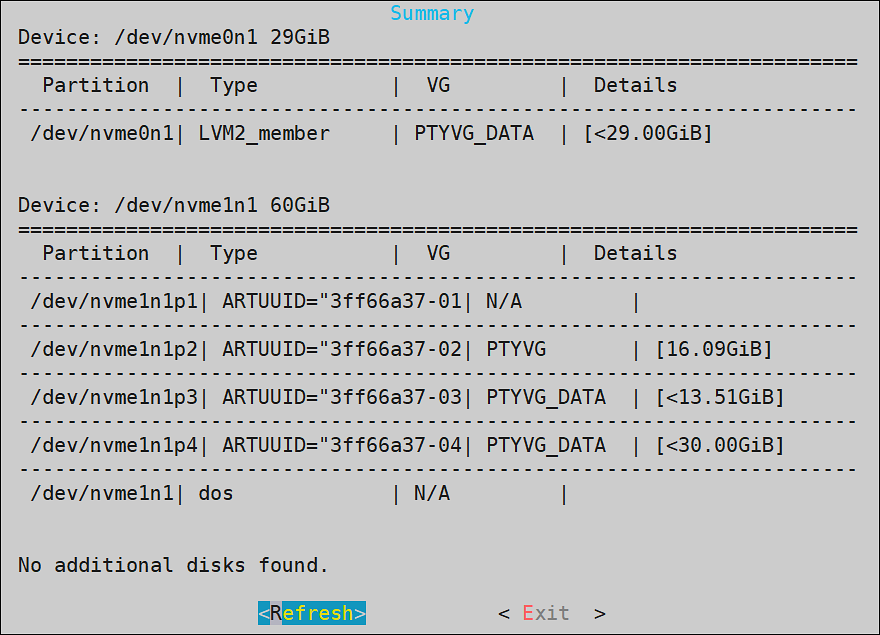
Navigate to Tools > Disk Management.
The following screen appears confirming addition of the hard disk to the Appliance disk size.

Rolling Back Addition of New Hard Disks
If the Appliance has been upgraded, then roll back to the setup of the previous version is possible. Roll back option is unavailable if you have upgraded your system to Appliance v8.0.0 and have not finalized the upgrade. When you finalize the upgrade, you confirm that the system is functional. Only then does the roll back feature become available.
For more information about upgrade, refer to the Protegrity Upgrade Guide.
Feedback
Was this page helpful?