This section describes the tasks that need to be performed for loading the ESA appliance from an AMI, which is provided by Protegrity.
This is the multi-page printable view of this section. Click here to print.
Loading the Protegrity Appliance from an Amazon Machine Image (AMI)
- 1: Creating an ESA Instance from the AMI
- 2: Configuring the Virtual Private Cloud (VPC)
- 3: Adding a Subnet to the Virtual Private Cloud (VPC)
- 4: Finalizing the Installation of Protegrity Appliance on the Instance
1 - Creating an ESA Instance from the AMI
Perform the following steps to create an ESA instance using an AMI.
Access AWS at the following URL:
The AWS home screen appears.
Click the Sign In to the Console button.
The AWS login screen appears.
On the AWS login screen, enter the following details:
- Account Number
- User Name
- Password
Click the Sign in button.
After successful authentication, the AWS Management Console screen appears.
Click Services.
Navigate to Compute > EC2
The EC2 Dashboard screen appears.
Contact Protegrity Support and provide your Amazon Account Number so that the required Protegrity AMIs can be made accessible to the account.
Click on AMIs under the Images section.
The AMIs that are accessible to the user account appear in the right pane.
Select the AMI of the required ESA in the right pane.
Click the Launch instance from AMI button to launch the selected ESA appliance.
The Launch an instance screen appears.
Depending on the performance requirements, choose the required instance type.
For the ESA appliance, an instance with 32 GB RAM is recommended.
If you need to configure the details of the instance, then click the Next: Configure Instance Details button.
The Configure Instance Details screen appears.
Specify the following parameters on the Configure Instance Details screen:
Number of Instances: The number of instances that you want to launch at a time.
Purchasing option: The option to request Spot instances, which are unused EC2 instances. If you select this option, then you need to specify the maximum price that you are willing to pay for each instance on an hourly basis.
Network: The VPC to launch the ESA in. If you need to create a VPC, then click the Create new VPC link. For more information about creating a VPC, refer to the section Configuring VPC.
Subnet: The Subnet to be used to launch the ESA. A subnet resides in one Availability zone.
If you need to create a Subnet, then click the Create new subnet link.
For more information about creating a subnet, refer to the section Adding a Subnet to the Virtual Private Cloud (VPC).
Auto-assign Public IP: The IP address from where your instance can be accessed over the Internet. You need to select Enable from the list.
Availability Zone: A location within a region that is designed to be isolated from failures in other Availability Zones.
IAM role: This option is disabled by default.
Shutdown behaviour: The behaviour of the ESA when an OS-level shut down command is initiated.
Enable Termination Protection: The option to prevent accidental termination of the ESA instance.
Monitoring: The option to monitor, collate, and analyze the metrics for the instance of your ESA.
If you need to add additional storage to the ESA instance, then click the Next: Add Storage button.
The Add Storage screen appears.
You can provision additional storage for the ESA by clicking the Add New Volume button. Root is the default volume for your instance.
Alternatively, you can provision additional storage for the ESA later too.
For more information on configuring the additional storage on the instance of the ESA, refer to the section Increasing Disk Space on the Appliance.
If you need to create a key-value pair, then click the Add additional tags button.
Enter the Key and Value information and select the Resource types from the drop-down.
Select the Existing Key Pair option and choose a key from the list of available key pairs.
- Alternatively, you can select the Create a new Key Pair, to create a new key pair.
- If you proceed without a key pair, then the system will not be accessible.
If you need to configure the Security Group, then click the Next: Configure Security Group button.
The Configure Security Group screen appears.
You can assign a security group from the available list.
Alternatively, you can create security group with rules for the required inbound and outbound ports.
The Summary section lists all the details related to the ESA instance. You can review the required sections before you launch your instance.
Click the Launch instance button.
The ESA instance is launched and the Launch Status screen appears.
Click the View Instances button.
The Instances screen appears listing the ESA instance.
If you need to use the instance, then access the ESA CLI Manager using the IP address of the ESA.
2 - Configuring the Virtual Private Cloud (VPC)
If you need to connect two Protegrity appliances, or to the Internet, or a corporate network using a Private IP address, then you might need to configure the VPC.
For more information about the various inbound and outbound ports to be configured in the VPC, refer to section Open Listening Ports.
Perform the following steps to configure the VPC for the instance.
Ensure that you are logged in to AWS and at the AWS Management Console screen.
On the AWS Management Console, click VPC under the Networking section.
The VPC Dashboard screen appears.
Click on Your VPCs under the Virtual Private Cloud section.
The Create VPC screen appears listing all available VPCs in the right pane.
Click the Create VPC button.
The Create VPC dialog box appears.
Specify the following parameters on the Create VPC dialog box:
- Name tag: The name of the VPC.
- CIDR block: The range of the IP addresses for the VPC in x.x.x.x/y form where x.x.x.x is the IP address and y is the /16 and /28 netmask.
- Tenancy: This parameter can be set to Default or Dedicated. If the value is set to Default, then it selects the tenancy attribute specified while launching the instance of the appliance for the VPC.
Click the Yes, Create button.
The VPC is created.
3 - Adding a Subnet to the Virtual Private Cloud (VPC)
You can add Subnets to your VPC. A subnet resides in an Availability zone. When you create a subnet, you can specify the CIDR block.
Perform the following steps to create the subnet for your VPC.
Ensure that you are logged in to AWS and at the AWS Management Console screen.
On the AWS Management Console, click VPC under the Networking section.
The VPC Dashboard screen appears.
Click Subnets under the Virtual Private Cloud section.
The create subnet screen appears listing all available subnets in the right pane.
Click the Create Subnet button.
The Create Subnet dialog box appears.
Specify the following parameters on the Create Subnet dialog box.
- Name tag: The name for the Subnet.
- VPC: The VPC for which you want to create a subnet.
- Availability Zone: The Availability zone where the subnet resides.
- CIDR block: The range of the IP addresses for the VPC in x.x.x.x/y form where x.x.x.x is the IP address and y is the /16 and /28 netmask.
Click the Yes, Create button.
The subnet is created.
4 - Finalizing the Installation of Protegrity Appliance on the Instance
When you install the ESA appliance, it generates multiple security identifiers such as, keys, certificates, secrets, passwords, and so on. These identifiers ensure that sensitive data is unique between two appliances in a network. When you receive a Protegrity appliance image, the identifiers are generated with certain values. If you use the security identifiers without changing their values, then security is compromised and the system might be vulnerable to attacks.
Rotating Appliance OS keys to finalize installation
Using the Rotate Appliance OS Keys tool, you can randomize the values of these security identifiers for an appliance. During the finalization process, you run the key rotation tool to secure your appliance.
If you do not complete the finalization process, then some features of the appliance may not be functional including the Web UI.
For example, if the OS keys are not rotated, then you might not be able to add appliances to a Trusted Appliances Cluster (TAC).
For information about the default passwords, refer to the section Launching the ESA instance on Amazon Web Services in the Release Notes 10.1.0 from the My.Protegrity.
4.1 - Logging to the AWS Instance using the SSH Client
After installing the ESA on AWS, you must log in to the AWS instance using the SSH Client.
To login to the AWS instance using the SSH Client:
Start the local SSH Client.
Perform the SSH operation on the AWS instance using the key pair utilizing the following command. Ensure that you use the local_admin user to perform the SSH operation.
ssh -i <path of the private key pair> local_admin@<IP address of the AWS instance>Press Enter.
4.2 - Finalizing an AWS Instance
You can finalize the installation of the ESA after signing in to the CLI Manager.
Before you begin
“Before finalizing the AWS instance, consider the following:
The SSH Authentication Type by default, is set to Public key. Ensure that you use the Public key for accessing the CLI. You can change the authentication type from the ESA Web UI, once the finalization is completed.
Ensure that the finalization process is initiated from a single session only. If you start finalization simultaneously from a different session, then the “Finalization is already in progress.” message appears. You must wait until the finalization of the ESA instance is successfully completed.
Ensure that the session is not interrupted. If the session is interrupted, then the ESA becomes unstable and the finalization process is not completed on that instance.
Finalizing the AWS instance
Perform the following steps to finalize the AWS instance:
Sign in to the ESA CLI Manager of the instance created using the default local admin credentials.
The following screen appears.

Select Yes to initiate the finalization process.
If you select No, then the finalization process is not initiated.
To manually initiate the finalization process, navigate to Tools > Finalize Installation and press ENTER.
A confirmation screen to rotate the appliance OS keys appears. Select OK to rotate the appliance OS keys.
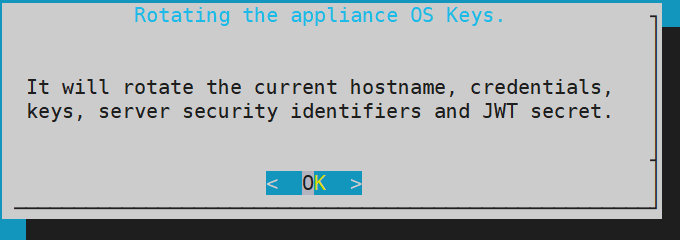
The following screen appears.
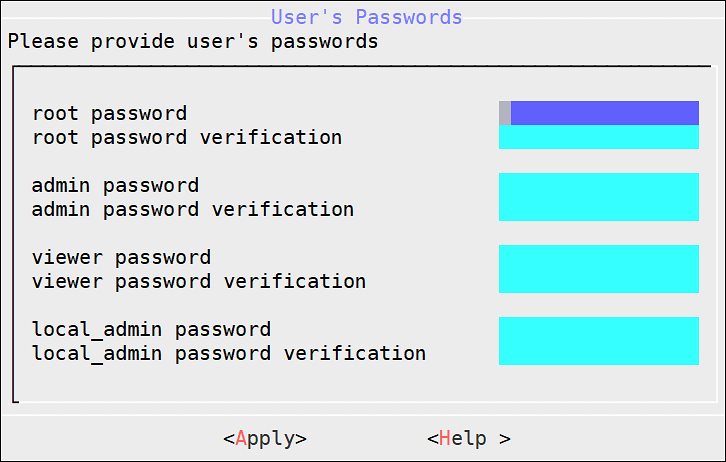
To update the user passwords, provide the credentials for the following users:
- root
- admin
- viewer
- local_admin
Select Apply.
The user passwords are updated and the appliance OS keys are rotated.
The finalization process is completed.