Importing the custom files
Describes the procedure to import the customer.custom file to a local file or to a cluster
Perform the following steps to import the customer.custom file to a local file.
Importing the customer.custom file to a local file
- On the Web UI, navigate to System > Backup & Restore > Import.
- From the dropdown menu, select the exported file.
- Click Import.
- On the following screen, select Custom Files and folders.
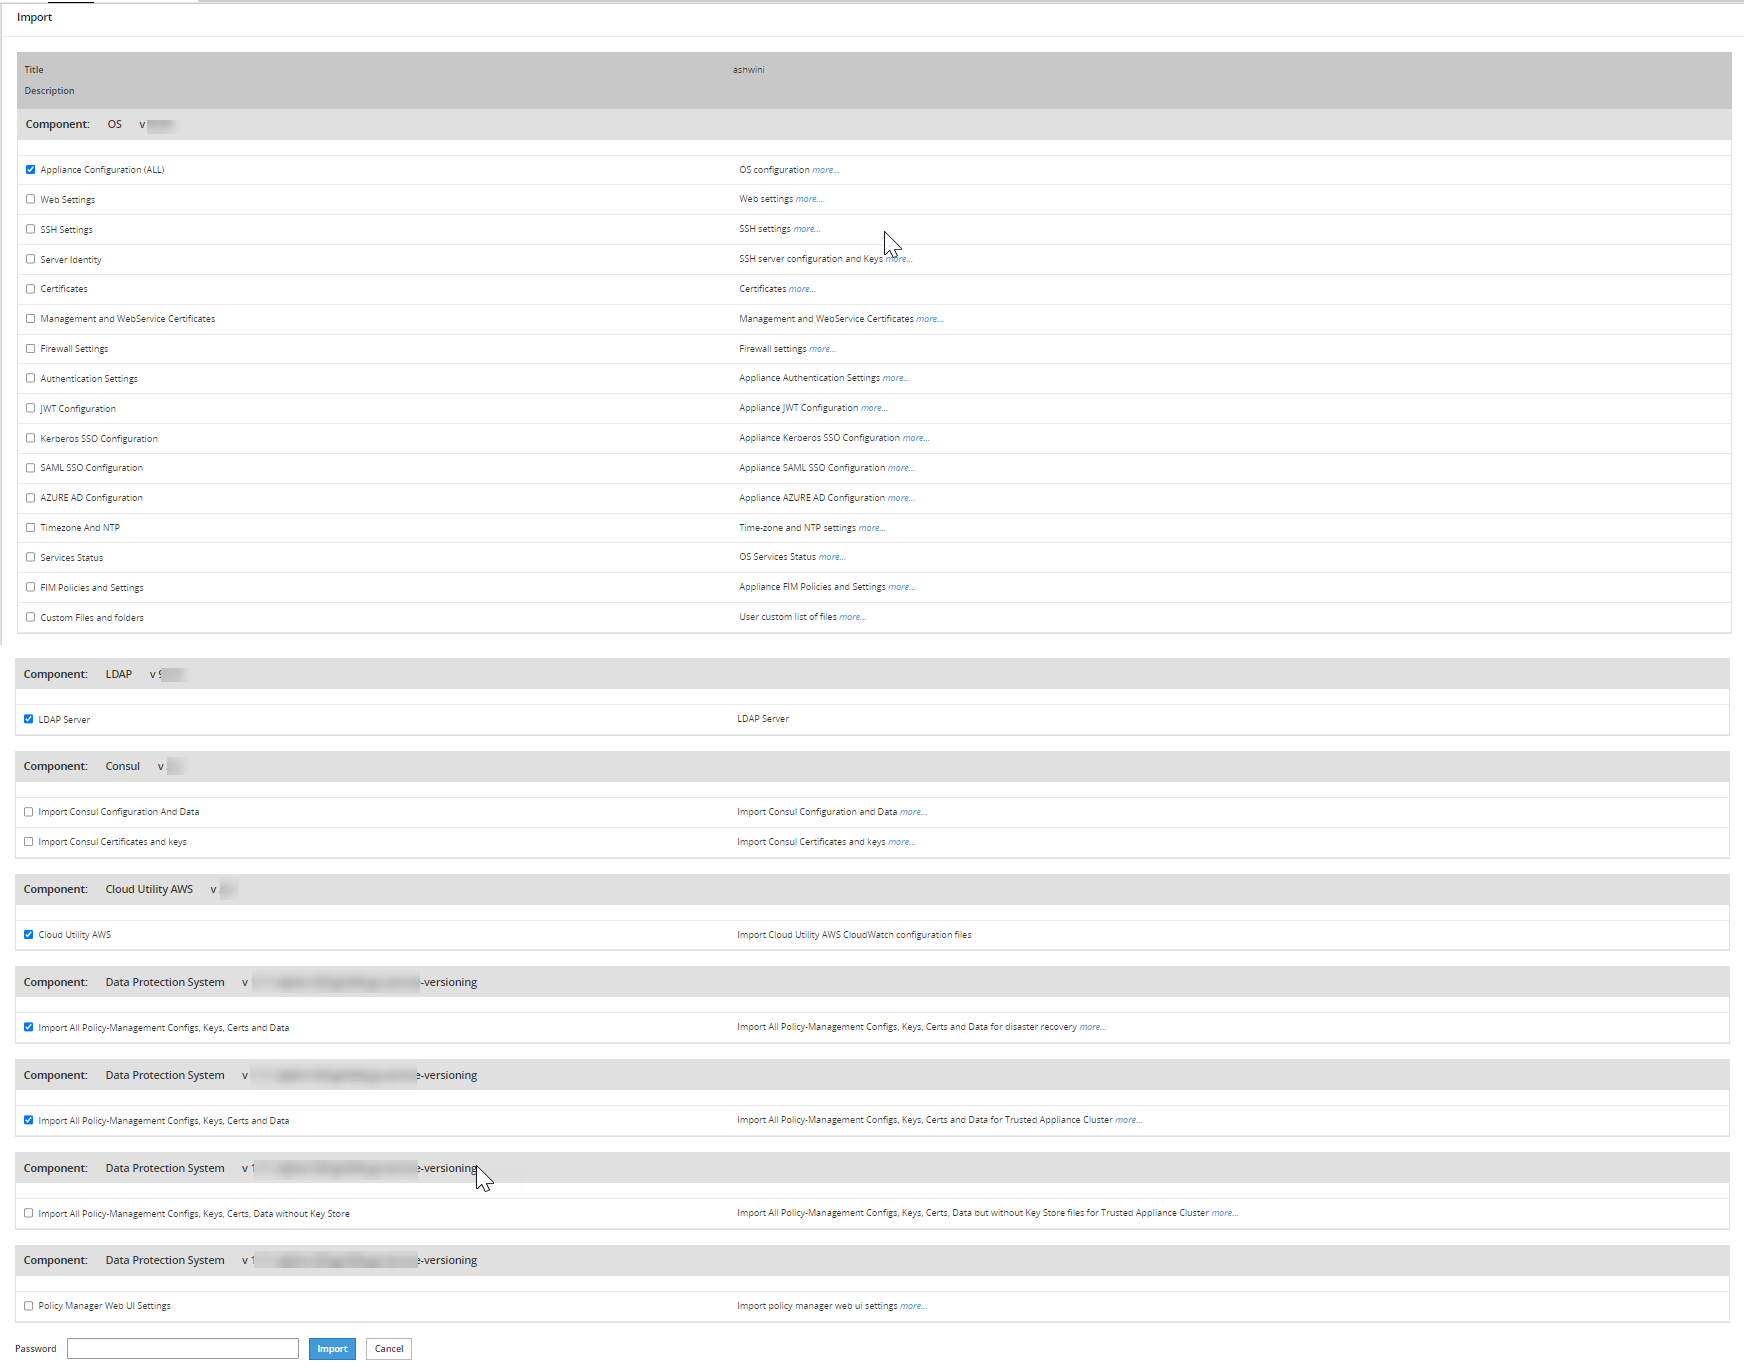
- Enter the password for the file in the Password text box and click Import.
The message File
has been imported successfully appears. - Click Done.
- On the CLI Manager, navigate to Administration > Backup/Restore Center > Import configurations from a local file.The Select an item to import screen appears.
- Select the required file or configuration to export and select OK.The contents of the file appear.
- Select OK.
- Enter the required password on the following screen and select OK.
- Select the required components.
Warning: Ensure to select each component individually.
- Select OK.The file import process starts.
- Select Done after the import process completes.
Feedback
Was this page helpful?