This is the multi-page printable view of this section. Click here to print.
Configuring ESA
1 - Rotating Insight certificates
These steps are only applicable for the system-generated Protegrity certificate and keys. For rotating custom certificates, refer here. If the ESA keys are rotated, then the Audit Store certificates must be rotated.
Log in to the ESA Web UI.
Navigate to System > Services > Misc.
Stop the td-agent service. Skip this step if Analytics is not initialized.
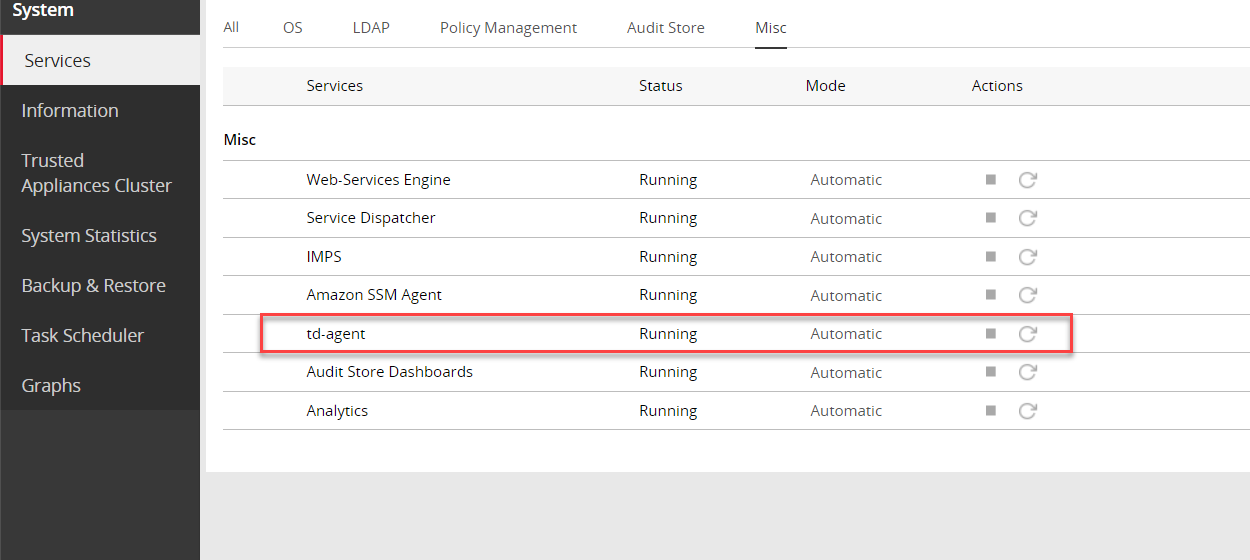
On the ESA Web UI, navigate to System > Services > Misc.
Stop the Analytics service.
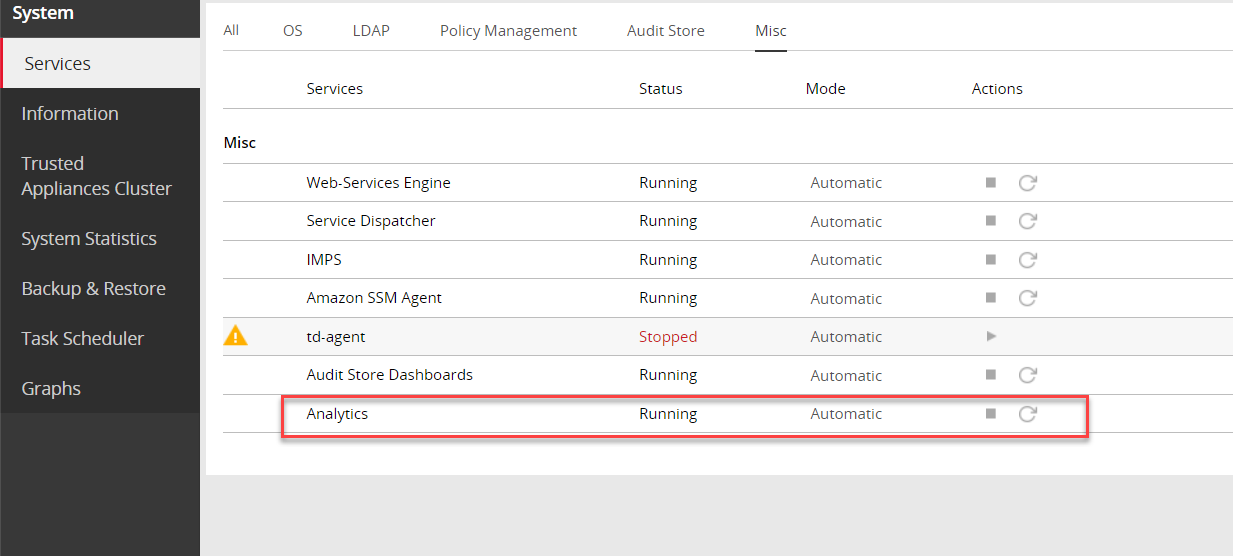
Navigate to System > Services > Audit Store.
Stop the Audit Store Management service.
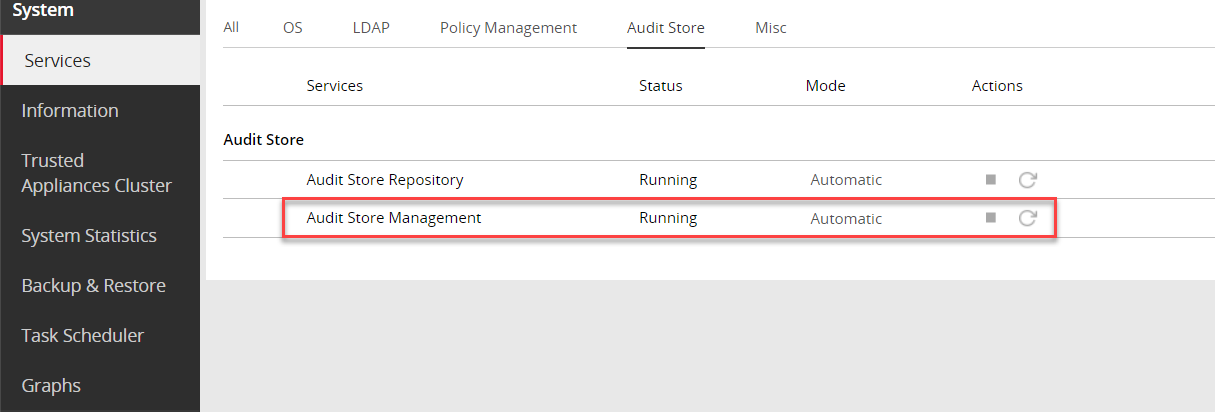
Navigate to System > Services > Audit Store.
Stop the Audit Store Repository service.
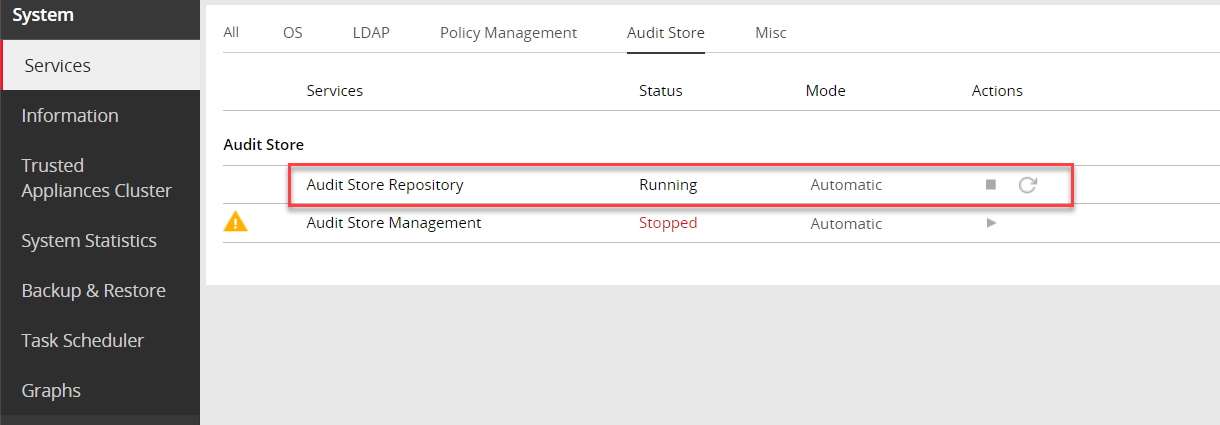
Run the Rotate Audit Store Certificates tool on the system.
In the ESA Web UI, click the Terminal Icon in lower-right corner to navigate to the ESA CLI Manager.
From the ESA CLI Manager, navigate to Tools > Rotate Audit Store Certificates.
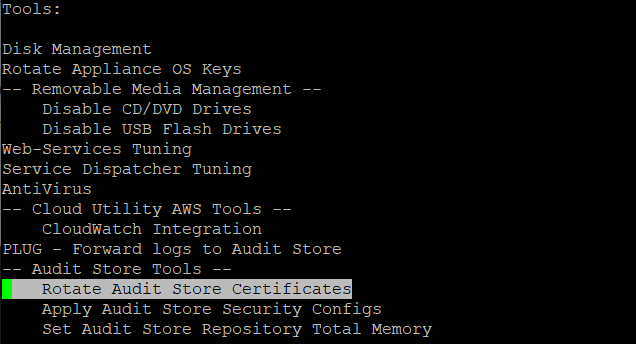
Enter the root password and select OK.
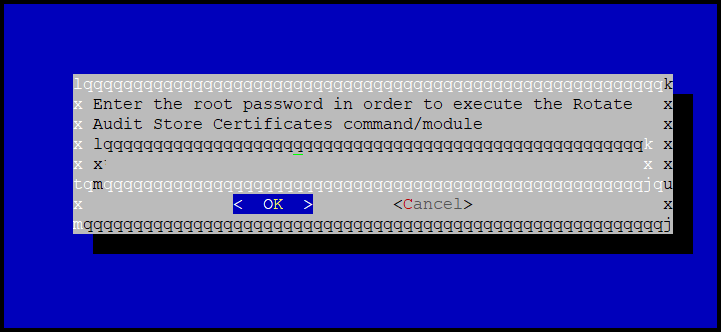
Enter the admin username and password and select OK.
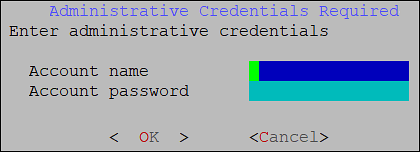
Enter the IP of the local system in the Target Audit Store Address field and select OK to rotate the certificates.

After the rotation is complete select OK.
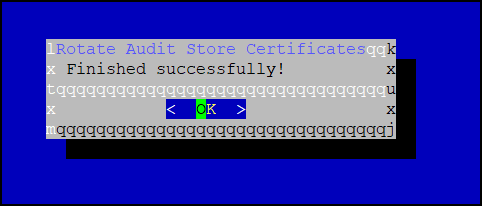
The CLI screen appears.

From the ESA Web UI, navigate to System > Services > Audit Store.
Start the Audit Store Repository service.
Navigate to System > Services > Audit Store.
Start the Audit Store Management service.
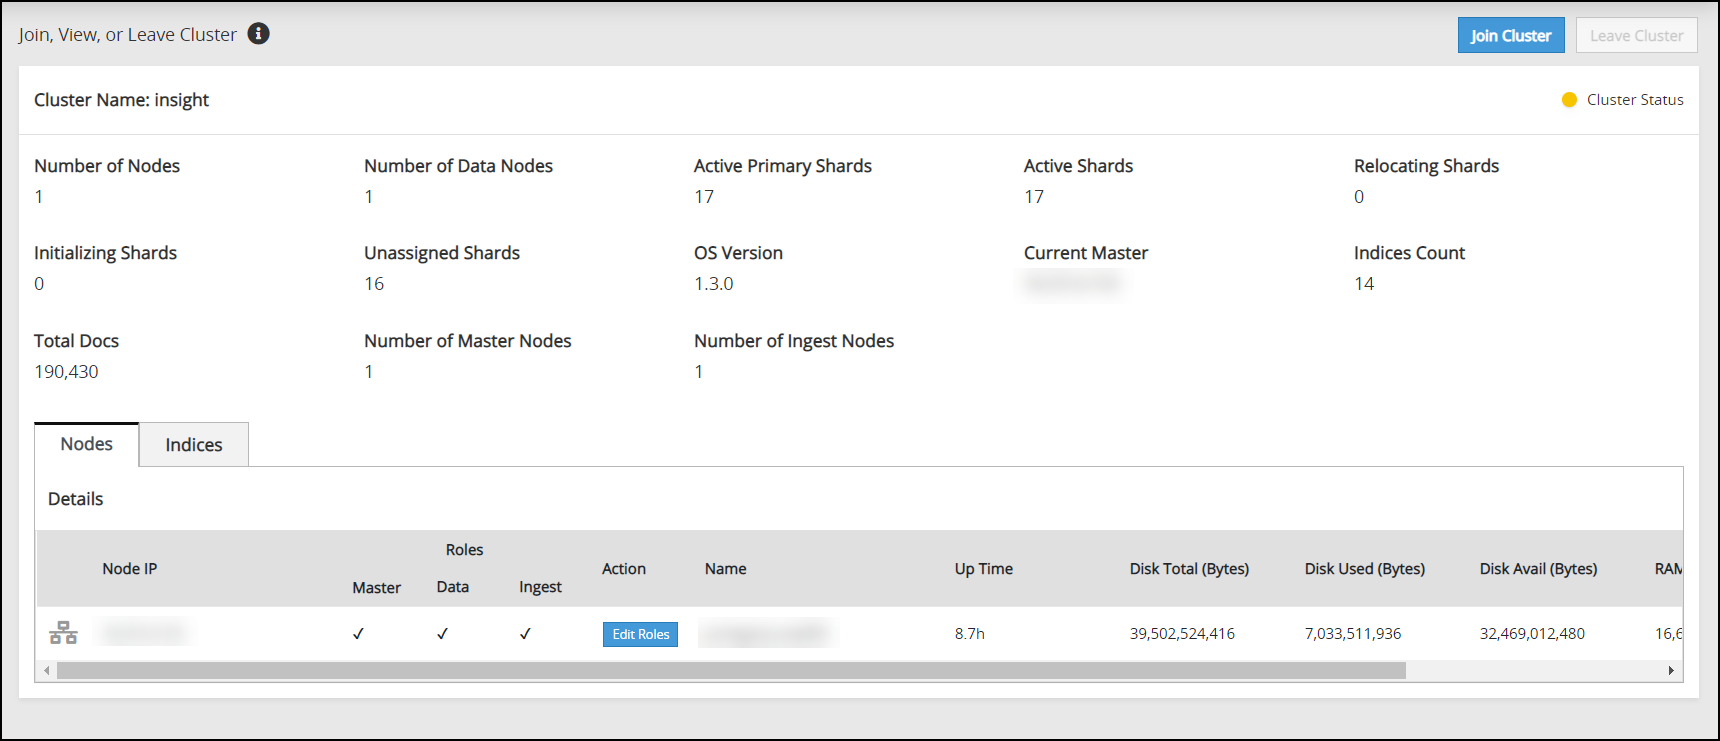
Navigate to Audit Store > Cluster Management and confirm that the cluster is functional and the cluster status is green or yellow. The cluster with green status is shown in the following figure.
Navigate to System > Services > Misc.
Start the Analytics service.
Navigate to System > Services > Misc.
Start the td-agent service. Skip this step if Analytics is not initialized.
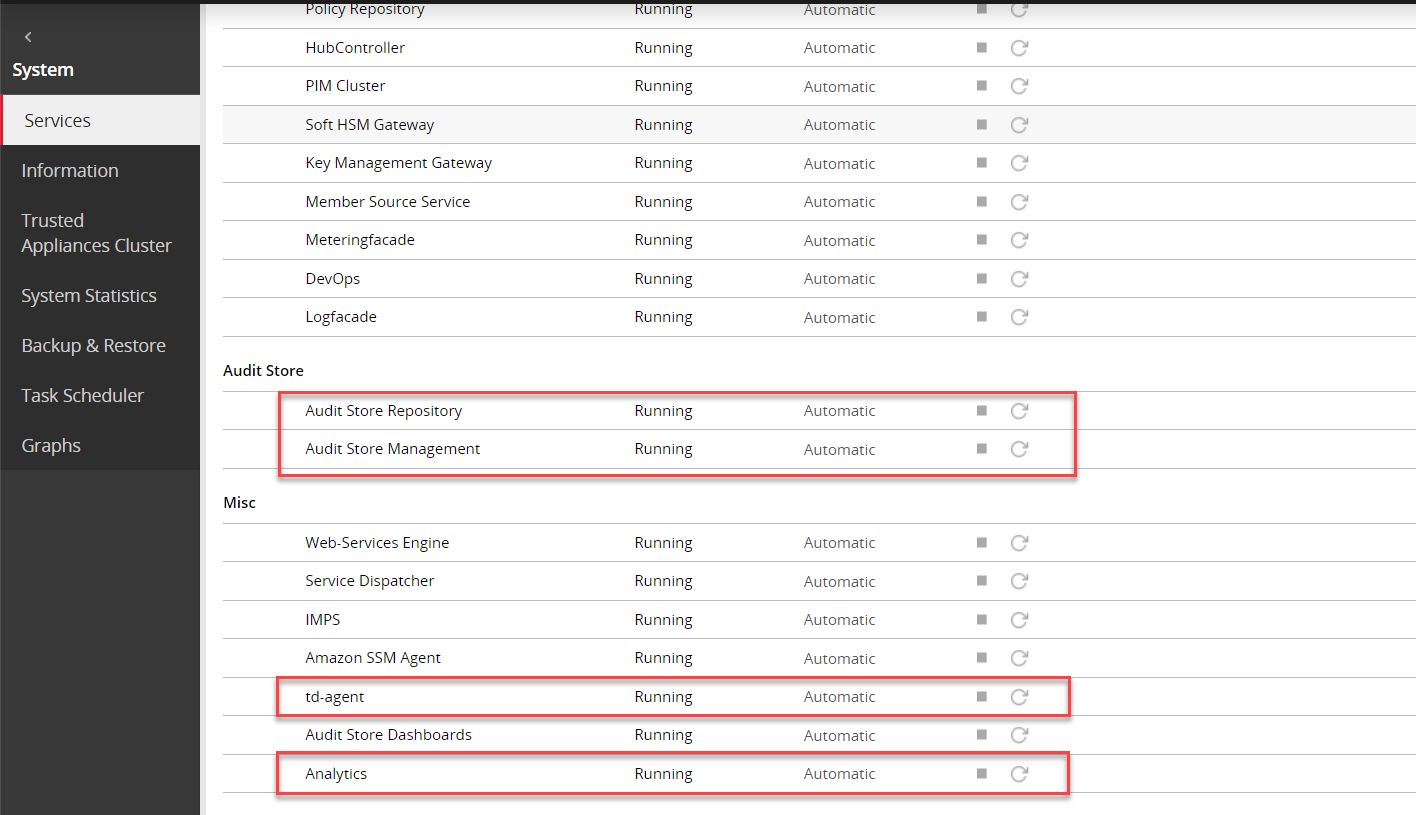
The following figure shows all services started.
On a multi-node Audit Store cluster, the certificate rotation must be performed on every node in the cluster. First, rotate the certificates on a Lead node, which is the Primary ESA, and then use the IP address of this Lead node while rotating the certificates on the remaining nodes in the cluster. The services mentioned in this section must be stopped on all the nodes, preferably at the same time with minimum delay during certificate rotation. After certificate rotation, the services that were stopped must be started again on the nodes in the reverse order.
Log in to the ESA Web UI.
Stop the required services.
Navigate to System > Services > Misc.
Stop the td-agent service. This step must be performed on all the other nodes followed by the Lead node. Skip this step if Analytics is not initialized.

On the ESA Web UI, navigate to System > Services > Misc.
Stop the Analytics service. This step must be performed on all the other nodes followed by the Lead node.

Navigate to System > Services > Audit Store.
Stop the Audit Store Management service. This step must be performed on all the other nodes followed by the Lead node.

Navigate to System > Services > Audit Store.
Stop the Audit Store Repository service.
Attention: This is a very important step and must be performed on all the other nodes followed by the Lead node without any delay. A delay in stopping the service on the nodes will result in that node receiving logs. This will lead to inconsistency in the logs across nodes and logs might be lost.

Run the Rotate Audit Store Certificates tool on the Lead node.
In the ESA Web UI, click the Terminal Icon in lower-right corner to navigate to the ESA CLI Manager.
From the ESA CLI Manager of the Lead node, that is the primary ESA, navigate to Tools > Rotate Audit Store Certificates.

Enter the root password and select OK.

Enter the admin username and password and select OK.

Enter the Ip of the local machine in the Target Audit Store Address field and select OK.

After the rotation is completed without errors, the following screen appears. Select OK to go to the CLI menu screen.

The CLI screen appears.

Run the Rotate Audit Store Certificates tool on all the remaining nodes in the Audit Store cluster one node at a time.
In the ESA Web UI, click the Terminal Icon in lower-right corner to navigate to the ESA CLI Manager.
From the ESA CLI Manager of a node in the cluster, navigate to Tools > Rotate Audit Store Certificates.

Enter the root password and select OK.

Enter the admin username and password and select OK.

Enter the IP address of the Lead node in Target Audit Store Address and select OK.

Enter the admin username and password for the Lead node and select OK.
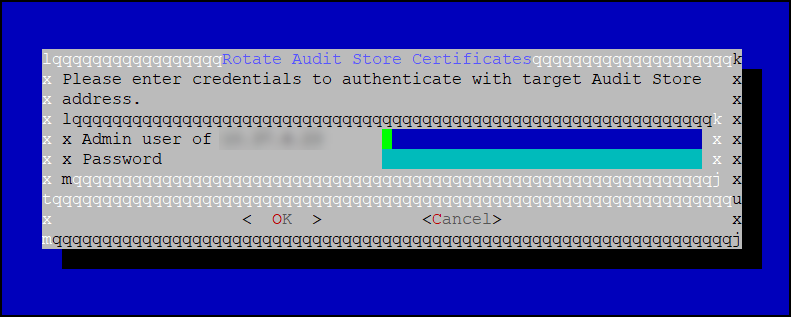
After the rotation is completed without errors, the following screen appears. Select OK to go to the CLI menu screen.

The CLI screen appears.

Start the required services.
From the ESA Web UI, navigate to System > Services > Audit Store.
Start the Audit Store Repository service.
Attention: This step must be performed on the Lead node followed by all the other nodes without any delay. A delay in starting the services on the nodes will result in that node receiving logs. This will lead to inconsistency in the logs across nodes and logs might be lost.
Navigate to System > Services > Audit Store.
Start the Audit Store Management service. This step must be performed on the Lead node followed by all the other nodes.
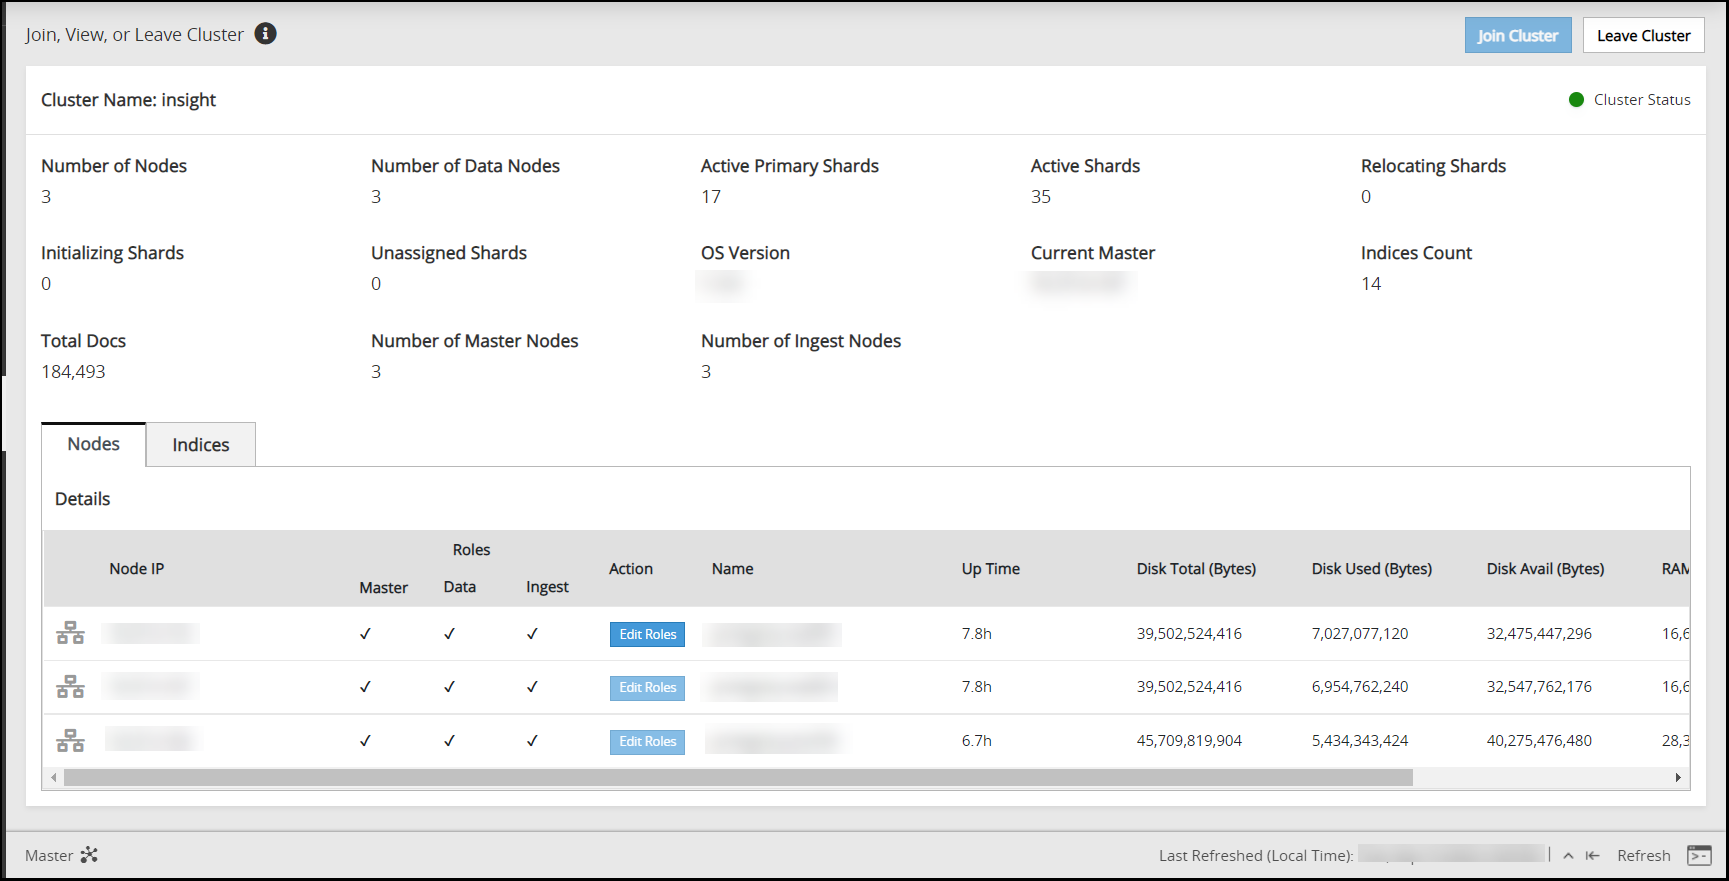
Navigate to Audit Store > Cluster Management and confirm that the Audit Store cluster is functional and the Audit Store cluster status is green or yellow as shown in the following figure.
Navigate to System > Services > Misc.
Start the Analytics service. This step must be performed on the Lead node followed by all the other nodes.
Navigate to System > Services > Misc.
Start the td-agent service. This step must be performed on the Lead node followed by all the other nodes. Skip this step if Analytics is not initialized.
The following figure shows all services that are started.

Verify that the Audit Store cluster is stable.
On the ESA Web UI, navigate to Audit Store > Cluster Management.
Verify that the nodes are still a part of the Audit Store cluster.

2 - Updating configurations after changing the domain name
Before you begin:
Ensure that the following prerequisites are complete:
The ESA is configured to forward logs to Insight and the external SIEM.
For more information about forwarding logs to a SIEM, refer here.
The external syslog server is available and running.
If certificates are used, ensure that the certificates are updated with the required information.
For more information about updating the certificates, refer here.
Ensure that the hostname does not contain the dot(.) special character.
Perform the following steps to update the configuration:
Open the CLI Manager on the Primary ESA.
Log in to the CLI Manager of the Primary ESA.
Navigate to Administration > OS Console.
Enter the root password and select OK.
Run the following command to update the configuration files.
/opt/protegrity/td-agent/scripts/update_bindaddress_td_agent_INPUT_forward_external.sh $(hostname)The bind address in INPUT_forward_external.conf is updated with the hostname.domainname.
Restart the td-agent service.
Log in to the ESA Web UI.
Navigate to System > Services > Misc > td-agent,
Restart the td-agent service.
Complete the steps on the remaining ESAs where the domain name must be updated.
If td-agent is used to receive logs on the ESA or are using an external SIEM, then update the upstream.cfg file on the protector using the following steps.
Log in and open a CLI on the protector machine.
Navigate to the config.d directory using the following command.
cd /opt/protegrity/logforwarder/data/config.dProtectors v9.2.0.0 and later use the /opt/protegrity/logforwarder/data/config.d path. Use the /opt/protegrity/fluent-bit/data/config.d path for protectors v9.1.0.0 and earlier.
Back up the existing upstream.cfg file using the following command.
cp upstream.cfg upstream.cfg_updating_host_backupProtectors v9.2.0.0 and later use the upstream.cfg file. Use the upstream_es.cfg file for protectors v9.1.0.0 and earlier.
Open the upstream.cfg file using a text editor.
Update the Host value with the updated IP address of the ESA.
The extract of the code is shown here:
[UPSTREAM]
    Name       pty-insight-balancing

[NODE]
    Name       node-1
    Host       <IP address of the ESA>
    Port       24284
    tls        on
    tls.verify off
The code shows information updated for one node. If multiple nodes are present, then ensure that the information is updated for all the nodes.
Do not leave any trailing spaces or line breaks at the end of the file.
Protectors v9.2.0.0 and later use the Name parameter as pty-insight-balancing. Use the Name parameter as pty-es-balancing for protectors v9.1.0.0 and earlier.
Save and close the file.
Restart logforwarder on the Protector using the following commands.
/opt/protegrity/logforwarder/bin/logforwarderctrl stop
/opt/protegrity/logforwarder/bin/logforwarderctrl start
Protectors v9.2.0.0 and later use the /opt/protegrity/logforwarder/bin path. Use the /opt/protegrity/fluent-bit/bin path for protectors v9.1.0.0 and earlier.
Complete the configurations on the remaining protector machines.
3 - Updating the IP address of the ESA
Perform the steps on one system at a time if multiple ESAs must be updated.
Updating the IP address on the Primary ESA
Update the ESA configuration of the Primary ESA. This is the designated ESA that is used to log in for performing all configurations. It is also the ESA that is used to create and deploy policies.
Perform the following steps to refresh the configurations:
Recreate the Docker containers using the following steps.
Open the OS Console on the Primary ESA.
- Log in to the CLI Manager on the Primary ESA.
- Navigate to Administration > OS Console.
- Enter the root password.
Stop the containers using the following commands.
/etc/init.d/asrepository stop
/etc/init.d/asdashboards stop
Remove the containers using the following commands.
/etc/init.d/asrepository remove
/etc/init.d/asdashboards remove
Update the IP address in the config.yml configuration file.
In the OS Console, navigate to the /opt/protegrity/auditstore/config/security directory.
cd /opt/protegrity/auditstore/config/securityOpen the config.yml file using a text editor.
Locate the internalProxies: attribute and update the IP address value for the ESA.
Save and close the file.
Start the containers using the following commands.
/etc/init.d/asrepository start
/etc/init.d/asdashboards start
Update the IP address in the asd_api_config.json configuration file.
In the OS Console, navigate to the /opt/protegrity/insight/analytics/config directory.
cd /opt/protegrity/insight/analytics/configOpen the asd_api_config.json file using a text editor.
Locate the x_forwarded_for attribute and update the IP address value for the ESA.
Save and close the file.
Rotate the Audit Store certificates on the Primary ESA.
For the steps to rotate Audit Store certificates, refer here.
Use the IP address of the local node, which is the Primary ESA and the Lead node, while rotating the certificates.
Apply security configurations. This step should be performed only once from any node, after all updates have been applied to all nodes in the cluster.
Open the ESA CLI.
Navigate to Tools.
Run Apply Audit Store Security Configs.
Monitor the cluster status.
Log in to the Web UI of the Primary ESA.
Navigate to Audit Store > Cluster Management.
Wait till the following updates are visible on the Overview page.
- The IP address of the Primary ESA is updated.
- All the nodes are visible in the cluster.
- The health of the cluster is green.
Alternatively, monitor the log files for any errors by logging into the ESA Web UI, navigating to Logs > Appliance, and selecting the following files from the Enterprise-Security-Administrator - Event Logs list:
- insight_analytics
- asmanagement
- asrepository
Updating the IP Address on the Secondary ESA
Ensure that the IP address of the ESA has been updated. Perform the steps on one system at a time if multiple ESAs must be updated.
Perform the following steps to refresh the configurations:
Recreate the Docker containers using the following steps.
Open the OS Console on the Secondary ESA.
- Log in to the CLI Manager on the Secondary ESA.
- Navigate to Administration > OS Console.
- Enter the root password.
Stop the containers using the following commands.
/etc/init.d/asrepository stop
/etc/init.d/asdashboards stop
Remove the containers using the following commands.
/etc/init.d/asrepository remove
/etc/init.d/asdashboards remove
Update the IP address in the config.yml configuration file.
In the OS Console, navigate to the /opt/protegrity/auditstore/config/security directory.
cd /opt/protegrity/auditstore/config/securityOpen the config.yml file using a text editor.
Locate the internalProxies: attribute and update the IP address value for the ESA.
Save and close the file.
Start the containers using the following commands.
/etc/init.d/asrepository start
/etc/init.d/asdashboards start
Update the IP address in the asd_api_config.json configuration file.
In the OS Console, navigate to the /opt/protegrity/insight/analytics/config directory.
cd /opt/protegrity/insight/analytics/configOpen the asd_api_config.json file using a text editor.
Locate the x_forwarded_for attribute and update the IP address value for the ESA.
Save and close the file.
Rotate the Audit Store certificates on the Secondary ESA. Perform the steps on the Secondary ESA. However, use the IP address of the Primary ESA, which is the Lead node, for rotating the certificates.
For the steps to rotate Audit Store certificates, refer here.
Apply security configurations. This step should be performed only once from any node, after all updates have been applied to all nodes in the cluster.
Open the ESA CLI.
Navigate to Tools.
Run Apply Audit Store Security Configs.
Monitor the cluster status.
Log in to the Web UI of the Primary ESA.
Navigate to Audit Store > Cluster Management.
Wait till the following updates are visible on the Overview page.
- The IP address of the Secondary ESA is updated.
- All the nodes are visible in the cluster.
- The health of the cluster is green.
Alternatively, monitor the log files for any errors by logging into the ESA Web UI, navigating to Logs > Appliance, and selecting the following files from the Enterprise-Security-Administrator - Event Logs list:
- insight_analytics
- asmanagement
- asrepository
4 - Updating the host name or domain name of the ESA
Updating the host name or domain name on the Primary ESA
Update the configurations of the Primary ESA. This is the designated ESA that is used to log in for performing all configurations. It is also the ESA that is used to create and deploy policies.
Ensure that the host name or domain name of the ESA has been updated.Ensure that the hostname does not contain the dot(.) special character.
Perform the steps on one system at a time if multiple ESAs must be updated.
Perform the following steps to refresh the configurations:
Update the host name or domain name in the configuration files.
Open the OS Console on the Primary ESA.
- Log in to the CLI Manager on the Primary ESA.
- Navigate to Administration > OS Console.
- Enter the root password.
Update the repository.json file for the Audit Store configuration.
Navigate to the /opt/protegrity/auditstore/management/config directory.
cd /opt/protegrity/auditstore/management/configOpen the repository.json file using a text editor.
Locate and update the hosts attribute with the new host name and domain name as shown in the following example.
"hosts": [
    "protegrity-esa123.protegrity.com"
  ]
Save and close the file.
Update the repository.json file for the Analytics configuration.
Navigate to the /opt/protegrity/insight/analytics/config directory.
cd /opt/protegrity/insight/analytics/configOpen the repository.json file using a text editor.
Locate and update the hosts attribute with the new host name and domain name as shown in the following example.
"hosts": [
    "protegrity-esa123.protegrity.com"
  ]
Save and close the file.
Update the opensearch.yml file for the Audit Store configuration.
Navigate to the /opt/protegrity/auditstore/config directory.
cd /opt/protegrity/auditstore/configOpen the opensearch.yml file using a text editor.
Locate and update the node.name, network.host, and the http.host attributes with the new host name and domain name as shown in the following example. Update the node.name only with the host name. If required, uncomment the line by deleting the number sign (#) character at the start of the line.
...
<existing code>
...
node.name: protegrity-esa123
...
<existing code>
...
network.host:
- protegrity-esa123.protegrity.com
...
<existing code>
...
http.host:
- protegrity-esa123.protegrity.com
Save and close the file.
Update the opensearch_dashboards.yml file for the Audit Store Dashboards configuration.
Navigate to the /opt/protegrity/auditstore_dashboards/config directory.
cd /opt/protegrity/auditstore_dashboards/configOpen the opensearch_dashboards.yml file using a text editor.
Locate and update the opensearch.hosts attribute with the new host name and domain name as shown in the following example.
opensearch.hosts: [ "https://protegrity-esa123.protegrity.com:9200" ]Save and close the file.
Update the OUTPUT.conf file for the td-agent configuration.
Navigate to the /opt/protegrity/td-agent/config.d directory.
cd /opt/protegrity/td-agent/config.dOpen the OUTPUT.conf file using a text editor.
Locate and update the hosts attribute with the new host name and domain name as shown in the following example.
hosts protegrity-esa123.protegrity.comSave and close the file.
Update the INPUT_forward_external.conf file for the external SIEM configuration. This step is required only if an external SIEM is used.
Navigate to the /opt/protegrity/td-agent/config.d directory.
cd /opt/protegrity/td-agent/config.dOpen the INPUT_forward_external.conf file using a text editor.
Locate and update the bind attribute with the new host name and domain name as shown in the following example.
bind protegrity-esa123.protegrity.comSave and close the file.
Recreate the Docker containers using the following steps.
Open the OS Console on the Primary ESA, if it is not opened.
- Log in to the CLI Manager on the Primary ESA.
- Navigate to Administration > OS Console.
- Enter the root password.
Stop the containers using the following commands.
/etc/init.d/asrepository stop
/etc/init.d/asdashboards stop
Remove the containers using the following commands.
/etc/init.d/asrepository remove
/etc/init.d/asdashboards remove
Start the containers using the following commands.
/etc/init.d/asrepository start
/etc/init.d/asdashboards start
Rotate the Audit Store certificates on the Primary ESA. Use the IP address of the local node, which is the Primary ESA and the Lead node, while rotating the certificates.
For the steps to rotate Audit Store certificates, refer here.
Update the unicast_hosts.txt file for the Audit Store configuration.
Open the OS Console on the Primary ESA.
Navigate to the /opt/protegrity/auditstore/config directory using the following command.
cd /opt/protegrity/auditstore/configOpen the unicast_hosts.txt file using a text editor.
Locate and update the host name and domain name.
protegrity-esa123
protegrity-esa123.protegrity.com
Save and close the file.
Monitor the cluster status.
Log in to the Web UI of the Primary ESA.
Navigate to Audit Store > Cluster Management.
Wait till the following updates are visible on the Overview page.
- The IP address of the Primary ESA is updated.
- All the nodes are visible in the cluster.
- The health of the cluster is green.
It is possible to monitor the log files for any errors by logging into the ESA Web UI, navigating to Logs > Appliance, and selecting the following files from the Enterprise-Security-Administrator - Event Logs list:
- insight_analytics
- asmanagement
- asrepository
Updating the host name or domain name on the Secondary ESA
Update the configurations of the Secondary ESA after the host name or domain name of the ESA has been updated.
Perform the steps on one system at a time if multiple ESAs must be updated.
Perform the following steps to refresh the configurations:
Update the host name or domain name in the configuration files.
Open the OS Console on the Secondary ESA.
- Log in to the CLI Manager on the Secondary ESA.
- Navigate to Administration > OS Console.
- Enter the root password.
Update the repository.json file for the Audit Store configuration.
Navigate to the /opt/protegrity/auditstore/management/config directory.
cd /opt/protegrity/auditstore/management/configOpen the repository.json file using a text editor.
Locate and update the hosts attribute with the new host name and domain name as shown in the following example.
"hosts": [
    "protegrity-esa456.protegrity.com"
  ]
Save and close the file.
Update the repository.json file for the Analytics configuration.
Navigate to the /opt/protegrity/insight/analytics/config directory.
cd /opt/protegrity/insight/analytics/configOpen the repository.json file using a text editor.
Locate and update the hosts attribute with the new host name and domain name as shown in the following example.
"hosts": [
    "protegrity-esa456.protegrity.com"
  ]
Save and close the file.
Update the opensearch.yml file for the Audit Store configuration.
Navigate to the /opt/protegrity/auditstore/config directory.
cd /opt/protegrity/auditstore/configOpen the opensearch.yml file using a text editor.
Locate and update the node.name, network.host, and the http.host attributes with the new host name and domain name as shown in the following example. Update the node.name only with the host name. If required, uncomment the line by deleting the number sign (#) character at the start of the line.
...
<existing code>
...
node.name: protegrity-esa456
...
<existing code>
...
network.host:
- protegrity-esa456.protegrity.com
...
<existing code>
...
http.host:
- protegrity-esa456.protegrity.com
Save and close the file.
Update the opensearch_dashboards.yml file for the Audit Store Dashboards configuration.
Navigate to the /opt/protegrity/auditstore_dashboards/config directory.
cd /opt/protegrity/auditstore_dashboards/configOpen the opensearch_dashboards.yml file using a text editor.
Locate and update the opensearch.hosts attribute with the new host name and domain name as shown in the following example.
opensearch.hosts: [ "https://protegrity-esa456.protegrity.com:9200" ]Save and close the file.
Update the OUTPUT.conf file for the td-agent configuration.
Navigate to the /opt/protegrity/td-agent/config.d directory.
cd /opt/protegrity/td-agent/config.dOpen the OUTPUT.conf file using a text editor.
Locate and update the hosts attribute with the new host name and domain name as shown in the following example.
hosts protegrity-esa456.protegrity.comSave and close the file.
Update the INPUT_forward_external.conf file for the external SIEM configuration. This step is required only if an external SIEM is used.
Navigate to the /opt/protegrity/td-agent/config.d directory.
cd /opt/protegrity/td-agent/config.dOpen the INPUT_forward_external.conf file using a text editor.
Locate and update the bind attribute with the new host name and domain name as shown in the following example.
bind protegrity-esa456.protegrity.comSave and close the file.
Recreate the Docker containers using the following steps.
Open the OS Console on the Secondary ESA, if it is not opened.
- Log in to the CLI Manager on the Secondary ESA.
- Navigate to Administration > OS Console.
- Enter the root password.
Stop the containers using the following commands.
/etc/init.d/asrepository stop
/etc/init.d/asdashboards stop
Remove the containers using the following commands.
/etc/init.d/asrepository remove
/etc/init.d/asdashboards remove
Start the containers using the following commands.
/etc/init.d/asrepository start
/etc/init.d/asdashboards start
Rotate the Audit Store certificates on the Secondary ESA. Perform the steps on the Secondary ESA using the IP address of the Primary ESA, which is the Lead node, for rotating the certificates.
For the steps to rotate Audit Store certificates, refer here.
Update the unicast_hosts.txt file for the Audit Store configuration.
Open the OS Console on the Primary ESA.
Navigate to the /opt/protegrity/auditstore/config directory using the following command.
cd /opt/protegrity/auditstore/configOpen the unicast_hosts.txt file using a text editor.
Locate and update the host name and domain name.
protegrity-esa456
protegrity-esa456.protegrity.com
Save and close the file.
Monitor the cluster status.
Log in to the Web UI of the Primary ESA.
Navigate to Audit Store > Cluster Management.
Wait till the following updates are visible on the Overview page.
- The IP address of the Secondary ESA is updated.
- All the nodes are visible in the cluster.
- The health of the cluster is green.
Monitor the log files for any errors by logging into the ESA Web UI, navigating to Logs > Appliance, and selecting the following files from the Enterprise-Security-Administrator - Event Logs list:
- insight_analytics
- asmanagement
- asrepository
5 - Updating Insight custom certificates
These steps are only applicable for custom certificate and keys. For rotating Protegrity certificates, refer here.
For more information about Insight certificates, refer here.
Rotate custom certificates on the Audit Store cluster that has a single node in the cluster using the steps provided in Using custom certificates in Insight.
On a multi-node Audit Store cluster, the certificate rotation must be performed on every node in the cluster. First, rotate the certificates on a Lead node, which is the Primary ESA, and then use the IP address of this Lead node while rotating the certificates on the remaining nodes in the cluster. The services mentioned in this section must be stopped on all the nodes, preferably at the same time with minimum delay during certificate rotation. After updating the certificates, the services that were stopped must be started again on the nodes in the reverse order.
Log in to the ESA Web UI.
Navigate to System > Services > Misc.
Stop the td-agent service. This step must be performed on all the other nodes followed by the Lead node.

On the ESA Web UI, navigate to System > Services > Misc.
Stop the Analytics service. This step must be performed on all the other nodes followed by the Lead node. The other nodes might not have Analytics installed. In this case, skip this step on those nodes.

Navigate to System > Services > Audit Store.
Stop the Audit Store Management service. This step must be performed on all the other nodes followed by the Lead node.

Navigate to System > Services > Audit Store.
Stop the Audit Store Repository service.
Attention: This is a very important step and must be performed on all the other nodes followed by the Lead node without any delay. A delay in stopping the service on the nodes will result in that node receiving logs. This will lead to inconsistency in the logs across nodes and logs might be lost.

Apply the custom certificates on the Lead ESA node.
For more information about certificates, refer to Using custom certificates in Insight.
Complete any one of the following steps on the remaining nodes in the Audit Store cluster.
Apply the custom certificates on the remaining nodes in the Audit Store cluster.
For more information about certificates, refer to Using custom certificates in Insight.
Run the Rotate Audit Store Certificates tool on all the remaining nodes in the Audit Store cluster one node at a time.
In the ESA Web UI of a node in the Audit Store cluster, click the Terminal Icon in lower-right corner to navigate to the ESA CLI Manager.
Navigate to Tools > Rotate Audit Store Certificates.

Enter the root password and select OK.

Enter the admin username and password and select OK.

Enter the IP address of the Lead node in Target Audit Store Address and select OK.

Enter the admin username and password for the Lead node and select OK.

After the rotation is completed without errors, the following screen appears. Select OK to go to the CLI menu screen.

The CLI screen appears.

In the ESA Web UI, navigate to System > Services > Audit Store.
Start the Audit Store Repository service.
Attention: This step must be performed on the Lead node followed by all the other nodes without any delay. A delay in starting the services on the nodes will result in that node receiving logs. This will lead to inconsistency in the logs across nodes and logs might be lost.
Navigate to System > Services > Audit Store.
Start the Audit Store Management service. This step must be performed on the Lead node followed by all the other nodes.
Navigate to Audit Store > Cluster Management and confirm that the Audit Store cluster is functional and the Audit Store cluster status is green or yellow as shown in the following figure.

Navigate to System > Services > Misc.
Start the Analytics service. This step must be performed on the Lead node followed by all the other nodes. The other nodes might not have Analytics installed. In this case, skip this step on those nodes.
Navigate to System > Services > Misc.
Start the td-agent service. This step must be performed on the Lead node followed by all the other nodes.
The following figure shows all services that are started.

On the ESA Web UI, navigate to Audit Store > Cluster Management.
Verify that the nodes are still a part of the Audit Store cluster.

6 - Removing an ESA from the Audit Store cluster
Before you begin:
Verify if the scheduler task jobs are enabled on the ESA using the following steps:
- Log in to the ESA Web UI.
- Navigate to System > Task Scheduler.
- Verify whether the following tasks are enabled on the ESA.
- Update Policy Status Dashboard
- Update Protector Status Dashboard
Perform the following steps to remove the ESA node:
From the ESA Web UI, click Audit Store > Cluster Management to open the Audit Store clustering page.
The Overview screen appears.
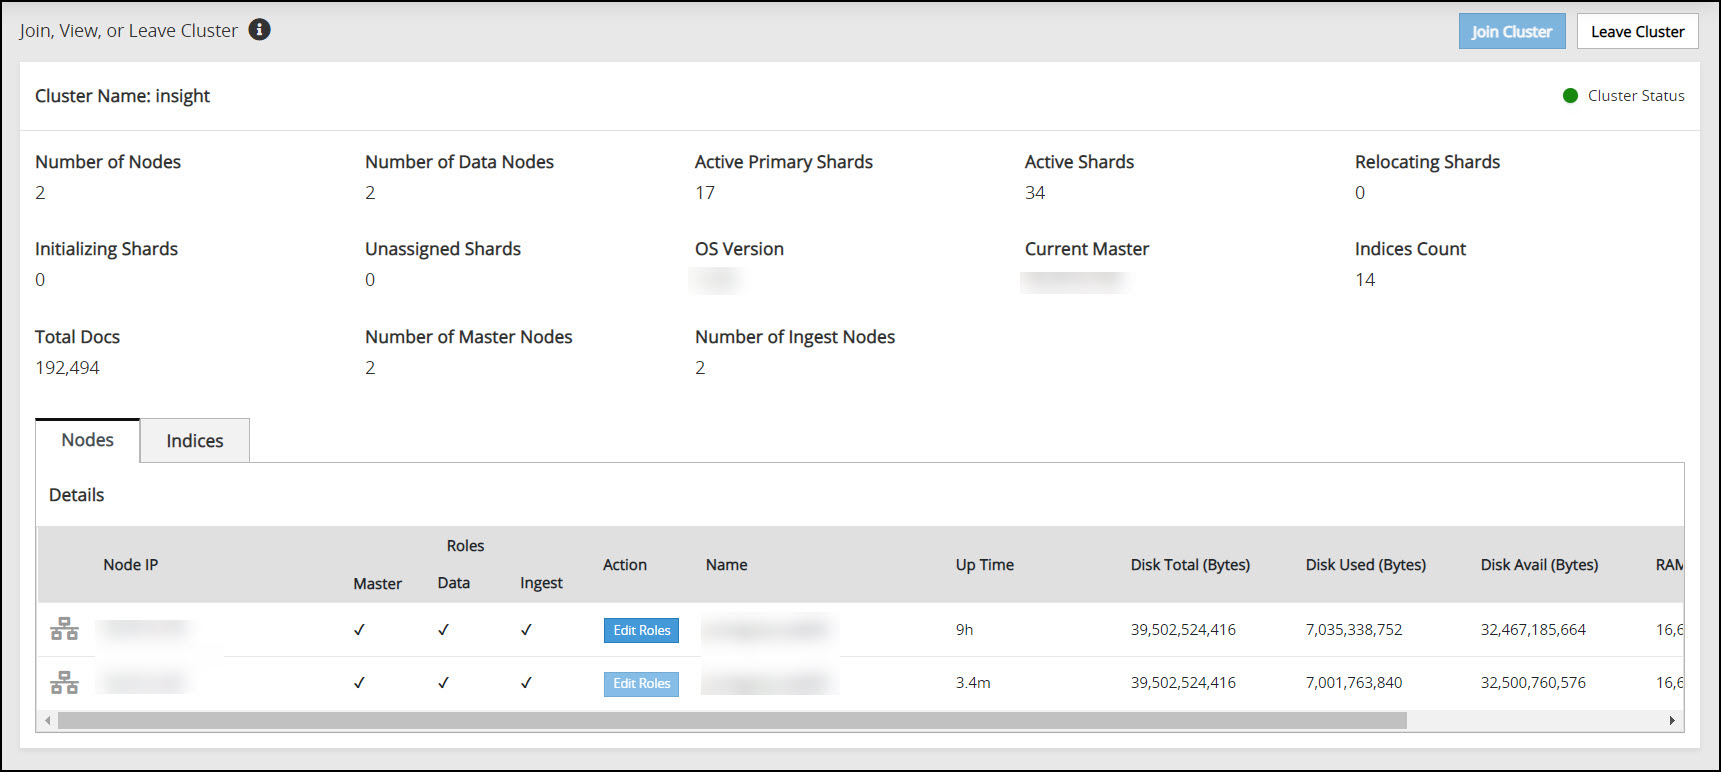
Click Leave Cluster.
A confirmation dialog box appears. The Audit Store cluster information is updated when a node leaves the Audit Store cluster. Hence, nodes must be removed from the Audit Store cluster one at a time. Removing multiple nodes from the Audit Store cluster at the same time using the ESA Web UI would lead to errors.
Click YES.
The ESA is removed from the Audit Store cluster. The Leave Cluster button is disabled and the Join Cluster button is enabled. The process takes time to complete. Stay on the same page and do not navigate to any other page while the process is in progress.
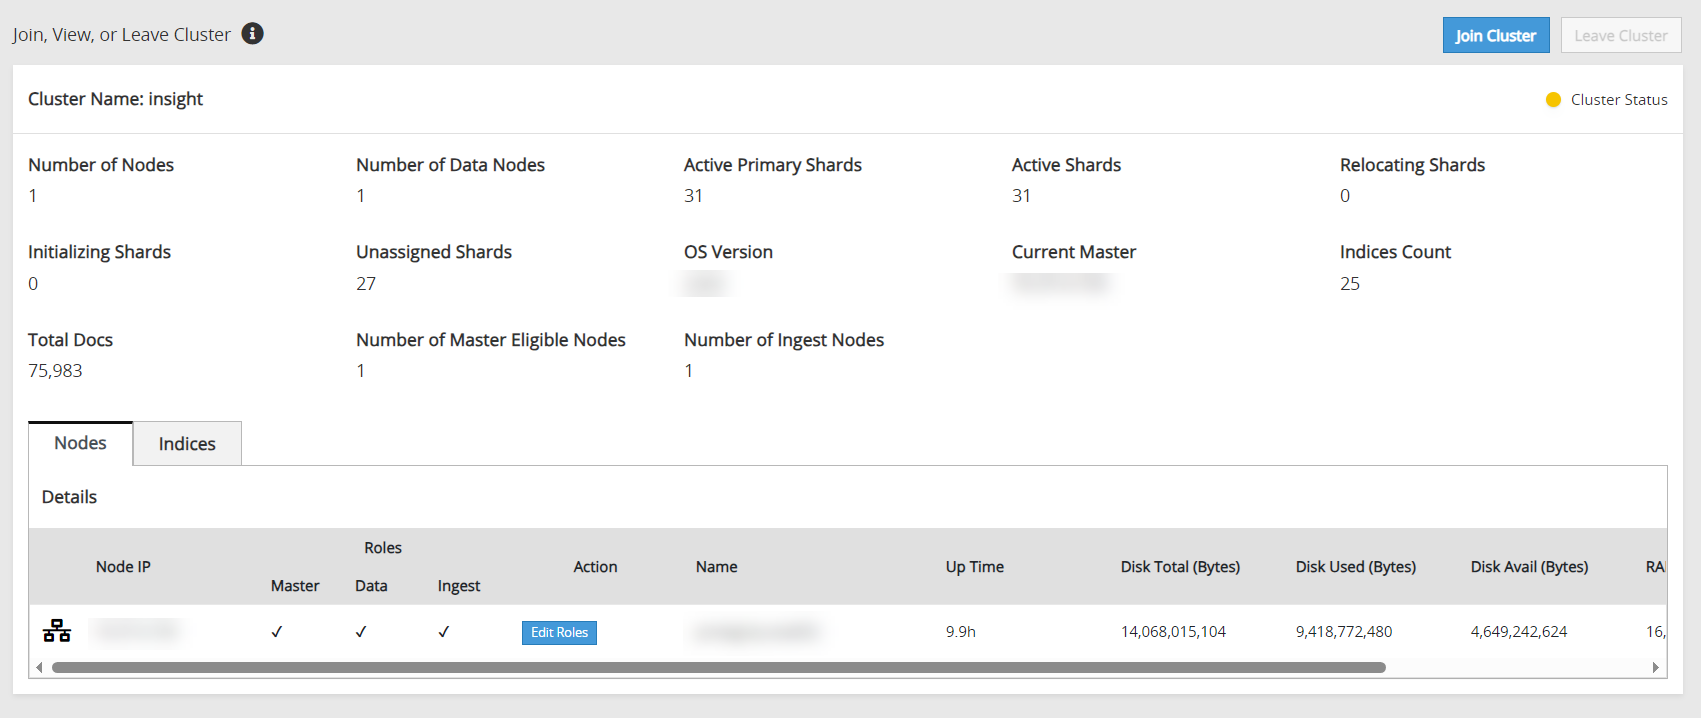
If the scheduler task jobs were enabled on the ESA that was removed, then enable the scheduler task jobs on another ESA in the Audit Store cluster. These tasks must be enabled on any one ESA in the Audit Store cluster. Enabling on multiple nodes might result in a loss of data.
- Log in to the ESA Web UI of any one node in the Audit Store cluster.
- Navigate to System > Task Scheduler.
- Enable the following tasks by selecting the task, clicking Edit, selecting the Enable check box, and clicking Save.
- Update Policy Status Dashboard
- Update Protector Status Dashboard
- Click Apply.
- Specify the root password and click OK.
After leaving the Audit Store cluster, the configuration of the node and data is reset. The node will be uninitialized. Before using the node again, Protegrity Analytics needs to be initialized on the node or the node needs to be added to another Audit Store cluster.