Creating an Audit Store Cluster
The Audit Store cluster is a collection of nodes that process and store data. The Audit Store is installed on the ESA nodes. The logs generated by the Appliance, such as, ESA or DSG, and Protector machines are stored in this Audit Store. The logs are useful for obtaining information about the nodes and the cluster on the whole. The logs can also be monitored for any data loss, system compromise, or any other issues with the nodes in the Audit Store cluster.
An Audit Store cluster must have a minimum of three nodes with the Master-eligible role due to following scenarios:
- 1 master-eligible node: If only one node with the Master-eligible role is available, then it is elected the Master, by default. In this case, if the node becomes unavailable due to some failure, then the cluster becomes unstable as there is no additional node with the Master-eligible role.
- 2 master-eligible nodes: A cluster where only two nodes have the Master-eligible role, then both have the Master-eligible role at the minimum to be up and running for the cluster to remain functional. If any one of those nodes becomes unavailable due to some failure, then the minimum condition for the nodes with the Master-eligible role is not met and cluster becomes unstable. This setup is not recommended for a multi-node cluster.
- 3 master-eligible nodes and above: In this case, if any one node goes down, then the cluster can still remain functional because the cluster requires a minimum of two nodes with the Master-eligible role.
Completing the Prerequisites
Ensure that the following prerequisites are met before configuring the Audit Store Cluster. Protegrity recommends that the Audit Store Cluster has a minimum of three ESAs for creating a highly-available multi-node Audit Store cluster.
Prepare and set up three v10.1.0 ESAs.
Create the TAC on the first ESA. This will be the Primary ESA.
Add the remaining ESAs to the TAC. These will be the secondary ESAs in the TAC. For more information about installing the ESA, refer here.
Creating the Audit Store Cluster on the ESA
Initialize the Audit Store only on the first ESA or the Primary ESA in the TAC. This also configures Insight to retrieve data from the Audit Store. Additionally, the required processes, such as, td-agent, is started and Protegrity Analytics is initialized. The Audit Store cluster is initialized on the local machine so that other nodes can join this Audit Store cluster.
Perform the following steps to initialize the Audit Store.
Log in to the ESA Web UI.
Navigate to Audit Store > Initialize Analytics.
The following screen appears.
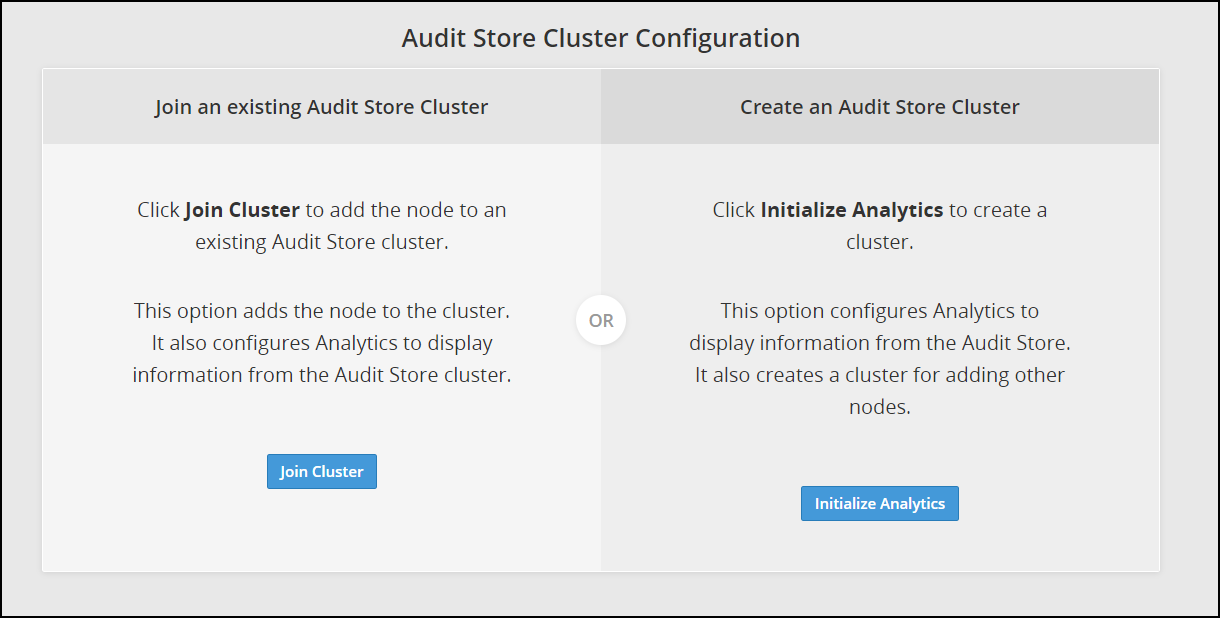
Click Initialize Analytics.
Protegrity Analytics is now configured and retrieves data for the reports from the Audit Store. The Index Lifecycle Management screen is displayed. The data is available on the Audit Store > Dashboard tab.
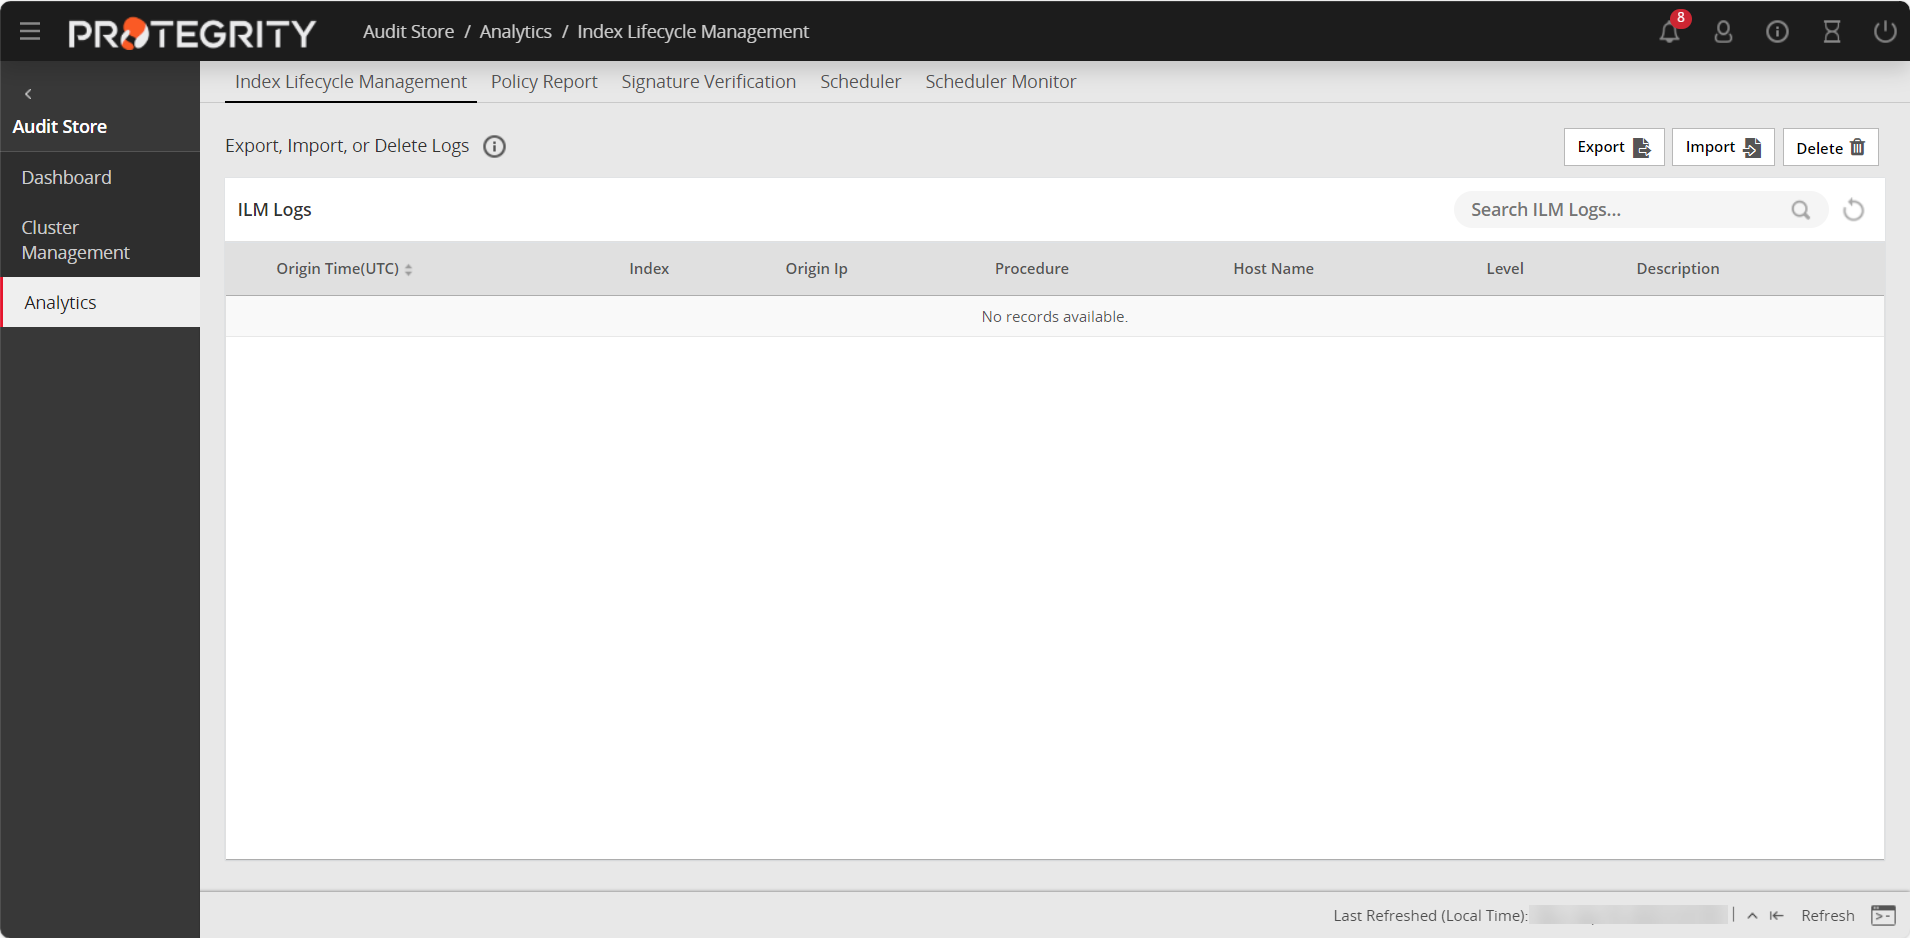
Verify that the following Audit Store services are running by navigating to System > Services:
- Audit Store Management
- Audit Store Repository
- Audit Store Dashboards
- Analytics
- td-agent
Adding an ESA to the Audit Store Cluster
Add multiple ESAs to the Audit Store cluster to increase the cluster size. In this case, the current ESA is added as a node in the Audit Store cluster. After the configurations are completed, the required processes are started and the logs are read from the Audit Store cluster.
The Audit Store cluster information is updated when a node joins the Audit Store cluster. This information is updated across the Audit Store cluster. Hence, nodes must be added to an Audit Store cluster one at a time. Adding multiple nodes to the Audit Store at the same time using the ESA Web UI would make the cluster information inconsistent, make the Audit Store cluster unstable, and would lead to errors.
Ensure that the following prerequisites are met:
- Ensure that the SSH Authentication type on all the ESAs is set to Password + PublicKey. For more information about setting the authentication, refer here.
- Ensure that the Audit Store cluster is initialized on the node that must be joined.
- The health status of the target Audit Store node is green or yellow.
- The health status of the Audit Store node that must be added to the cluster is green or yellow.
To check the health status of a node, log in to ESA Web UI of the node, click Audit Store > Cluster Management > Overview, and view the Cluster Status from the upper-right corner of the screen. For more information about the health status, refer here.
Log in to the Web UI of the second ESA.
Navigate to Audit Store > Initialize Analytics.
The following screen appears.

Click Join Cluster.
The following screen appears.
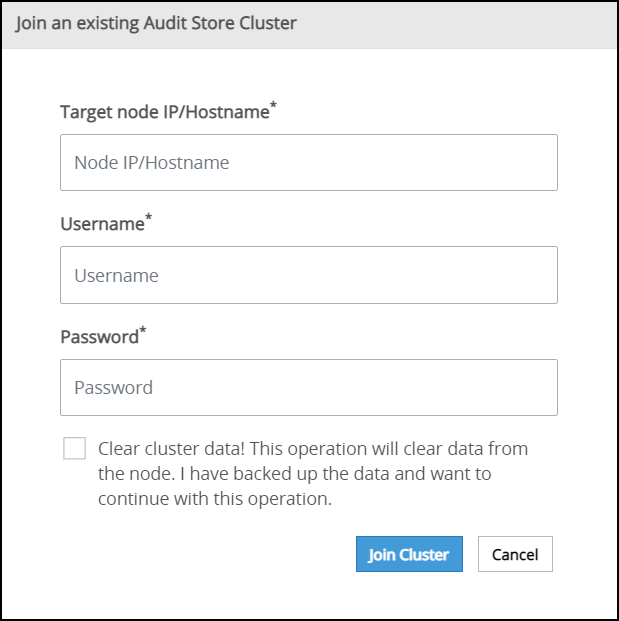
Specify the IP address or the hostname of the Audit Store cluster to join. Use hostname only if the hostname is resolved between the nodes.
Ensure that Protegrity Analytics is initialized and the Audit Store cluster is already created on the target node. A node cannot join the cluster if Protegrity Analytics is not initialized on the target node.
Specify the administrator username and password for the Audit Store cluster. If required, select the Clear cluster data check box to clear the Audit Store data from the current node before joining the Audit Store cluster. The check box will only be enabled if the node is a re-purposed ESA and has data, that is, if the Audit Store was earlier installed on the ESA.
Selecting this check box will delete the existing data on the re-purposed ESA before adding it to the Audit Store.
Click Join Cluster.
A confirmation message appears as shown in the following figure.
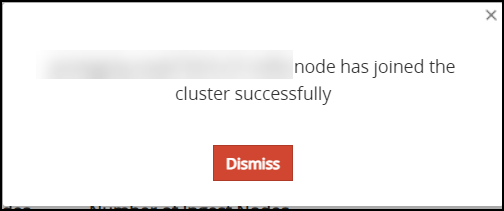
Click Dismiss.
The Index LIfecycle Management screen appears as shown in the following figure.

Repeat the steps to add the remaining ESAs as required. Add only one ESA at a time. After adding the ESA, wait till the cluster becomes stable. The cluster is stable when the cluster status indicator turns green.
Verifying the Audit Store Cluster
View the Audit Store Management page to verify that the configurations were completed successfully using the steps provided here.
Log in to the ESA Web UI.
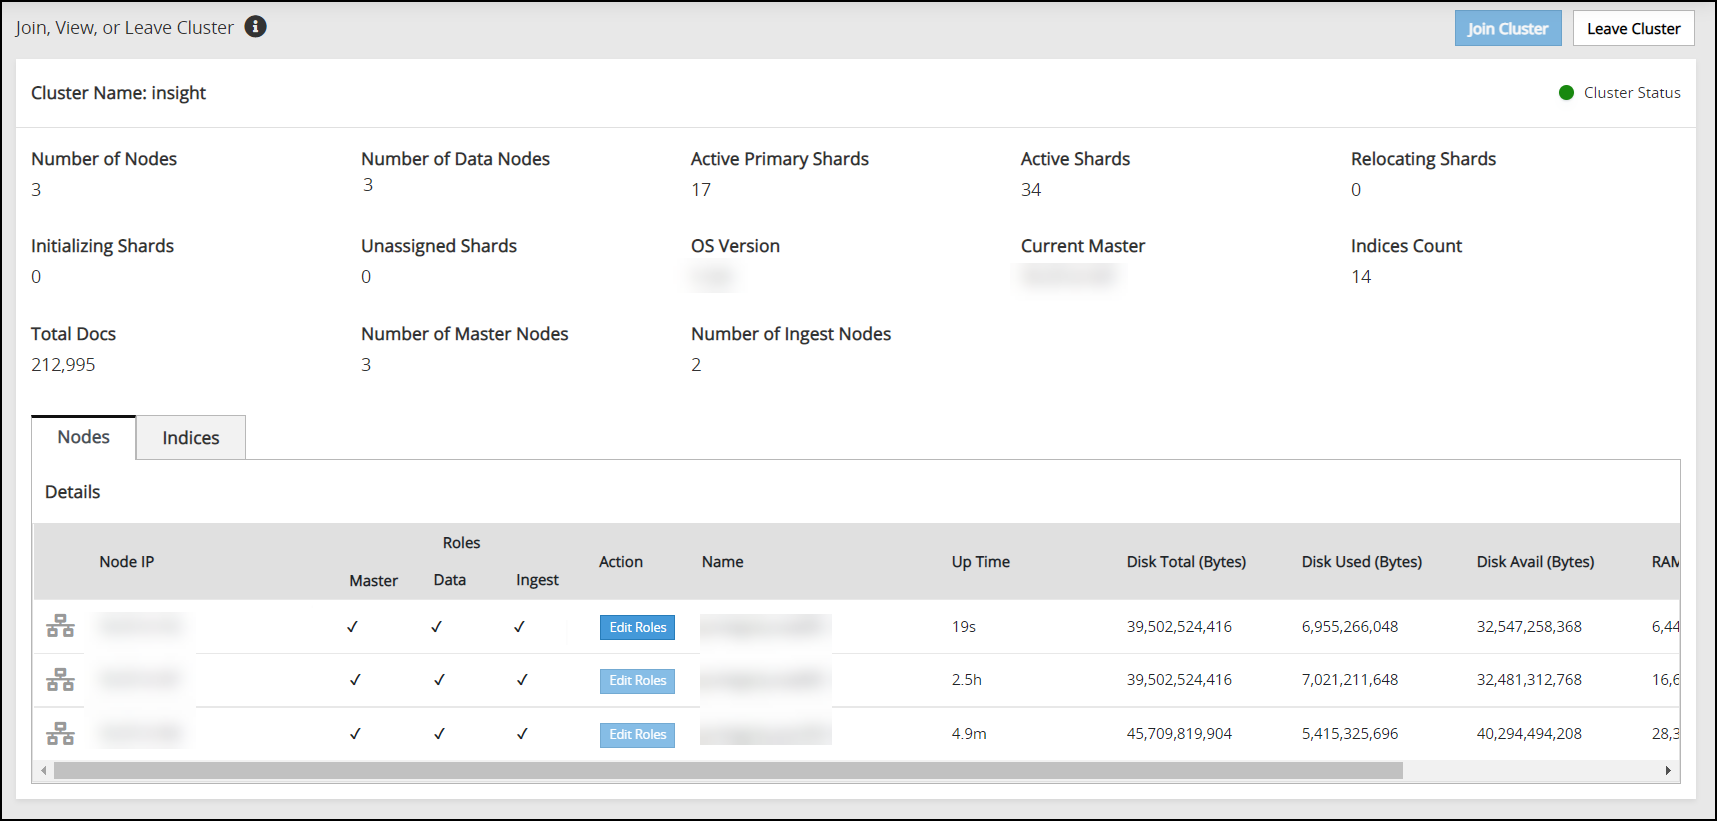
Navigate to the Audit Store > Cluster Management > Overview page.
Verify that the nodes are added to the cluster. The health of the nodes must be green.
Updating the Priority IP List for Signature Verification
Signature verification jobs run on the ESA and use the ESA’s processing time. Update the priority IP list for the default signature verification jobs after setting up the system. By default, the primary ESA will be used for the priority IP. If there are multiple ESAs in the priority list, then additional ESAs are available to process the signature verifications jobs. This frees up the Primary ESA’s processor to handle other important tasks.
For example, if the maximum jobs to run on an ESA is set to 4 and 10 jobs are queued to run on 2 ESAs, then 4 jobs are started on the first ESA, 4 jobs are started on the second ESA, and 2 jobs will be queued to run till an ESA job slot is free to accept and run the queued job.
For more information about scheduling jobs, refer here.
For more information about signature verification jobs, refer here.
Use the steps provided in this section to update the priority IP list.
Log in to the ESA Web UI.
Navigate to Audit Store > Analytics > Scheduler.
From the Action column, click the Edit icon (
 ) for the Signature Verification task.
Update the Priority IPs filed with the list of the ESAs available separating the IPs using commas.
Click Save.
Enter the root password, to apply the updates.
Feedback
Was this page helpful?