Protegrity Anonymization allows processing of the datasets, via generalization, to ensure the risk of reidentification is within tolerable thresholds. For a meaningful anonymization of a dataset, direct identifiers and quasi-identifiers need to be correctly identified and specified on the configuration of an anonymization job. If direct identifiers and quasi-identifiers are not correctly specified, the risk metrics do not reflect the true risks of reidentification of that anonymized dataset.
This is the multi-page printable view of this section. Click here to print.
Anonymization
Protegrity Anonymization, developed by Protegrity, assesses the reidentification risk of datasets containing personal data.
- 1: Introduction
- 1.1: Business cases
- 1.2: Data security and data privacy
- 1.3: Importance and types of data
- 1.4: Data anonymization techniques
- 1.5: How Protegrity Anonymization Works
- 2: About Protegrity Anonymization
- 3: Installing Protegrity Anonymization
- 3.1: Using Cloud Services
- 3.1.1: Protegrity Anonymization on AWS
- 3.1.2: Protegrity Anonymization on Azure
- 3.1.3: Optional steps for AWS and Azure
- 3.2: Installing using Docker containers
- 3.3: Installing the Protegrity Anonymization Python SDK
- 4: Using Protegrity Anonymization
- 5: Building the Anonymization request
- 5.1: Common Configurations for building the request
- 5.2: Building the request using the REST API
- 5.3: Building the request using the Python SDK
- 6: Using the Auto Anonymizer
- 7: Using Sample Anonymization Jobs
- 7.1: Sample Data Sets
- 7.2: Sample Requests for Protegrity Anonymization
- 7.3: Samples for cloud-related source and destination files
- 8: Additional Information
1 - Introduction
Learn about data privacy.
Organizations today collect vast amounts of personal data, providing valuable insights into individuals’ habits, purchasing trends, health, and preferences. This information helps businesses refine their strategies, develop products, and drive success. However, much of this data is highly sensitive and private, requiring organizations to implement robust protection measures that align with compliance requirements and business needs.
To safeguard personal data, pseudonymization can be used to replace direct identifiers with encrypted or tokenized values, allowing data to be processed while minimizing direct exposure to sensitive attributes. Because pseudonymized data can be re-identified with authorized access to the decryption or tokenization mechanism, it enables controlled data usage while maintaining privacy. However, as more fields—particularly quasi-identifiers—are pseudonymized to prevent re-identification, the overall utility of the data may decrease. Attributes like ZIP codes, birthdates, or demographic details may not be personally identifiable on their own, but when combined, they can reveal an individual’s identity. Protecting these fields strengthens privacy but may also limit their analytical value. Striking the right balance between security and usability is essential for compliance while preserving meaningful insights.
For scenarios requiring a higher level of privacy protection, anonymization provides an additional layer of security by ensuring that not only PII but also quasi-identifiers are generalized, redacted, or transformed. This prevents re-identification even when multiple data points are analyzed together. Anonymization techniques include removing or obfuscating key attributes, generalizing data to broader categories (e.g., replacing an exact address with just the city or state). By implementing anonymization, organizations can retain the analytical value of data while eliminating the risk of re-identification, ensuring compliance with privacy regulations and ethical data practices.
1.1 - Business cases
A few business cases to understand more about the importance of data privacy.
Consider the following business cases:
- Case 1: A hospital wants to share patient data with a third-party research lab. The privacy of the patient, however, must be preserved.
- Case 2: An organization requires customer data from several credit unions to create training data. The data will be used to train machine learning models looking for new insights. The customers, however, have not agreed for their data to be used.
- Case 3: An organization which must be compliant with GDPR, CCPA, or other privacy regulations requires to keep some information beyond the period that meets regulations.
- Case 4: An organization requires raw data to train their software for machine learning.
In all these cases, data forms an integral part of the source for continuing the business process or analysis. Additionally, only what was done is required in all the cases, who did it does not have any value in the data. In this case, the personal information about the individual users can be removed from the dataset. This removes the personal factor from the data and at the same time retains the value of the data from the business point of view. This data, since it does not have any private information, is also pulled from the legal requirements governing the data.
Thus, revisiting the business cases, the data in each case can be valuable after processing it in the following ways:
- In case 1, all private information can be removed from the data and sent to the research lab for analysis.
- In case 2, all private information must be scrubbed from the data before the data can be used. After scrubbing, the data will be generalized in such a way that the data can be used for machine learning, since no one will be able to identify individuals in the anonymized dataset.
- In case 3, by anonymizing the data, the Data Subject is removed, and the data is no longer in scope for privacy compliance.
- In case 4, a generalized form of the data can be obtained.
Removing data manually to remove private information would take a lot of time and effort, especially if the dataset consists of millions of records, with file sizes of several GBs. Running a find and replace or just deleting columns might remove important fields that might make the dataset useless for further analysis. Additionally, a combination of remaining attributes (such as, date of birth, postcode, gender) may be enough to re-identify the data subject.
Protegrity Anonymization applies various privacy models to the data, removing direct identifiers and applying generalization to the remaining indirect identifiers, to ensure that no single data subject can be identified.
1.2 - Data security and data privacy
Understand the difference between data security and data privacy.
Most organizations understand the need to secure access to personally identifiable information. Sensitive values in records are often protected at rest (storage), in transit (network) and in use (fine-grained access control), through a process known as de-identification. De-Identification is a spectrum, where data security and data privacy issues must be balanced with data usability.

Pseudonymization
Pseudonymization is the process of de-identification by substituting sensitive values with a consistent, non-sensitive value. This is most often accomplished through encryption, tokenization, or dynamic data masking. Access to the process for re-identification (decryption, detokenization, unmasking) is controlled, so that only users with a business requirement will see the sensitive values.
Advantages:
- The original data can be obtained again.
- Only authorized users can view the original data from protected data.
- It processes each record and cell (intersection of a record and column) individually.
- This process is faster than anonymization.
Disadvantages
Access-Control Dependency: Pseudonymized data remains linkable to its original form if authorized users have access to the decryption or tokenization mechanism, which requires strict security controls.
Regulatory Considerations: Since pseudonymization allows re-identification under controlled access, it may not meet the same compliance exemptions as anonymization under certain privacy regulations.
Increased Security Overhead: Additional security measures are needed to protect the tokenization keys and manage access controls, ensuring only authorized users can reverse the process.
Limited Protection for Quasi-Identifiers: While direct identifiers are typically tokenized, quasi-identifiers (e.g., birthdates, ZIP codes) may still pose a re-identification risk if not generalized or redacted.
Using tokenized data might make analysis incorrect and or less useful (e.g., changing time related attributes).
The tokenized data is still private from the users perspective.
Further processing is required to retrieve the original data.
Additional security is required to secure the data and the keys used for working with data.
Anonymization
Anonymization is the process of de-identification which irreversibly redacts, aggregates, and generalizes identifiable information on all data subjects in a dataset. This method ensures that while the data retains value for various use cases, analytics, data democratization, sharing with 3rd parties, and so on, the individual data subject can no longer be identified in the dataset.
Advantages:
- Anonymized datasets can be used for analysis with typically low information loss.
- An individual user cannot be identified from the anonymized dataset.
- Enables compliance with privacy regulation.
Disadvantages
- Being an irreversible process, the original data cannot be obtained again. This is required for some use cases.
- This process is slower than pseudonymization because multiple passes must be made on the set to anonymize it.
1.3 - Importance and types of data
A record consists of all the information pertaining to a user. This record consists of different fields of information, such as, first name, last name, address, telephone number, age, and so on.
These records might be linked with other records, such as, income statements or medical records to provide valuable information. The various fields as a whole, called a record, is private and is user-centric. However, the individual fields may or may not be personal. Accordingly, based on the privacy level, the following data classifications are available:
- Direct Identifier: Identity Attributes can identify an individual with the value alone. These attributes are unique to an individual in a dataset and at times even in the world. It is personal and private to the user. For example, name, passport, Social Security Number (SSN), mobile number, and so on.
- Quasi-Identifier or Indirect Identifier: Quasi-Identifying Attributes are identifying characteristic about a data subject. However, you cannot identify an individual with the quasi-identifier alone. For example, date of birth or an address. Moreover, the individual pieces of data in a quasi-identifier might not be enough to identify a single individual. Take the example of date of birth, the year might be common to many individuals and would be difficult to narrow down to a single individual. However, if the dataset is small, then it might be easy to identify an individual using this information.
- Data about data subject: Data about the data subject is typically the data that is being analyzed. This data might exist in the same table or a different related table of the dataset. It provides valuable information about the dataset and is very helpful for analysis. This data may or might not be private to an individual. For example, salary, account balance, or credit limit. However, like quasi-identifiers, in a small dataset, this data might be unique to an individual. Additionally, this data can be classified as follows:
- Sensitive Attributes: This data may disclose something like a health condition which in a small result set may identify a single individual.
- Insensitive Attributes: This data is not associated with a privacy risk and is common information, such as, the type of bank accounts in a bank, individual or business.
A sample dataset is shown in the following figure:

Based on the type of data, the columns in the above table can be classified as follows:
| Type | Field Names | Description |
|---|---|---|
| Direct Identifier | First Name, Last Name, Address with city and state, E-Mail Address, SSN / NID | The data in these fields are enough to identify an individual. |
| Quasi-Identifier | City, State, Date of Birth | The data in these fields could be the same for more than one individual. Note: Address could be a direct identifier if a single individual is present from a particular state. |
| Sensitive Attribute | Account Balance, Credit Limit, Medical Code | The data is important for analysis, however, in a small dataset it is easy to de-identify an individual. |
| Insensitive Attribute | Type | The data is general information making it difficult to de-identify an individual. |
1.4 - Data anonymization techniques
The privacy models are techniques for anonymizing data.
Important terminology
- De-identification: General term for any process of removing the association between a set of identifying data and the data subject.
- Pseudonymization: Particular type of data de-identification that both removes the association with a data subject and adds an association between a particular set of characteristics relating to the data subject and one or more pseudonyms.
- Anonymization: Process that removes the association between the identifying dataset and the data subject. Anonymization is another subcategory of de-identification. Unlike pseudonymization, it does not provide a means by which the information may be linked to the same person across multiple data records or information systems. Hence reidentification of anonymized data is not possible.
Note: As defined in ISO/TS 25237:2008.
Anonymization models
k-anonymity: K-anonymity can be described as a “hiding in the crowd”. Each quasi-identifier tuple occurs in at least k records for a dataset with k-anonymity. Definition: if each individual is part of a larger group, then any of the records in this group could correspond to a single person.
l-diversity: The l-diversity model is an extension of the k-anonymity and adds the promotion of intra-group diversity for sensitive values in the anonymization mechanism. The l-diversity model handles some of the weaknesses in the k-anonymity model where protected identities to the level of k-individuals is not equivalent to protecting the corresponding sensitive values that were generalized or suppressed, especially when the sensitive values within a group exhibit homogeneity.
t-closeness: t-closeness is a further refinement of l-diversity. The t-closeness model extends the l-diversity model by treating the values of an attribute distinctly by taking into account the distribution of data values for that attribute.
1.5 - How Protegrity Anonymization Works
Protegrity Anonymization takes as input a dataset, removes direct identifiers, transforms quasi identifiers, and applies privacy models, and outputs an anonymized dataset. Additionally, the three privacy models are used to calculate the risk of re-identification. They also generalize and remove direct identifiers.
Protegrity Anonymization is a software solution that processes data by removing personal information and transforming the remaining details to protect privacy.
In simple terms, it takes raw data as input, applies techniques like generalization and summarization, and outputs anonymized data that can still be used for analysis—without revealing individual identities. The following figure illustrates this process.

As shown in the above image, a sample table is fed as input into Protegrity Anonymization. The private data that can be used to identify a particular individual is removed from the table. The final table with anonymized information is provided as output. The output table shows data loss due to column and row removals during Anonymization. This data loss is necessary to mitigate the risk of de-identification.
The anonymized data is used for analytics and data sharing. However, a standard set of attacks is defined to assess the effectiveness of Anonymization against different attack vectors. The de-identification attacks can be from a prosecutor, journalist, or marketer. The prosecutor’s attack is known as the worst case attack since the target individual is known.
- In prosecutor, the attacker has prior knowledge about a specific person whose information is present in the dataset. The attacker matches this pre-existing information with the information in the dataset and identifies an individual.
- In journalist, the attacker uses the prior information that is available. However, this information might not be enough to identify a person in the dataset. Here, the attacker might find additional information about the person using public records and narrow down the records to de-identify the individual.
- In marketer, the attacker tries to de-identify as many people as possible from the dataset. This is a hit or miss strategy and many individuals identified might be incorrect. However, even though a lot of individuals de-identified might be incorrect, it is an issue if even few individuals are identified.
For more information about risk metrics, refer to Protegrity Anonymization Risk Metrics.
2 - About Protegrity Anonymization
Protegrity Anonymization, developed by Protegrity, assesses the reidentification risk of datasets containing personal data.
Protegrity Anonymization allows processing of the datasets via generalization, to ensure the risk of reidentification is within tolerable thresholds. An example of this generalization process is that instead of a data subject being 32 years old, the anonymization process might need to generalize age to be a range between 30-35 years old. The anonymization process will have an impact on data utility, but Protegrity Anonymization optimizes this fundamental privacy-utility trade-off to ensure maximum data quality within the privacy goals. This trade-off can be further optimized via the importance parameter, later described.
Protegrity Anonymization leverages Kubernetes for data anonymization at scale and it provides instructions and support for deployment and usage on AWS EKS and Microsoft Azure AKS.
Note: Currently, the Protegrity Anonymization has been tested only on AWS EKS and Microsoft Azure AKS.
2.1 - Protegrity Anonymization Architecture
Communication between Protegrity Anonymization, the Dask Scheduler, and Dask Workers is detailed in this section.
An overview of the communication is shown in the following figure.

Protegrity Anonymization leverages several pods on Kubernetes. The first pod contains the Dask Scheduler. This pod connects to the Dask Worker pod over TLS. If Protegrity Anonymization requires more processing to work with the dataset, then based on the configuration, additional Dask Worker pods can be added. Protegrity Anonymization Web Server performs the processing using an internal Database Server for holding the data securely. The anonymization request is received by the Nginx-Ingress component. Ingress forwards the request to the Anon-App. The Anon-App processes the request and submits the tasks to the Dask Cluster. The Dask Scheduler schedules task on the Dask Workers The Anon-app stores the metadata about the job in the Anon-DB container. Next, the Dask Workers read, write, and process the data that is stored in the Anon-Storage, the request stream, or the Cloud storage. The Anon-Storage uses MinIO for storing data. The Anon-workstation comprises of the Jupyter notebook environment with Anon preinstalled. The communication between the Dask Scheduler and the Dask Workers is handled by the Dask Scheduler. The Dask workers run on random ports.
The user accesses Protegrity Anonymization using HTTPS over the port 443. The user requests are directed to an Ingress Controller, and the controller in turn communicates with the required pods using the following ports:
- 8090: Ingress controller and the Protegrity Anonymization API Web Service
- 8786: Ingress controller and the Dask Scheduler
- 8100: Ingress controller and MinIO
- 8888: Ingress controller and the Jupyter Lab service
Protegrity Anonymization leverages Kubernetes for data anonymization at scale and it provides instructions and support for deployment and usage on AWS EKS and Microsoft Azure AKS.
2.2 - Understanding Protegrity Anonymization Components
Protegrity Anonymization components are leveraged to anonymize datasets.
Protegrity Anonymization is composed of the following main components:
- Protegrity Anonymization REST Server: This core component exposes a REST interface through which clients can interact with the anonymization service. Protegrity Anonymization uses an in-memory task queue and stores anonymized datasets and respective metadata on persistent storage. Anonymization tasks are submitted to a queue and are handled in first-in first out fashion. Protegrity Anonymization invokes the Dask Scheduler to perform the anonymization task.
Note: Only one anonymization task is executed at a time in Protegrity Anonymization.
- REST Client: The client connects to the Protegrity Anonymization REST Server using an API tool, such as Postman, to create, send, and receive the anonymization request. It also provides a Swagger interface detailing the APIs available. The Swagger interface can also be used as a REST client for raising API requests.
- Python SDK: It is the Python programmatic interface used to communicate with the REST server.
- Anon-Storage: It is used to read data from and write data to the storage. It uses the MinIO framework to perform file operations.
- Anon-DB: It is a PostgreSQL database that is used to store metadata related to anonymization jobs.
- Dask Scheduler: This component analyzes the work load and distributes processing of the dataset to one or more Dask Workers. The scheduler can invoke additional workers or reduce the number of workers required for processing the task. The Dask Scheduler analyzes the dataset as a whole and allocates a small chunk of the dataset to each worker.
- Dask Worker: This component is registered with the Dask Scheduler and processes the dataset. It is the Dask library that handles the interaction and interface with the data sets and the storage. Protegrity Anonymizationsupports cloud storage, MinIO, and other storages compatible with Kubernetes. The repository can also be kept outside the container. The Dask Worker works on a subset of the entire data.
- Jupyter Lab Workstation: The Jupyter Lab notebook provides a ready environment to run an anonymization request using Protegrity Anonymization with minimum configuration. To use the notebook, you open the notebook, update the required parameters in the notebook, and run the request.
3 - Installing Protegrity Anonymization
Protegrity Anonymization is available as a REST API that can be installed and run from Kubernetes environments on AWS and Azure. After installing the REST API, you can use anonymize your data via this REST API or by leveraging a Python SDK. We also offer a local docker deployment mode.
Ensure that the following prerequisites are met:
- The user should be well versed with using container orchestration services like Kubernetes in AWS and Azure.
- Access as an Admin user is available for the cloud service used.
- A minimum of 2 nodes with the following minimum configuration for Kubernetes deployments:
- RAM: 16 GB
- CPU: 8 core
- Hard Disk: Unlimited
- For the local docker deployment mode, a machine with the following specifications will enable you to experiment with the main features of Protegrity Anonymization:
- RAM: 16 GB
- CPU: 8 core
- Hard Disk: 30GB
3.1 - Using Cloud Services
Protegrity Anonymization can be hosted in the Kubernetes service provided by various cloud platforms, such as AWS and Azure. Use the content provided in the following sections for configuring Protegrity Anonymization in the different cloud services.
Note: Protegrity Anonymization might be compatible with other cloud providers, other than Azure and AWS, but it has not been tested on additional cloud providers.
3.1.1 - Protegrity Anonymization on AWS
Set up and use Protegrity Anonymization on AWS.
Installation of Protegrity Anonymization requires working with the following AWS services: Elastic Container Registry, Elastic Kubernetes Service, EC2. You’ll need an administrator to be able to grant permissions for these services to interact with each other. Proficiency with helm, kubectl and eksctl is strongly recommended.
Create a base machine
We recommend creation of a virtual machine on EC2, from which you’ll interact with all the necessary services to standup Protegrity Anonymization. The following installation instructions have been tested with a Linux machine (Ubuntu 24.04). The following steps assume creation of such a virtual machine.
Install the latest AWS CLI on your virtual machine.
For more information about the installation steps, refer to Installing or updating to the latest version of the AWS CLI.
From your virtual machine, login to your account by running and completing the steps presented by:
aws configureInstall Kubectl version 1.32 by following the instructions on the link below. Kubectl enables you to run commands from the virtual machine so that you can communicate with the Kubernetes cluster. Follow the instructions on this same page to install eksctl.
Note: For more information about installing kubectl, refer to Install eksctl.
- Install the Helm client version 3.17.2 for working with Kubernetes clusters.
Note: For more information about installing the Helm client, refer to Installing Helm.
- Install Docker engine 28.0.4.
Note: For more information about installing the Docker engine 28.0.4, refer to Install Docker Engine. Make sure to run the post-installation steps as well.
- Create a key pair, by accessing the Key Pairs service on the EC2 service on AWS (ED25519 key pair type and .pem key file format). You’ll need reference this key pair on the cluster-aws.yaml file, later described. This will enable you to authenticate into the k8s cluster.
Create a Container Registry
To create a container registry leverage the Elastic Container Registry service on AWS and configure it according to your environment requirements and constraints.
Note: For more information about creating the Elastic Container Registry, refer to Amazon Elastic Container Registry Documentation.
Deploy Protegrity Anonymization on EKS
Note: Because the installation script changes parameter values of configuration files, if you make a mistake during installation you might end up with inconsistent values for the same parameters. In that case, to attempt installation again, we recommend that you run step 3 again.
Make sure to read the optional section for additional configuration options Anonymization on AWS or Azure.
Obtain and copy Protegrity Anonymization’s installation artifact ANON-API_RHUBI-ALL-64_x86-64_Generic.K8S_1.3.0.tgz into a directory on your base machine.
From that directory, run
tar -xvzf ANON-API_RHUBI-ALL-64_x86-64_Generic.K8S_1.3.0.tgz.Edit the install.properties file and follow additional instructions on that file. You’ll encounter global configurations and Cloud specific sections.
Edit the cluster-aws.yaml file according to your environment. The mandatory fields that you need to edit are flagged with <>. You may want to change other fields, such as cluster name. Depending on your workloads, you may also want to change the maxSixe of the nodeGroups section.
You’ll find a AWS_Install.sh file. Make sure to read the script before you run it, since it contains delete operations, namely deleting Kubernetes namespaces and auxiliary files.
Run
AWS_Install.sh. This will generally take less than 30 minutes to deploy Protegrity Anonymization. At the end of the script, you’ll be shown an IP address of Ingress which you’ll need to edit your hosts file, like soXX.XX.XX.XX anon.protegrity.com. To get additional information about the deployment, you may leverage the following commands (these are the default namespaces defined in install.properties):kubectl get pods -n anon-ns kubectl get svc -n anon-ns kubectl get pods -n nginx kubectl get svc -n nginxYou may now use Protegrity Anonymization. Use the URLs provided here for viewing the Protegrity Anonymization service and pod details after you have successfully deployed Protegrity Anonymization . For more information about updating the hosts file, refer to step 2 of the section Enabling custom certificates from SDK.
- Open a web browser. Use the following URL to view basic information about Protegrity Anonymization: https://anon.protegrity.com/.
- Use the following URL to view the Swagger UI. The various Protegrity Anonymization APIs are visible on this page: https://anon.protegrity.com/anonymization/api/v1/ui.
- Go to https://anon.protegrity.com/lab, where you’ll have a Jupyter Lab environment available to quickly experiment with Protegrity Anonymization. Inside the folder Anonymization-engine, you’ll find a Jupyter Notebook with several examples.
- Use the following URL to view the contractual information for Protegrity Anonymization: https://anon.protegrity.com/about.
- Visit https://anon.protegrity.com/sdkapi and you’ll find a link to download the python SDK.
- Refer to the Sample Requests for Protegrity Anonymization section for code snippets.
Note: Do not stop or delete the running Dask scheduler or the Protegrity Anonymization API container service, which might lead to loss of the respective data and logs.
Uninstall
From the same Virtual machine from where you installed the product, run the following commands in accordance with what you specified in the install.properties file
- List deployments with:
helm list -n anon-ns helm list -n nginx - Uninstall via:
helm uninstall <name of anon deployment> -n anon-ns #eg: helm uninstall anon -n anon-ns helm uninstall <name of nginx deployment> -n nginx #eg: helm uninstall ingress-nginx -n nginx - You may monitor the status of the uninstall with:
kubectl get pods -n anon-ns kubectl get pods -n nginx kubectl get pv -n anon-ns kubectl get pvc -n anon-ns - Wait for the deletion of the pods.
- If you face an issue with pv and or pvc at this stage, run:
# ----- anon-db-pvc ----- kubectl patch pvc anon-db-pvc -n anon-ns -p '{"metadata":{"finalizers":null}}' kubectl patch pv anon-db-pv -n anon-ns -p '{"metadata":{"finalizers":null}}' kubectl delete pvc anon-db-pvc -n anon-ns --ignore-not-found kubectl delete pv anon-db-pv --grace-period=0 --force --ignore-not-found # ----- anon-nb-pvc ----- kubectl patch pv anon-nb-pv -n anon-ns -p '{"metadata":{"finalizers":null}}' kubectl patch pvc anon-nb-pvc -n anon-ns -p '{"metadata":{"finalizers":null}}' kubectl delete pv anon-nb-pv --grace-period=0 --force --ignore-not-found kubectl delete pvc anon-nb-pvc -n anon-ns --ignore-not-found # ----- anon-storage-pvc ----- kubectl patch pvc anon-storage-pvc -n anon-ns -p '{"metadata":{"finalizers":null}}' kubectl patch pv anon-storage-pv -n anon-ns -p '{"metadata":{"finalizers":null}}' kubectl delete pvc anon-storage-pvc -n anon-ns --ignore-not-found kubectl delete pv anon-storage-pv --grace-period=0 --force --ignore-not-found - Delete the EKS cluster.
- The product installation will create 3 Volumes, which you’ll need to delete (e.g., from the AWS EC2 console). By default, given the properties in install.properties, those volumes are called: deployment_anon_storage; deployment__anon_db; deployment_anon_workstation.
3.1.2 - Protegrity Anonymization on Azure
Set up and use Protegrity Anonymization on Azure.
Installation of Protegrity Anonymization requires working with the following Microsoft Azure services: Container Registries, Kubernetes Services, Disks. You’ll need an administrator to be able to grant permissions for these services to interact with each other. Proficiency with helm and kubectl is strongly recommended.
Note: For ease of configuration and installation, we recommend that you work within your target Subscription, with the same Resource group, Virtual network, Subnet, and Zone.
Create a base machine
We recommend creation of a Virtual machine on Microsoft Azure, from which you’ll interact with all the necessary services to standup Protegrity Anonymization. The following installation instructions have been tested with a Linux machine (Ubuntu 24.04). The following steps assume creation of such a Virtual machine.
Install and initialize the Azure CLI on your virtual machine.
For more information about the installation steps, refer to How to install the Azure CLI.
From your virtual machine, login to your account by running:
az loginFollow the steps presented by the wizard to complete authentication.
Install Kubectl version 1.32.3. Kubectl enables you to run commands from the virtual machine so that you can communicate with the Kubernetes cluster.
Note: For more information about installing kubectl, refer to Install Tools.
- Install the Helm client version 3.17.2 for working with Kubernetes clusters.
Note: For more information about installing the Helm client, refer to Installing Helm.
- Install Docker engine 28.0.4.
Note: For more information about installing the Docker engine 28.0.4, refer to Install Docker Engine. Make sure to run the post-installation steps as well.
Create a Container Registry
To create a container registry leverage the Container registries service on Azure and configure it according to your environment requirements and constraints.
Note: For more information about creating the Azure Container Registry, refer to Create an Azure container registry using the Azure portal.
Create a Kubernetes cluster
This section describes how to create a Kubernetes Cluster on Azure.
Note: The steps listed in this procedure for creating a Kubernetes cluster are for reference use. Be advised of potential differences between the screen captures here presented and what you’ll encounter on the user interface on the Azure user interface.
To create a Kubernetes cluster via the user interface:
Log in to the Azure Cloud and access Kubernetes services.
CLick on Create and the following options will appear:
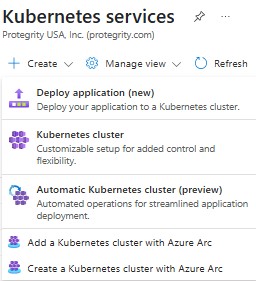
Click Kubernetes cluster and the Create Kubernetes cluster screen appears.
We’ll detail the basic and mandatory configurations to launch a cluster (of type private) for the Anonymization. In Basics tab, Subscription field select the desired subscription where you intend to deploy Protegrity Anonymization. In the Resource group field, select the required resource group. On Cluster preset configuration choose the preset that best suits your needs. In the Kubernetes cluster name field, specify a name for your Kubernetes cluster. Select 1.32.3 as the Kubernetes version. Retain the default values for the remaining settings.
In the Node pools tab:
- Under Node pools by default an agentpool is created with System Mode. System node pools are preferred for system pods.
- Click Add node pool, select a name for your Node pool name, select User Mode user node pools are preferred for your application pods, Ubuntu Linux OS SKU, Availability zones according to your regions and zones, Node size of at least 4 vCPUs and 16 RAM(GiB), Minimum node count of at least 2, and Maximum node count of 5 strikes a good balance. Everything else can be left with default values.
- In the Networking tab:
- Under Private access, select Enable private cluster.
- Under Container networking, select Azure CNI Node Subnet. Enable Bring your own Azure virtual network. On Virtual network select your virtual network and subnet for the Cluster subnet.
In the Integrations tab, choose the name of your Container Registry, previously created.
Click Review + create to validate the configuration.
Click Create to create the Kubernetes cluster.
The Kubernetes cluster is created.
Note: Protegrity Anonymization leverages volume mounts on Kubernetes. Be advised that this will require interaction between Kubernetes and Disks. Once the cluster has been created you must ensure the cluster managed identity has the necessary permissions to mount storage. You can find more information here. You may create your own customized set of permissions or use a default Azure role of Virtual Machine Contributor and add the Kubernetes cluster managed identity directly to the respective resource group.
Deploy Protegrity Anonymization on AKS
Note: Because the installation script changes parameter values of configuration files, if you make a mistake during installation you might end up with inconsistent values for the same parameters. In that case, to attempt installation again, we recommend that you run step 3 again.
Make sure to read the optional section for additional configuration options Anonymization on AWS or Azure.
Obtain and copy Protegrity Anonymization’s installation artifact ANON-API_RHUBI-ALL-64_x86-64_Generic.K8S_1.3.0.tgz into a directory on your base machine.
From that directory, run
tar -xvzf ANON-API_RHUBI-ALL-64_x86-64_Generic.K8S_1.3.0.tgz.Edit the install.properties file and follow additional instructions on that file. You’ll encounter global configurations and Cloud specific sections.
You’ll find a Azure_install.sh file. Make sure to read the script before you run it, since it contains delete operations, namely deleting Kubernetes namespaces and auxiliary files.
Run
Azure_install.sh. This will generally take less than 30 minutes to deploy Protegrity Anonymization. At the end of the script, you’ll be shown an IP address of Ingress which you’ll need to edit your hosts file, like soXX.XX.XX.XX anon.protegrity.com. To get additional information about the deployment, you may leverage the following commands (these are the default namespaces defined in install.properties):kubectl get pods -n anon-ns kubectl get svc -n anon-ns kubectl get pods -n nginx kubectl get svc -n nginxYou may now use Protegrity Anonymization. Use the URLs provided here for viewing the Protegrity Anonymization service and pod details after you have successfully deployed the Protegrity Anonymization. For more information about updating the hosts file, refer to step 2 of the section Enabling custom certificates from SDK.
- Open a web browser. Use the following URL to view basic information about Protegrity Anonymization: https://anon.protegrity.com/.
- Use the following URL to view the Swagger UI. The various Protegrity Anonymization APIs are visible on this page: https://anon.protegrity.com/anonymization/api/v1/ui.
- Go to https://anon.protegrity.com/lab, where you’ll have a Jupyter Lab environment available to quickly experiment with Protegrity Anonymization. Inside the folder Anonymization-engine, you’ll find a Jupyter Notebook with several examples.
- Use the following URL to view the contractual information for Protegrity Anonymization: https://anon.protegrity.com/about.
- Visit https://anon.protegrity.com/sdkapi and you’ll find a link to download the python SDK. Install it and use it with python 3.12 in your environment to interact with Protegrity Anonymization.
- Refer to the Sample Requests for Protegrity Anonymization section for code snippets.
Note: Do not stop or delete the running Dask scheduler or the Protegrity Anonymization API container service, which might lead to loss of respective data and logs.
Uninstall
From the same Virtual machine from where you installed the product, run the following commands in accordance with what you specified in the install.properties file
- List deployments with:
helm list -n anon-ns helm list -n nginx - Uninstall via:
helm uninstall <name of anon deployment> -n anon-ns #eg: helm uninstall anon -n anon-ns helm uninstall <name of nginx deployment> -n nginx #eg: helm uninstall ingress-nginx -n nginx - You may monitor the status of the uninstall with:
kubectl get pods -n anon-ns kubectl get pods -n nginx kubectl get pv -n anon-ns kubectl get pvc -n anon-ns - Wait for the deletion of the pods.
- If you face an issue with pv and or pvc at this stage, run:
# ----- anon-db-pvc ----- kubectl patch pvc anon-db-pvc -n anon-ns -p '{"metadata":{"finalizers":null}}' kubectl patch pv anon-db-pv -n anon-ns -p '{"metadata":{"finalizers":null}}' kubectl delete pvc anon-db-pvc -n anon-ns --ignore-not-found kubectl delete pv anon-db-pv --grace-period=0 --force --ignore-not-found # ----- anon-nb-pvc ----- kubectl patch pv anon-nb-pv -n anon-ns -p '{"metadata":{"finalizers":null}}' kubectl patch pvc anon-nb-pvc -n anon-ns -p '{"metadata":{"finalizers":null}}' kubectl delete pv anon-nb-pv --grace-period=0 --force --ignore-not-found kubectl delete pvc anon-nb-pvc -n anon-ns --ignore-not-found # ----- anon-storage-pvc ----- kubectl patch pvc anon-storage-pvc -n anon-ns -p '{"metadata":{"finalizers":null}}' kubectl patch pv anon-storage-pv -n anon-ns -p '{"metadata":{"finalizers":null}}' kubectl delete pvc anon-storage-pvc -n anon-ns --ignore-not-found kubectl delete pv anon-storage-pv --grace-period=0 --force --ignore-not-found - Delete the AKS cluster.
- The product installation will create 3 Disks, which you’ll need to delete (e.g., from the Azure console). By default, given the properties in install.properties, those volumes are called: deployment_anon_storage; deployment__anon_db; deployment_anon_workstation.
3.1.3 - Optional steps for AWS and Azure
Optional steps for setting up Protegrity Anonymization on AWS or Azure.
Optional - Using custom certificates in Ingress
Protegrity Anonymization uses certificates for secure communication with the client. You can use the certificates provided by Protegrity or use your own certificates. Complete the configurations provided in this section to use your custom certificates with the Ingress Controller.
Ensure that the certificates and keys are in the .pem format.
Note: Skip the steps provided in this section if you want to use the default Protegrity certificates for Protegrity Anonymization.
Log in to the Base Machine where Ingress in configured and open a command prompt.
Copy your certificates to the Base Machine.
Create a Kubernetes secret of the server certificate using the following command. The namespace used must be the same where Protegrity Anonymization application is to be deployed.
kubectl create secret --namespace <namespace-name> generic <secret-name> --from-file=tls.crt=<path_to_certificate>/<certificate-name> --from-file=tls.key=<path_to_certificate>/<certificate-key>For example,
kubectl create secret --namespace anon-ns generic anon-protegrity-tls --from-file=tls.crt=/tmp/cust_cert/anon-server-cert.pem --from-file=tls.key=/tmp/cust_cert/anon-server-key.pemCreate a Kubernetes secret of the CA certificate using the following command. The namespace used must be the same where the Protegrity Anonymization application is to be deployed.
kubectl create secret --namespace <namespace-name> generic <secret-name> --from-file=ca.crt=<path_to_certificate>/<certificate-name>For example,
kubectl create secret --namespace anon-ns generic ca-protegrity --from-file=ca.crt=/tmp/cust_cert/anon-ca-cert.pemOpen the values.yaml file.
Add the following host and secret code for the Ingress configuration at the end of the values.yaml file.
## Refer section in documentation for setting up and configuring NGINX-INGRESS before deploying the application.
ingress:
  ## Add host section with the hostname used as CN while creating server certificates.
  ## While creating the certificates you can use *.protegrity.com as CN and SAN used in below example
  host: anon.protegrity.com                  # Update the host according to your server certificates.

  ## To terminate TLS on the Ingress Controller Load Balancer.
  ## K8s TLS Secret containing the certificate and key must also be provided.
  secret: anon-protegrity-tls                # Update the secretName according to your secretName.

  ## To validate the client certificate with the above server certificate
  ## Create the secret of the CA certificate used to sign both the server and client certificate as shown in example below
  ca_secret: ca-protegrity                    # Update the ca-secretName according to your secretName.

  ingress_class: nginx-anon
Note: Ensure that you replace the host, secret, and ca_secret attributes in the values.yaml file with the values as per your certificate.
For more information about using custom certificates, refer to Enabling custom certificates from SDK.
Optional - MinIO
MinIO uses access keys and secret for performing file operations. Protegrity provides a default set of credentials that are stored as part of the secret storage-creds. If you are creating your own secret, then, update the existingSecret section on the values.yaml file inside the Anon-helm folder.
    ```
    anonstorage:
      ## Refer the following command for creating your own secret.
      ## CMD: kubectl create secret generic my-minio-secret --from-literal=rootUser=foobarbaz --from-literal=rootPassword=foobarbazqux
      existingSecret: ""                # Supply your secret Name for ignoring below default credentials.
      bucket_name: "anonstorage"        # Default bucket name for minio
      secret:
        name: "storage-creds"           # Secret to access minio-server
        access_key: "anonuser"          # Access key for minio-server
        secret_key: "protegrity"        # Secret key for minio-server
    ```
Optional - Setting up logging for Protegrity Anonymization
Protegrity Anonymization centralizes logs into a file by leveraging the script Anon_logs.sh (edit according to your requirements). If you haven’t configured log forwarding, this is a quick way of obtaining logs from Protegrity Anonymization.
- Navigate to the base machine from where you deployed Protegrity Anonymization, which contains installation files.
- Use the
Anon_logs.shscript to pull the logs from all the pods. You may need to assign execute permissions to be able to runAnon_logs.sh. you’ll be prompted for the namespace where Anonymization is deployed.chmod +x Anon_logs.sh ./<path_to_script>/Anon_logs.sh
3.2 - Installing using Docker containers
Complete the following steps to run Protegrity Anonymization on a host machine.
Ensure that you have completed the following prerequisites before deploying the Protegrity Anonymization.
- Install Docker engine 28.0.4.
Note: For more information about installing the Docker engine 28.0.4, refer to Install Docker Engine. Make sure to run the post-installation steps as well.
To install Protegrity Anonymization:
Log in to the machine as an administrator.
Obtain and copy Protegrity Anonymization’s installation artifact ANON-API_RHUBI-ALL-64_x86-64_Generic.K8S_1.3.0.tgz into a directory on your base machine.
From that directory, run
tar -xvzf ANON-API_RHUBI-ALL-64_x86-64_Generic.K8S_1.3.0.tgz.Run Local_docker_install.sh.
Note: Depending on your workload, you may want to edit the docker-compose file, namely pty-worker and increase the replicas parameter.
The previous script will launch several containers. Retrieve the IP of the nginx container by running
docker inspect -f '{{range .NetworkSettings.Networks}}{{.IPAddress}}{{end}}' <container ID>and map it in your hosts file, like so:
XX.XX.XX.XX anon.protegrity.com
- Open a web browser. Use the following URL to view basic information about Protegrity Anonymization: https://anon.protegrity.com/.
- Use the following URL to view the Swagger UI. The various Protegrity Anonymization APIs are visible on this page: https://anon.protegrity.com/anonymization/api/v1/ui.
- Go to https://anon.protegrity.com/lab, where you’ll have a Jupyter Lab environment available to quickly experiment with Protegrity Anonymization. Inside the folder Anonymization-engine, you’ll find a Jupyter Notebook with several examples.
- Use the following URL to view the contractual information for Protegrity Anonymization: https://anon.protegrity.com/about.
- Visit https://anon.protegrity.com/sdkapi and you’ll find a link to download the python SDK.
- Refer to the Sample Requests for Protegrity Anonymization section for code snippets.
3.3 - Installing the Protegrity Anonymization Python SDK
Complete the steps provided in this section to install the Protegrity Anonymization Python SDK in your environment. Protegrity Anonymization communicates with the Protegrity Anonymization REST API to anonymize data.
Prerequisites for deploying Protegrity Anonymization
Protegrity Anonymization Python SDK is provided as a wheel file that may be installed using pip. Additionally, ensure that the following prerequisites are met:
Python 3.12 is installed.
Protegrity Anonymization REST API is installed.
For more information about the installation steps, refer to the section Installing the Protegrity Anonymization REST API.
Note: If administrator has not updated the DNS entry for ANON REST API service, then map the hostname with the IP address of Anon Service in the hosts file of the system.
Installing Protegrity Anonymization Python
After having installed Protegrity Anonymization via one of the several installation methods, you may now leverage the provided Python SDK, provided as a wheel file, to interact with the product using Python. Install the Wheel file provided using pip to use the Protegrity Anonymization SDK:
Install Python 3.12 in the environment where you mapped the IP address of Ingress to anon.protegrity.com.
Obtain the whl file via the instructions given on the several installation methods of Protegrity Anonymization.
Instal the whl file via
pip install anonsdk_dir-1.3.0-py3-none-any.whlYou can now import and use the Protegrity Anonymization SDK using Python in your environment.
Refer to the Sample Requests for Protegrity Anonymization section for code snippets.
Optional - Enabling custom certificates from SDK
Protegrity Anonymization SDK uses certificates for secure communication with the client. You can use the certificates provided by Protegrity or use your own certificates. Complete the configurations provided in this section to use your custom certificates with the SDK.
Ensure that the certificates and keys are in the .pem format.
Note: If you want to use the default Protegrity certificates for the Protegrity Anonymization SDK, then skip the steps to set up the certificates provided in this section.
Complete the configuration on the machine where the Protegrity Anonymization SDK SDK will be used.
Create a directory that is named .pty_anon in the directory from where the SDK will run.
Create certs in the .pty_anon directory.
Create generated-certs in the certs directory.
Create ca-cert in the generated-certs directory.
Create cert in the generated-certs directory.
Create key in the generated-certs directory.
Copy the client certificates and key to the respective directories in the .pty_anon/certs/generated-certs directory.
The directory structure will be as follows:
.pty_anon/certs/generated-certs/ca-cert/CA-xyz-cert.pem
.pty_anon/certs/generated-certs/key/xyz-key.pem
.pty_anon/certs/generated-certs/cert/xyz-cert.pem
Make sure that you are using valid certificates.
Create a config.yaml file in the .pty_anon directory with the following Ingress Endpoint defined under CLUSTER_ENDPOINT. The BUCKET_NAME, ACCESS_KEY, and SECRET_KEY are the default details that are used to communicate with the MinIO container for reading and writing files from SDK.
STORAGE:
  CLUSTER_ENDPOINT: https://**anon.protegrity.com**/
  BUCKET_NAME: 'anonstorage'
  ACCESS_KEY: 'anonuser'
  SECRET_KEY: 'protegrity'
Note: Ensure that you replace anon.protegrity.com with your host name specified in values.yaml. Also, ensure that you update the default credentials if you have used your own secret.
Updating the hosts file.
Log in to the machine where Protegrity Anonymization SDK will be used.
Update the hosts file with the following code according to your setup.
For Kubernetes:
<LB-IP of Ingress> <host defined for ingress in values.yaml>For Docker:
<LB-IP of Ingress> <server_name defined in nginx.conf>For example,
XX.XX.XX.XX anon.protegrity.com
The URL can now be used while creating the Connection Object in the SDK, such as, conn = anonsdk.Connection("https://anon.protegrity.com/").
4 - Using Protegrity Anonymization
This section explains the REST APIs provided by Protegrity Anonymization. It also details the method for creating and running Protegrity Anonymization SDK requests.
4.1 - Creating Protegrity Anonymization requests
This section walks you through the process of creating Protegrity Anonymization requests to anonymize your data. It describes the steps for using the REST API and creating Protegrity Anonymization Python SDK requests.
A general overview of the process you need to follow to anonymize the data is shown in the following figure:

- Identify the dataset that needs to be anonymized.
- Analyze and classify the various fields available in the dataset. The following classifications are available:
- Direct Identifiers
- Quasi-Identifier
- Sensitive Attributes
- Non-Sensitive Attributes
- Determine the use case by specifying the data that is required for further analysis.
- Specify the quasi-identifiers and other fields that are not required in the dataset
- Specify the required anonymization methods for the data. Some commonly used methods are as follows:
- Generalization
- Micro-Aggregation
- Specify and measure the acceptable statistics and risk levels for the data fields for measuring the statistic before running the anonymization job.
Note: For more information about different risk levels for the data fields, refer to Anonymization models.
- Verify that the anonymized data satisfies the acceptable risk threshold level.
- Measure the quality of the anonymized data by comparing it with the original data. If the quality does not meet standards, then work on the data or drop the output.
- Save the anonymized data to an output file.
The anonymized data can now be used for further analysis and as input for machine learning softwares.
4.2 - Working with Protegrity Anonymization APIs
The various APIs provided with Protegrity Anonymization are described here.
For Protegrity Anonymization Python SDK, import the anonsdk module to install and use it. The AnonElement is an essential part of the Protegrity Anonymization Python SDK. For more information about the AnonElement object, refer to Understanding the AnonElement object.
The following table shows the list of REST APIs and Python SDK requests:
| List of APIs | REST APIs | Python SDK |
|---|---|---|
| Anonymization Functions | ||
| Anonymize | Yes | Yes |
| Apply Anonymize | Yes | Yes |
| Measure | Yes | Yes |
| Task Monitoring APIs | ||
| Get Job IDs | Yes | Yes |
| Get Job Status | Yes | Yes |
| Get Metadata | Yes | Yes |
| Abort | Yes | Yes |
| Delete | Yes | Yes |
| Statistics APIs | ||
| Get Exploratory Statistics | Yes | Yes |
| Get Risk Metric | Yes | Yes |
| Get Utility Statistics | Yes | Yes |
| Detection APIs | ||
| Get Data Domains | Yes | No*1 |
| Detect Anonymization Information | Yes | No*1 |
| Detect Classification | Yes | No*1 |
| Detect Hierarchy | Yes | No*1 |
*1 - It is not applicable for Protegrity Anonymization Python SDK.
4.2.1 - Understanding Protegrity Anonymization REST APIs
The following APIs are available with Protegrity Anonymization REST API. You can run these APIs using the command line with the curl command. You can also run them using the Swagger UI or a tool like Postman.
Before running the anonymization jobs mentioned in the Protegrity Anonymization REST APIs section below, the following pre-requisites must be completed:
- Ensure that Anonymization machine is set up and is configured as “https://anon.protegrity.com/".
For more information about setting up and configuring an Anonymization machine for AWS and Azure, refer to AWS and Azure. - Ensure that the disk is not full and enough free space is available for saving the destination file.
- Verify the destination file is not in use. Set the required permissions for creating and modifying the destination file.
- Verify that the anonymization job exists.
You can use different sample requests to build and run the anonymization APIs. For more information about the sample requests for REST APIs, refer to Sample Requests for Protegrity Anonymization.
Anonymization Functions
The Anonymization Functions APIs are used to run the anonymization job.
Anonymize
The Anonymize API is used to start an anonymize operation.
For more information about the anonymize API, refer to Submit a new anonymization job.
Note: When you run the job, an empty destination file is created. This file is created during processing for verifying the necessary destination permissions. Avoid using this file till the anonymization job is complete.
Ensure that the anonymized data file and the logs generated are moved to a different system before deleting your environment.
If the source file is larger than the maximum limit that is allowed on the Cloud environment, then run the anonymization request with “additional_properties”: { “single_file”: “no” }.
Apply Anonymize
The Apply Anonymize API is used as a template to anonymize additional entries. Using this API you can use the existing configuration to process additional data. This is especially useful in machine learning for training the system to anonymize new data points.
Note:In this API, privacy model parameters are ignored while performing the anonymization for the new entry.
For more information about the apply anonymize API, refer to Apply anonymization config to a given dataset.
Measure
The Measure API is used to measure or obtain anonymization result statics for different configurations before the actual anonymization job.
For more information about the anonymize API, refer to Submit a new anonymization Measure job.
Task Monitoring APIs
The Task Monitoring APIs are used to monitor the anonymization job. Use these APIs to obtain the job status, retrieve a job, and abort a job.
Get Job IDs
The Get Job ID API is used to get the job IDs of the last 20 anonymization operations that are running, in queue, or completed. You can then use the required job ID with the other APIs to work with the anonymization job.
For more information about the job ID API, refer to Obtain job ids.
Get Job Status
The Get Job Status API is used to get the status of an anonymize operation that is running, in queue, or complete. It shows the percentage of job completed. Use the information provided here to monitor if a job is running or stalled.
For more information about the job status API, refer to Obtain job status.
Get Job Status API Parameters
Use this API to get the status of an anonymize operation that is running. It shows the percentage of job completed. Use the information provided here to monitor if a job is running or stalled.
| Monitor Job Information | Description |
|---|---|
| Function | status() |
| Parameters | None |
| Return Type | A string with the status information in the JSON format. completed: This is information about the job, such as, data, statistics, summary, and time spent. id: This is the job ID. info: This is information about the job being processed, such as, the source and attributes for the job. running: This is the completion status of the jobs being processed. It shows the percentage of the job completed. status: This is the status of the job, such as, running or completed. Note: This API displays all the status of the job. To obtain the ID of a job, use job.id(). |
| Sample Request | job.status() |

Get Metadata
The Get Metadata API is used to retrieve the metadata for the existing job. This API is useful when you need to view the configuration available for a job. It displays the fields, configuration, and the data that is used to run the anonymization job.
For more information about the metadata API, refer to Obtain job metadata.
Retrieve Anonymized Data API Parameters
Use this API to retrieve the results of an anonymized job.
| Retrieve Job Information | Description |
|---|---|
| Function | result() |
| Parameters | None |
| Return Type | Returns the AnonResult element, which provides the DataFrame for the anon data. Note: The result.df will be None if you have overridden the resultstore as part of anonymize method. |
| Sample Request | job.result() Note: This is a blocking API and will stall processing till the job is complete. |

Abort
The Abort API is used to abort a running anonymization job. You can abort jobs if you need to modify the parameters or if the job is stalled or taking too much time or resources to process.
For more information about the abort API, refer to Abort a running anonymization job.
Note: After aborting the task, it might take time before all the running processes are stopped.
Abort API Parameters
Use this API to abort a running anonymize operation. You can abort jobs if you need to modify the parameters or if the job is stalled or taking too much time or resources to process.
| Abort Job Information | Description |
|---|---|
| Function | abort() |
| Parameters | None |
| Return Type | A string with the status of the abort request. |
| Sample Request | job.abort() |

Delete
The Delete API is used to delete an existing job that is no longer required.
For more information about the delete API, refer to Delete a job.
Statistics APIs
The Statistics APIs are used to obtain information about the anonymization data. Use these APIs to obtain the risk and utility information about the anonymization. The user needs to access these APIs to measure the utility benefits and risk of publishing the anonymized data. If these configurations are not satisfactory, then the user can re-submit the anonymization job after modifying some parameters based on these results.
Get Exploratory Statistics
The Get Exploratory Statistics API is used to obtain data distribution statistics about a completed anonymization job.
For more information about the exploratory statistic API, refer to Obtain the exploratory statistics.
Get Exploratory Statistics API Parameters
It provides information about both, the source and the target data distribution statistics.
| Exploratory Statistics Information | Description |
|---|---|
| Function | exploratoryStats() |
| Parameters | None |
| Return Type | A Pandas dataframe with the exploratory information of the source data and the anonymized data. |
| Sample Request | job.exploratoryStats() |
This provides the data distribution of the attribute, which is all unique values of an attribute and its occurrence count. This can be used to build data histogram of all attributes in the dataset. .The following values appear for the source and result set:

Get Risk Metric
The Get Risk Metric API is used to ascertain the risk of the source data and the anonymized data.
For more information about the risk metric API, refer to Obtain the risk statistics.
Get Risk Metric API Parameters
It shows the risk of the data against attacks such as journalist, marketer, and prosecutor.
| Risk Metric Information | Description |
|---|---|
| Function | riskStat() |
| Parameters | None |
| Return Type | A Pandas dataframe with the source data and the anonymized data privacy risk information. Note: You can customize the riskThreashold as part of AnonElement configuration. |
| Sample Request | job.riskStat() |
The following values appear for the source and result set:
| Values for Source and Result Set | Description |
|---|---|
| avgRecordIdentification | This value displays the average probability for identifying a record in the anonymized dataset. The risk is higher when the value is closer to the value 1. |
| maxProbabilityIdentification | This displays the maximum probability value that a record can be identified from the dataset. The risk is higher when the value is closer to the value 1. |
| riskAboveThreshold | This value displays the number of records that are at a risk above the risk threshold. The default threshold is 10%. The threshold is the maximum value set as a boundary. Any values beyond the threshold are a risk and might be easy to identify. For this result, the value 0 is preferred. |

Get Utility Statistics
The Get Utility Statistics API is used to check the usability of the anonymized data.
For more information about the utility statistics API, refer to Obtain the anonymization data utility statistics.
Get Utility Statistics API Parameters
It shows the information that was lost to gain privacy protection.
| Risk Metric Information | Description |
|---|---|
| Function | utilityStat() |
| Parameters | None |
| Return Type | A Pandas dataframe with the source and anonymized data utility information. |
| Sample Request | job.utilityStat() |
The following values appear for the source and result set:
| Values for Source and Result Set | Description |
|---|---|
| ambiguity | This value displays how well a record is hidden in all the records. This captures the ambiguity of records. |
| average_class_size | This measures the average size of groups of indistinguishable records. A smaller class size is more favourable for retaining the quality of the information. A larger class size increases anonymity at the cost of quality. |
| discernibility | This measures the size of groups of indistinguishable records with penalty for records which have been completely suppressed. Discernibility metrics measures the cardinality of the equivalent class. Discernibility metrics considers only the number of records in the equivalent class and does not capture information loss caused by generalization. |
| generalization_intensity | Data transformation from the original records to anonymity is performed using generalization and suppression. This measures the concentration of generalization and suppression on attribute values. |
| infoLoss | This value displays the probability of information lost with the data transformation from the original records. Larger the value, lesser the quality for further analysis. |

Detection APIs
The Detection APIs are used to analyze and classify data in the Protegrity Anonymization.
Get Data Domains
The Get Data Domains API is used to obtain a list of data domains supported.
For more information about obtaining the data domains API, refer to Get the supported data domains.
Detect Anonymization Information
The Detect Anonymization Information API is used to detect the data domain, classification type, hierarchy, and privacy models for the dataset.
For more information about the detect anonymization information API, refer to Data domain, Classification type, Hierarchy, and Privacy Models detection from a dataset.
Detect Classification
The Detect Classification API is used to detect the classification that will be used for the anonymization operation. Accordingly, you can modify the classification to match your requirements.
For more information about the detect classification API, refer to Classification type detection from a dataset.
Detect Hierarchy
The Detect Hierarchy API is used to detect the hierarchy type that will be used for the anonymization operation.
For more information about the detect hierarchy API, refer to Hierarchy Type detection from a dataset.
4.2.2 - Understanding Protegrity Anonymization Python SDK Requests
The following APIs are available with Protegrity Anonymization. You can import the Protegrity Anonymization in your Python SDK environment, pass the required parameter and data to the Protegrity Anonymization Python SDK requests, and retrieve work with the anonymized output.
Before running the anonymization jobs mentioned in the Protegrity Anonymization SDK section below, the following pre-requisites must be completed:
- Ensure that Anonymization machine is set up and is configured as “https://anon.protegrity.com/".
For more information about setting up and configuring an Anonymization machine for AWS and Azure, refer to AWS and Azure. - Ensure that the disk is not full and enough free space is available for saving the destination file.
- Verify the destination file is not in use. Set the required permissions for creating and modifying the destination file.
- Verify that the anonymization job exists.
- Verify the import of the Pythonic SDK. For example, import
anonsdkasasdk.
You can use different sample requests to build and run the anonymization APIs. For more information about the sample requests for Python SDK, refer to Sample Requests for Protegrity Anonymization.
Understanding the AnonElement object
The AnonElement is an essential part of the Protegrity Anonymization SDK. It holds all information that is required for processing the anonymization request. The AnonElement is a part of the anonsdk package.
Protegrity Anonymization SDK processes a Pandas dataframe to anonymize data using the Protegrity Anonymization REST API. It is the AnonElement that accepts the parameters and passes the information to the REST API. The AnonElement accepts the connection to the REST API, the pandas dataframe with the data that must be processed, and the optionally the source location for processing the request.
Anonymization Functions
The Anonymization Functions APIs are used to run the anonymization job.
Anonymize
The Anonymize API is used to start an anonymize operation.
For more information about the anonymize API, refer to Submit a new anonymization job.
Note: When you run the job, an empty destination file is created. This file is created during processing for verifying the necessary destination permissions. Avoid using this file till the anonymization job is complete.
Ensure that the anonymized data file and the logs generated are moved to a different system before deleting your environment.
If the source file is larger than the maximum limit that is allowed on the Cloud environment, then run the anonymization request with “additional_properties”: { “single_file”: “no” }.
Apply Anonymize
The Apply Anonymize API is used as a template to anonymize additional entries. Using this API you can use the existing configuration to process additional data. This is especially useful in machine learning for training the system to anonymize new data points.
Note: In this API, privacy model parameters are ignored while performing the anonymization for the new entry.
For more information about the apply anonymize API, refer to Apply anonymization config to a given dataset.
Apply Anonymize API Parameters
Use this API to start an anonymize operation.
| Apply Anonymize Job Information | Description |
|---|---|
| Function | anonymize(anon_object, target_datastore, force, mode) |
| Parameters | anon_object: The object with the configuration for performing the anonymization request. target_datastore: The location to store the anonymized result. force: The boolean value to force the operation. Acceptable values: True and False. Set this flag to true to resubmit the same anonymized job without any modification. mode: The value to enable auto anonymization. Acceptable value: auto. Do not include this parameter to skip auto anonymization. |
| Return Type | A job object with which the task monitoring and task statistics can be obtained. |
| Sample Request | Without auto anonymization: job = asdk.anonymize(anon_object,target_datastore ,force=True) With auto anonymization: job = asdk.anonymize(anon_object,target_datastore ,force=True,mode=“auto”) Note: When you run the job, an empty destination file is created. This file is created during processing for verifying the necessary destination permissions. Avoid using this file till the anonymization job is complete. |
For more information about using the Auto Anonymization, refer to Using the Auto Anonymizer.
Ensure that the anonymized data file and the logs generated are moved to a different system before deleting your environment.
If the source file is larger than the maximum limit that is allowed on the Cloud environment, then run the anonymization request with “additional_properties”: { “single_file”: “no” }.
If you want to bypass the Anon-Storage, then you can disable the pods by setting the pyt_storage flag to False.
For example, use the following code to run the anonymization request without using the storage pods
job=asdk.anonymize(anon_object, pty_storage=False)

Measure
The Measure API is used to measure or obtain anonymization result statics for different configurations before the actual anonymization job.
For more information about the anonymize measure job API, refer to Submit a new anonymization Measure job.
Using Infer to Anonymize API Parameters
Use the Infer API to start auto-detecting the data-domain, classification type, hierarchies, and anonymization configuration in Protegrity Anonymization. Any user-defined configuration, such as, QI attribute assignments, hierarchy, and K value, are retained and considered while performing the auto anonymization.
| Using Infer to Anonymize Information | Description |
|---|---|
| Function | infer(targetVariable) |
| Parameters | targetVariable: The field specified here is used as a focus point for performing the anonymization. |
| Return Type | It returns an anon element with all the detected classifications and hierarchies generated. |
| Sample Request | e.infer(targetVariable=‘income’) Note: You can use e.measure() to modify the request and view different outcomes of the result set. |
For more information about the anonymize measure job API, refer to Using Infer to Anonymize.
Task Monitoring APIs
The Task Monitoring APIs are used to monitor the anonymization job. Use these APIs to obtain the job status, retrieve a job, and abort a job.
Get Job IDs
The Get Job ID API is used to get the job IDs of the last 20 anonymization operations that are running, in queue, or completed. You can then use the required job ID with the other APIs to work with the anonymization job.
For more information about the job ID API, refer to Obtain job ids.
Get Job Status
The Get Job Status API is used to get the status of an anonymize operation that is running, in queue, or complete. It shows the percentage of job completed. Use the information provided here to monitor if a job is running or stalled.
For more information about the job status API, refer to Obtain job status.
Get Job Status API Parameters
Use this API to get the status of an anonymize operation that is running. It shows the percentage of job completed. Use the information provided here to monitor if a job is running or stalled.
| Monitor Job Information | Description |
|---|---|
| Function | status() |
| Parameters | None |
| Return Type | A string with the status information in the JSON format. completed: This is information about the job, such as, data, statistics, summary, and time spent. id: This is the job ID. info: This is information about the job being processed, such as, the source and attributes for the job. running: This is the completion status of the jobs being processed. It shows the percentage of the job completed. status: This is the status of the job, such as, running or completed. Note: This API displays all the status of the job. To obtain the ID of a job, use job.id(). |
| Sample Request | job.status() |
Get Metadata
The Get Metadata API is used to retrieve the metadata for the existing job. This API is useful when you need to view the configuration available for a job. It displays the fields, configuration, and the data that is used to run the anonymization job.
For more information about the metadata API, refer to Obtain job metadata.
Retrieve Anonymized Data API Parameters
Use this API to retrieve the results of an anonymized job.
| Retrieve Job Information | Description |
|---|---|
| Function | result() |
| Parameters | None |
| Return Type | Returns the AnonResult element, which provides the DataFrame for the anon data. Note: The result.df will be None if you have overridden the resultstore as part of anonymize method. |
| Sample Request | job.result() Note: This is a blocking API and will stall processing till the job is complete. |
Abort
The Abort API is used to abort a running anonymization job. You can abort jobs if you need to modify the parameters or if the job is stalled or taking too much time or resources to process.
For more information about the abort API, refer to Abort a running anonymization job.
Note: After aborting the task, it might take time before all the running processes are stopped.
Abort API Parameters
Use this API to abort a running anonymize operation. You can abort jobs if you need to modify the parameters or if the job is stalled or taking too much time or resources to process.
| Abort Job Information | Description |
|---|---|
| Function | abort() |
| Parameters | None |
| Return Type | A string with the status of the abort request. |
| Sample Request | job.abort() |
Delete
The Delete API is used to delete an existing job that is no longer required.
For more information about the delete API, refer to Delete a job.
Statistics APIs
The Statistics APIs are used to obtain information about the anonymization data. Use these APIs to obtain the risk and utility information about the anonymization. The user needs to access these APIs to measure the utility benefits and risk of publishing the anonymized data. If these configurations are not satisfactory, then the user can re-submit the anonymization job after modifying some parameters based on these results.
Get Exploratory Statistics
The Get Exploratory Statistics API is used to obtain data distribution statistics about a completed anonymization job. The information includes information about both, the source and the target distribution.
For more information about the exploratory statistic API, refer to Obtain the exploratory statistics.
Get Risk Metric
The Get Risk Metric API is used to ascertain the risk of the anonymized data. It shows the risk of the data against attacks such as journalist, marketer, and prosecutor.
For more information about the risk metric API, refer to Obtain the risk statistics.
Get Utility Statistics
The Get Utility Statistics API is used to check the usability of the anonymized data.
For more information about the utility statistics API, refer to Obtain the anonymization data utility statistics.
5 - Building the Anonymization request
Use the APIs provided with the Protegrity Anonymization to create your request.
- To use the APIs, you need to specify the source (file or data) that must be transformed. The source can be a single row of data or multiple rows of data sent in the request, or it could be a file located on the Cloud storage.
- Next, you need to specify the transformation that must be performed on the various columns in the table.
- Finally, after the transformation is complete, you can save the output or use it for further processing.
The transformation request can be saved for processing further requests. It can also be used as an input in machine learning.
5.1 - Common Configurations for building the request
Use the information provided in this section to build the REST APIs and Python SDK request for performing the Protegrity Anonymization transformation.
Specifying the Transformation
The data store consists of various fields. These fields need to be identified for processing data. Additionally, the type of transformation that must be performed on the fields must be specified. Also specify the type of privacy model that must be used for anonymizing the data. While specifying the rules for transformation specify the importance of the data.
Classifying the Fields
Specify the type of information that the fields hold. This classification must be performed carefully, leaving out important fields might lead to the anonymized data being of no value. However, including data that can identify users poses a risk of anonymization not being carried out properly.
The following four different classifications are available:
| Classification | Description | Function | Treatment |
|---|---|---|---|
| Direct Identifier | This classification is used for the data in fields that directly identify an individual, such as, Name, SSN, phoneNo, email, and so on. | Redact | Values will be removed. |
| Quasi Identifying Attribute | This classification is used for the data in fields that does not identify an individual directly. However, it needs to be modified to avoid indirect identification. For example, age, date of birth, zip code, and so on. | Hierarchy models | Values will be transformed using the options specified. |
| Sensitive Attribute | This classification is used for the data in fields that does not identify an individual directly. However, it needs to be modified to avoid indirect identification. This data needs to be preserved to ensure further analysis or to obtain utility out of Anonymized data. In addition, ensure that records with this classification are part of a herd or group where it loses the ability to identify an individual. | LDiv, TClose | No change in values, exception extreme values that might identify an individual. Values will be generalized in case of t-closeness. |
| Non-Sensitive Attribute | This classification is used for the data in fields that does not identify an individual directly or indirectly. | Preserve | No change in values. |
Ensure that you identify the sensitive and the quasi-identifier fields for specifying the anonymization method for hiding individuals in the dataset.
Use the following code for specifying a quasi-identifier for REST API and Python SDK:
"classificationType": "Quasi Identifier",
e['<column>'] = asdk.Gen_Mask(maskchar='#', maxLength=3, maskOrder="L")
Specifying the privacy model
The privacy model transforms the dataset using one or several anonymization methods to achieve privacy.
The following anonymization techniques are available in the Protegrity Anonymization:
K-anonymity
Configuration of quasi-identifier tuple occurs of k records. The information type is Quasi-Identifier.
Use the following code for specifying K-anonymity for REST API and Python SDK:
"privacyModel": {
    "k": {
    "kValue": 5
    }
}
e.config.k=asdk.K(2)
l-diversity
Ensures k records in the inter-group is distributed and diverse enough to reduce the risk of identification. The information type is Sensitive Attribute.
Use the following code for specifying l-diversity for REST API and Python SDK:
"privacyModel": {
    "ldiversity": [
        {
        "lFactor": 2,
        "name": "sex",
        "lType": "Distinct-l-diversity"
        }
    ]
}
e["<column>"]=asdk.LDiv(lfactor=2)
t-closeness
Intra-group diversity for every sensitive attribute must be defined. The information type is Sensitive Attribute.
Use the following code for specifying t-closeness for REST API and Python SDK:
"privacyModel": {
"tcloseness": [
    {
    "name": "salary-class",
    "emdType": "EMD with equal ground distance",
    "tFactor": 0.2
    }
  ]
}
e["<column>"]=asdk.TClose(tfactor=0.2)
Specifying the Hierarchy
The hierarchy specifies how the information in the dataset is handled for anonymization. These hierarchical transformations are performed on Quasi-Identifiers and Sensitive Attributes. Accordingly, the data can be generalized using transformations or aggregated using mathematical functions. As we go up the hierarchy, the data is anonymized better, however, the quality of data for further analysis reduces.
Global Recoding and Full Domain Generalization
Global recoding and full domain generalization is used for anonymizing the data. When data is anonymized, the quasi-identifiers values are transformed to ensure that data fulfils the required privacy requirements. This transformation is also called as data recoding. In the Protegrity Anonymization, data is anonymized using global recoding, that is, the same transformation rule is applied to all entries in the data set.
Consider the data in the following tables:
| ID | Gender | Age | Race |
|---|---|---|---|
| 1 | Male | 45 | White |
| 2 | Female | 30 | White |
| 3 | Male | 25 | Black |
| 4 | Male | 30 | White |
| 5 | Female | 45 | Black |
| Level0 | Level1 | Level2 | Level3 | Level4 |
|---|---|---|---|---|
| 25 | 20-25 | 20-30 | 20-40 | * |
| 30 | 30-35 | 30-40 | 30-50 | * |
| 45 | 40-45 | 40-50 | 40-60 | * |
In the above example, when global recoding is used for a value such as 45, then all occurrences of age 45 will be generalized using only one generalized level as follows:
- 40-45
- 40-50
- 40-60
- *
Full-domain generalization means that all values of an attribute are generalized to the same level of the associated hierarchy level. Thus, in the first table, if age 45 gets generalized to 40-50 which is Level2, then all age values are also generalized to Level2 only. Hence, the value 30 will be generalized to 30-40.
In addition to generalization, micro-aggregation is available for transforming the dataset. In generalization, the mathematical function is performed on all the values of the column. However, in micro-aggregation, the mathematical function is performed on all the values within an equivalence class.
Consider the following table with ages of five men and five women.

The following output is obtained by performing a generalization aggregation on the Age using averages, by setting the Gender as QI and keeping the K value as 2.

In the table, a sum of all the ages is obtained and divided by the total, that is, 10 to obtain the generalization value using average.
The following output is obtained by performing a micro-aggregation on the Age using averages, by setting the Gender as QI and keeping the K value as 2.

In the table, two equivalence classes are formed based on the gender. The sum of the ages in each group is obtained and divided by the total of each group, that is, 5 to obtain the micro-aggregation value using average.
Generalization
In Generalization, the data is grouped into sets having similar attributes. The mathematical function is applied on the selected column by considering all the values in the dataset.
The following transformations are available:
- Masking-Based: In this transformation, information is hidden by masking parts of the data to form similar sets. For example, masking the last three numbers in the zip code could help group them, such as, 54892 and 54231 both being transformed as 54###.
An example of masking-based transformation for building a REST API and Python SDK is provided here.
{
            "classificationType": "Quasi Identifier",
            "dataTransformationType": "Generalization",
            "dataType": "String",
            "generalization": {
                "hierarchyType": "Rule",
                "rule": {
                    "masking": {
                        "maskOrder": "Right To Left",
                        "maskChar": "#",
                        "maxDomainSize": 5
                    }
                },
                "type": "Masking Based"
            },
            "name": "city"
}
Where:
- maskOrder is the order for masking, use Right To Left to mask from right and Left To Right for masking from the left.
- maskChar is the placeholder character for masking.
- maxDomainSize is the number of characters to mask. Default is the maximum length of the string in the column.
e["zip_code"] = asdk.Gen_Mask(maskchar="#", maskOrder = "R", maxLength=5)
Where:
- maskchar is the placeholder character for masking.
- maskOrder is the order for masking, use R to mask from right and L for masking from the left.
- maxLength is the number of characters to mask. Default is the maximum length of the string in the column.
- Tree-Based: In this transformation, data is aggregated by transformation to form similar sets using external knowledge. For example, in the case of address, the data can be anonymized based on the city, state, country, or continent, as required. You must specify the file containing the tree data. If the current level of aggregation does not provide adequate anonymization, then a higher level of aggregation is used. The higher the level of aggregation, the more the data is generalized. However, a higher level of generalization reduces the quality of data for further analysis.
An example of tree-based transformation for building a REST API and Python SDK is provided here.
{
          "classificationType": "Quasi Identifier",
          "dataTransformationType": "Generalization",
          "dataType": "String",
          "generalization": {
              "type": "Tree Based",
              "hierarchyType": "Data Store",
              "dataStore": {
                  "type": "File",
                  "file": {
                      "name": "adult_hierarchy_education.csv",
                      "props": {
                          "delimiter": ";",
                          "quotechar": "\"",
                          "header": null
                      }
                  },
                  "format": "CSV"
              }
          },
          "name": "education"
}
treeGen = {'lvl0': [11, 13, 14, 15, 27, 28, 20],
              'lvl1': ["<15", "<15", "<15", "<20", "<30", "<30", "<25"],
              'lvl2': ["<20", "<20", "<20", "<30", "<30", "<30", "<30"]}

e["bmi"] = asdk.Gen_Tree(pd.DataFrame(data=treeGen), ["Missing", "Might be <30", " Might be <30"])
You can refer to an external file for specifying the parameters for the hierarchy tree.
education_df = pd.read_csv('D:\\WS\\data source\\hierarchy\\adult_hierarchy_education.csv', sep=';')
e['education'] = asdk.Gen_Tree(education_df)
- Interval-Based: In this transformation, data is aggregated into groups according to a predefined interval specified.
In addition, the lowerbound and upperbound values need to be specified for building the SDK API. Values below the lowerbound and values above the upperbound are excluded from range generation.
An example of interval-based transformation for building a REST API and Python SDK is provided here.
{
            "classificationType": "Quasi Identifier",
            "dataTransformationType": "Generalization",
            "dataType": "Integer",
            "generalization": {
                "hierarchyType": "Rule",
                "rule": {
                    "interval": {
                        "levels": [
                            "5",
                            "10",
                            "50",
                            "100"
                        ],
                        "lowerBound": "0"
                    }
                },
                "type": "Interval Based"
            },
            "name": "age"
}
asdk.Gen_Interval([<interval_level>],<lowerbound>,<upperbound>)
An example of interval-based transformation for building the SDK API is provided here.
e['age'] = asdk.Gen_Interval([5,10,15])
e['age'] = asdk.Gen_Interval([5,10,15],20,60)
Aggregation-Based: In this transformation, integer data is aggregated as per the conditions specified. The available options for aggregation are Mean and Mode.
Note: Mean is applicable for Integer and Decimal data types.
Mode is applicable for Integer, Decimal, and String data types.
An example of aggregation-based transformation for building a REST API and Python SDK is provided here.
{
            "classificationType": "Quasi Identifier",
            "dataTransformationType": "Generalization",
            "dataType": "Integer",
            "generalization": {
                "hierarchyType": "Aggregate",
                "type": "Aggregation Based",
                "aggregateFn": "Mean"
            },
            "name": "age"
}
An example of aggregation-based transformation using Mean is provided here.
e['age'] = asdk.Gen_Agg(asdk.AggregateFunction.Mean)
An example of aggregation-based transformation using Mode is provided here.
e['salary'] = asdk.Gen_Agg(asdk.AggregateFunction.Mode)
- Date-Based: In this transformation, data is aggregated into groups according to the date.
An example of date-based interval and rounding for building a REST API and Python SDK is provided here.
{
            "classificationType": "Quasi Identifier",
            "dataTransformationType": "Generalization",
            "dataType": "Date",
            "generalization": {
                    "hierarchyType": "Rule",
                    "type": "Interval Based",
                    "rule": {
                      "daterange": {
                        "levels": [
                          "WD.M.Y",
                          "W.M.Y",
                          "FD.M.Y",
                          "M.Y",
                          "QTR.Y",
                          "Y",
                          "DEC",
                          "CEN"
                        ]
                      }
                    }
                  },
            "name": "date_of_birth"
}
It is not applicable for building Python SDK requests.
- Time-Based: In this transformation, data is aggregated into groups according to the time. In this, time intervals are in seconds. The LowerBound and UpperBound takes value of the format [HH:MM:SS].
An example of time-based interval and rounding for building a REST API and Python SDK is provided here.
{
            "classificationType": "Quasi Identifier",
            "dataTransformationType": "Generalization",
            "dataType": "Date",
            "generalization": {
                      "hierarchyType": "Rule",
                      "type": "Interval Based",
                      "rule": {
                            "interval": {
                                "levels": [
                                    "30",
                                    "60",
                                    "180",
                                    "240"
                                  ],
                        "lowerBound": "00:00:00",
                        "upperBound": "23:59:59"
                      }
                    }
                  },
            "name": "time_of_birth"
}
It is not applicable for building Python SDK request.
- Rounding-Based: In this transformation, data is rounded to groups according to a predefined rounding factor specified.
An example of rounding-based transformation for building a REST API and Python SDK is provided here.
It is not applicable for building the REST API request.
An example of date-based transformation is provided here.
e['DateOfBirth'] = asdk.Gen_Rounding(["H.M4", "WD.M.Y", "M.Y"])
An example of numeric-based transformation is provided here.
e['Interest_Rate'] = asdk.Gen_Rounding([0.05,0.10,1])
Micro-Aggregation
In Micro-Aggregation, mathematical formulas are used to group the data. This is used to achieve K-anonymity by forming small groups of data in the dataset.
The following aggregation functions are available for micro-aggregation in the Protegrity Anonymization:
- For numeric data types (integer and decimal):
Arithmetic Mean
Geometric Mean
Note: Micro-Aggregation using geometric mean is only supported for positive numbers.
Median
- For all data types:
- Mode
Note: Arithmetic Mean, Geometric Mean, and Median is applicable for Integer and Decimal data types.
Mode is applicable for Integer, Decimal, and String data types.
An example of micro-aggregation for building a REST API and Python SDK is provided here.
{
      "classificationType": "Quasi Identifier",
      "dataTransformationType": "Micro Aggregation",
      "dataType": "Decimal",
      "aggregateFn": "Median",
      "name": "age_ma_median"
}
e['income'] = asdk.MicroAgg(asdk.AggregateFunction.Mean)
5.2 - Building the request using the REST API
Use the information provided in this section to build the REST API request for performing the Protegrity Anonymization transformation.
Identifying the source and target
The source dataset is the starting point of the transformation. In this step, you specify the source that must be transformed. Specify the target where the anonymized data will be saved.
- The following file formats are supported:
- Comma separated values (CSV)
- Columnar storage format: This is an optimized file format for large amounts of data. Using this file format provides faster results. For example, Parquet (gzip and snappy).
- The following data storages have been tested for the Protegrity Anonymization:
- Local File System
- Amazon S3
- The following data storages can also be used for the Protegrity Anonymization:
- Microsoft Azure Storage
- Data Lake Storage
- Blob Storage
- MinIO Storage
- Other S3 Compatible Services
- Microsoft Azure Storage
Use the following code to specify the source:
Note: Modify the source and destination code for your provider.
For more cloud-related sample codes, refer to the section Samples for Cloud-related Source and Destination Files.
"source": {
      "type": "File",
      "file": {
        "name": "<Source_file_path>"
      }
}
Note: When uploading a file to the Cloud service, wait till the entire source file is uploaded before running the anonymization job.
Similarly, specify the target file using the following code:
"target": {
    "type": "File",
    "file": {
      "name": "<Target_file_path>"
    }
}
Specify additional parameters about the source and target file, such as, the character used to separate the values in the file, using the following properties attribute. If a property is not specified, then the default attribute shown here will be used.
"props": {
    "sep": ",",
    "decimal": ".",
    "quotechar": "\"",
    "escapechar": "\\",
    "encoding": "utf-8",
    "line_terminator": "\n"
}
If the required files are on a cloud storage, then specify the cloud-related access information using the following code:
"accessOptions": {
}
For more information about specifying the source and target files, refer to Dask remote data configuration.
Note: If the target directory already exists, then the job fails. If the target file already exists, then the file will be overwritten. Additional, some Cloud services have limitations on the file size. If such a limitation exists, then you can set the single_file switch to no when writing large files to the Cloud storage. This saves the output as multiple files to avoid any errors related to saving large files to the Cloud storage.
Specifying the Transformation
For more information about specifying the transformation, refer to Specifying the Transformation.
Classifying the Fields
For more information about different fields classification, refer to Classifying the Fields.
The following data types are supported for working with the data in the fields:
- Integer
- Float
- String
- Date
- Time
- DateTime
Date: The following date types are supported:
- mm-dd-yyyy - This is the default format.
- dd-mm-yyyy
- dd-mm-yy
- mm-dd-yy
- dd.mm.yyyy
- mm.dd.yyyy
- dd.mm.yy
- mm.dd.yy
- dd/mm/yyyy
- mm/dd/yyyy
- dd/mm/yy
- mm/dd/yy
Time: HH is used to specify time in the 24-hour format and hh is used to specify time in the 12-hour format. The following time formats are supported:
- HH:mm:ss - This is the default format.
- HH:mm:ss.ns
- hh:mm:ss
- hh:mm:ss.ns
- hh:mm:ss.ns p - Here, p is the 12 hour format with period AM/PM.
- HH:mm:ss.ns z - Here, z is timezone info with +- from UTC, that is, +0000,+0530,-0230.
- hh:mm:ss Z - Here, Z is the timezone info with the name, that is, UTC,EST, CST.
Here are a few examples:
{
            "classificationType": "Non-Sensitive Attribute",
            "dataType": "Integer",
            "name": "index"
}
{
            "classificationType": "Sensitive Attribute",
            "dataType": "String",
            "name": "diagnosis_dup"
}
Note: The values present in the first row of the dataset is considered for determining the format for date, time, and datetime. You can override the detection using “props”: {“dateformat”: “<Specify_Format>”}.
Consider the following example for date with the mm/dd/yyyy format:
10/09/2020
12/24/2020
07/30/2020
In this case, the data will be identified as dd/mm/yyyy.
You can override the using the following property:
"props": {"dateformat": "mm/dd/yyyy"}
Specifying the Privacy Model
For more information about anonymization methods for privacy model, refer to Specifying the Privacy Model.
Specifying the Hierarchy
For more information about how the information in the data set is handled for anonymization, refer to Specifying the Hierarchy.
Generalization
For more information about grouping data into sets having similar attributes, refer to Generalization.
Micro-Aggregation
For more information about the mathematical formulas used to group the data, refer to Micro-Aggregation.
Specifying Configurations
Additional configurations are available in the Protegrity Anonymization to enhance the anonymity of the information in the data set.
The following configurations are available:
"config": {
    "maxSuppression": 0.1
    "suppressionData": "*"
    "redactOutliers": False
}
- maxSuppression specifies the percentage of rows allowed to be an outlier row to obtain the anonymized data. The default is 10%.
- suppressionData specifies the character or character set to be used for suppressing the anonymized data. The default is *.
- redactOutliers specifies if the outlier row should be part of the anonymized dataset or not. The default is included denoted by False.
5.3 - Building the request using the Python SDK
Use the information provided in this section to build the request using the Python SDK environment for performing the Protegrity Anonymization transformation.
To build an anonymization request using the SDK, the user first needs to import the anonsdk module using the following command.
import anonsdk as asdk
Creating the connection
You need to specify the connection to the Protegrity Anonymization REST service to set up the Protegrity Anonymization.
Note: If administrator has not updated the DNS entry for ANON REST API service, then map the hostname with the IP address of Anon Service in the hosts file of the system.
For example, if the Protegrity Anonymization REST service is located at https://anon.protegrity.com, then you would create the following connection.
conn = asdk.Connection("https://anon.protegrity.com/")
Identifying the source and target
Protegrity Anonymizationis built to anonymize the data in a Pandas dataframe and return the anonymized dataframe. However, you can also specify a CSV file from various source systems for the source data.
Use the following code to specify the source.
e = asdk.AnonElement(conn, dataframe)
If the source file is located at the same place where Protegrity Anonymization is installed, then use the following code to load the source file into a dataframe.
dataframe = pandas.read_csv("<file_path>")
The following data storages have been tested for Protegrity Anonymization:
Local File System
Amazon S3
For example:
asdk.FileDataStore("s3://<path>/<file_name>.csv", access_options={"key": "<value>","secret": "value"})
The following data storages can also be used for Protegrity Anonymization:
- Microsoft Azure Storage
    - Data Lake Storage

        For example:

        ```
        asdk.FileDataStore("adl://<path>/<file_name>.csv", access_options={"tenant_id": "<value>", "client_id": "<value>", "client_secret": "<value>"})
        ```

    - Blob Storage

        For example:

        ```
        asdk.FileDataStore("abfs://<path>/<file_name>.csv", access_options={"account_name": "<value>", "account_key": "<value>"})
        ```

- MinIO Storage
- Other S3 Compatible Services

    > **Note**: When uploading a file to the Cloud service, wait till the entire source file is uploaded before running the anonymization job.

    For more information about using remote sources, refer to [Connect to remote data](https://docs.dask.org/en/latest/how-to/connect-to-remote-data.html).
If required, you can directly specify data in a list using the following format:
d = {['<column1_name>':['value1','value2','value3',...],
     ['<column2_name>':[number1,number2,number3,...],
     ['<column3_name>':['value1','value2','value3',...],
     ...}
For example:
d = {'gender': ['Male', 'Male', 'Male', 'Male', 'Female', 'Female', 'Female', 'Male', 'Female'],
         'occupation': ['Adm-clerical', 'Exec-managerial', 'Handlers-cleaners', 'Handlers-cleaners', 'Prof-specialty', 'Exec-managerial', 'Other-service', 'Exec-managerial', 'Prof-specialty'],
         'age': [39, 50, 38, 53, 28, 37, 49, 52, 31],
         'race': ['White', 'White', 'White', 'Black', 'Black', 'White', 'Black', 'White', 'White'],
         'marital-status': ['Never-married', 'Married-civ-spouse', 'Divorced', 'Married-civ-spouse', 'Married-civ-spouse', 'Married-civ-spouse', 'Married-spouse-absent', 'Married-civ-spouse', 'Never-married'],
         'education': ['Bachelors', 'Bachelors', 'HS-grad', '11th', 'Bachelors', 'Masters', '9th', 'HS-grad', 'Masters'],
         'native-country': ['United-States', 'United-States', 'United-States', 'United-States', 'Cuba', 'United-States', 'Jamaica', 'United-States', 'United-States'],
         'workclass': ['State-gov', 'Self-emp-not-inc', 'Private', 'Private', 'Private', 'Private', 'Private', 'Self-emp-not-inc', 'Private'],
         'income': ['<=50K', '<=50K', '<=50K', '<=50K', '<=50K', '<=50K', '<=50K', '>50K', '>50K'],
         'bmi': [11.5, 12.5, 13.5, 14.5, 16.5, 16.5, 17.5, 18.5, 11.5] }
The anonymized data is returned to the user as Pandas dataframe. Optionally, you can specify the required target file system and provide the target using the following code.
asdk.anonymize(e, resultStore=<targetFile>)
Specify additional parameters about the source and target file, such as, the character used to separate the values in the file, using the various properties attribute. If a property is not specified, then the default attributes will be used.
Note: Some Cloud services have limitations on the file size. If such a limitation exists, then you can set single_file to no when writing large files to the Cloud service, . This saves the output as multiple files to avoid any errors related to saving large files to the Cloud storage.
For more information and help on specifying the source and target files, refer to Dask remote data configuration.
Specifying the transformation
For more information about specifying the transformation, refer to Specifying the Transformation.
Protegrity Anonymizationuses Pandas to build and work with the data frame. You need to import the library for Pandas and store the source data that must be transformed in Pandas.
import pandas as pd

d = <source_data>
df = pd.DataFrame(data=d)
To build the transformation, you need to specify the AnonElement that holds the connection, data frame, and the source.
For example:
e = asdk.AnonElement(conn,df,source=datastore)
You need to specify the columns that must be included for processing the anonymization request and the column classification before performing the anonymization.
e["<column>"] = asdk.<transformation>
Where:
- column: Specify the column name or column ID.
- transformation: Specifies the processing to be applied for the column.
Note: By default, all the columns are set to ignore processing. The data is redacted and not included in the anonymization process. You need to manually set the column classification to include it in the anonymization process.
Specify multiple columns with assign using commas.
e.assign(["<column1>","<column2>"],asdk.Transformation())
You can view the configuration provided using the describe function.
e.describe()
Classifying the fields
For more information about different fields classification, refer to Classifying the Fields.
The following data types are supported for working with the data in the fields:
- Integer
- Float
- String
- DateTime
Specifying the privacy model
For more information about anonymization methods for privacy model, refer to Specifying the Privacy Model.
Specifying the Hierarchy
For more information about how the information in the data set is handled for anonymization, refer to Specifying the Hierarchy.
Generalization
For more information about grouping data into sets having similar attributes, refer to Generalization.
Micro-aggregation
For more information about the mathematical formulas used to group the data, refer to Micro-Aggregation.
Working with saved Anonymization requests
The save method provides interoperability with the REST API. It generates the required JSON payload that can be used as part of curl or any REST client.
Use the following command to save the anonymization request.
e.save("<file_path>\\fileName.json")
Applying Anonymization to additional rows
You can use the applyAnon method to anonymize any additional rows using the saved request. Use the following command to anonymize using a previous anonymization job.
asdk.applyAnon(<conn>,job.id(), <single_row_data>)
Use this function to anonymize only a few rows. You need to specify the row information using the key-value pair and ensure that all the required columns are present.
An example of a single and multi row data is shown here.
single_row_data = [{'ID': '1', 'Name': 'Wilburt Daniel', 'Address': '4 Sachtjen Plaza', 'City_Name': 'Ambato', 'Gender': 'Male', 'date': '18-04-2008'': '9'}]
multi_row_data = [{'ID': '1', 'Name': 'Wilburt Daniel', 'Address': '4 Sachtjen Plaza', 'City_Name': 'Ambato', 'Gender': 'Male', 'date': '18-04-2008'': '9'},{'ID': '2', 'Name': 'Jones Knight', 'Address': '25 Macadamia Street', 'City_Name': 'Ambato', 'Gender': 'Male', 'date': '25-11-1997'': '9'}]
Running a sample request
Run the sample code provided here in and SDK. This sample is also available at https://<IP_Address>:<Port>/sdkapi.
Import the Protegrity Anonymization and the Pandas package in the SDK tool.
import pandas as pd
import anonsdk as asdk
Create a variable d with the sample data.
#Sample data for Demo
d = {'gender': ['Male', 'Male', 'Male', 'Male', 'Female', 'Female', 'Female', 'Male', 'Female'],
         'occupation': ['Adm-clerical', 'Exec-managerial', 'Handlers-cleaners', 'Handlers-cleaners', 'Prof-specialty', 'Exec-managerial', 'Other-service', 'Exec-managerial', 'Prof-specialty'],
         'age': [39, 50, 38, 53, 28, 37, 49, 52, 31],
         'race': ['White', 'White', 'White', 'Black', 'Black', 'White', 'Black', 'White', 'White'],
         'marital-status': ['Never-married', 'Married-civ-spouse', 'Divorced', 'Married-civ-spouse', 'Married-civ-spouse', 'Married-civ-spouse', 'Married-spouse-absent', 'Married-civ-spouse', 'Never-married'],
         'education': ['Bachelors', 'Bachelors', 'HS-grad', '11th', 'Bachelors', 'Masters', '9th', 'HS-grad', 'Masters'],
         'native-country': ['United-States', 'United-States', 'United-States', 'United-States', 'Cuba', 'United-States', 'Jamaica', 'United-States', 'United-States'],
         'workclass': ['State-gov', 'Self-emp-not-inc', 'Private', 'Private', 'Private', 'Private', 'Private', 'Self-emp-not-inc', 'Private'],
         'income': ['<=50K', '<=50K', '<=50K', '<=50K', '<=50K', '<=50K', '<=50K', '>50K', '>50K'],
         'bmi': [11.5, 12.5, 13.5, 14.5, 16.5, 16.5, 17.5, 18.5, 11.5] }
Load the data in a Pandas DataFrame.
df = pd.DataFrame(data=d)
Specify the additional data required per attribute to transform and obtain anonymized data. In this example, the Hierarchy Tree is specified.
treeGen = {'lvl0': [11, 13, 14, 15, 27, 28, 20],
               'lvl1': ["<15", "<15", "<15", "<20", "<30", "<30", "<25"],
               'lvl2': ["<20", "<20", "<20", "<30", "<30", "<30", "<30"]}
Build the connection to a running Protegrity Anonymization REST cluster instance. Ensure that the hosts file is configured and points to the REST cluster.
conn = asdk.Connection('https://anon.protegrity.com/')
Build the AnonElement passing the connection and the data as inputs for the anonymization request.
e = asdk.AnonElement(conn,df)
Use the following code sample to read data from an external file store.
e = asdk.AnonElement(conn, dataframe, <SourceFile>)
Specify the transformation that is required.
e['gender'] = asdk.Redact()
e['occupation'] = asdk.Redact()
e['age'] = asdk.Gen_Tree(pd.DataFrame(data=treeGen), ["Missing", "Might be <30", " Might be <30"])

e["bmi"] = asdk.Gen_Interval(['5', '10', '15'])
Specify the K-value, the L-Diversity, and the T-Closeness values.
e.config.k = asdk.K(2)
e["income"] = asdk.LDiv(lfactor=2)
e["income"] = asdk.TClose(tfactor=0.2)
Specify the max suppression.
e.config['maxSuppression'] = 0.7
Specify the importance for the required fields.
e["race"] = asdk.Gen_Mask(maskchar="*",importance=0.8)
View the details of the current configuration.
e.describe()
Anonymize the data.
job = asdk.anonymize(e)
If required, save the results to a file.
datastore=asdk.FileDataStore("s3://...",access_options={"key": "K...","secret": "S..."})
job = asdk.anonymize(e, resultStore=datastore)
View the job status.
job.status()
View the anonymized data.
result = job.result()
if result.df is not None:
    print("Anon Dataframe.")
    print(result.df.head())
View the utility and risk statistics of the data.
job.utilityStat()
job.riskStat()
Save the job configuration with the updated source and target to a JSON file.
e.save("/file_path/file.json", store=datastore)
Optional: Apply the anonymization rules of previous jobs to new data.
anonData = asdk.applyAnon(conn,job.id(), [{'gender':'Male','age': '39', 'race': 'White', 'income': '<=50K','bmi':'12.5'}])
anonData
6 - Using the Auto Anonymizer
The Auto Anonymizer feature of Protegrity Anonymization is a powerful feature for performing anonymization. It processes the data to generate a template for completing anonymization requests.
The Auto Anonymizer feature is simple and easy to configure. Moreover, it is built to analyze the data and produce an output that has a balance of both, generalization and value. The output of the auto anonymizer should always be verified by a human with dataset knowledge. The output is merely a suggestion and should not be used without further inspection.
Protegrity Anonymization analyzes a sample of the data from the dataset. This sample is then analyzed to build a template for performing the anonymization. The template building takes time, based on the size of the dataset and the nature of the data itself.
You can specify the parameters such as, the various fields for redacting, for anonymizing the data. You can use the Auto Anonymizer feature to automatically analyze the data and perform the required anonymization. This feature can also scan the data and perform the best optimization for providing high quality anonymized data. The various parameters used for performing auto anonymization are configurable and can be optimized to suite your business need or requirements. Additionally, frequently performed fields can be created and stored to enable you to build the anonymization request faster and with minimal information before runtime.
A brief flow of the steps for auto anonymization is shown in the following figure.

The user provides the data, column identification, and anonymization parameters, if required. Protegrity Anonymization analyzes the parameters provided and analyzes the dataset. Various anonymization models are generated and analyzed. The parameters, such as, the K, l, and t values, along with the data available in the dataset are used for processing the request. The results are compared and finally, the dataset is processed using the model and parameters that have the best anonymization output.
Consider the following sample graph.

Protegrity Anonymization will first auto assign the privacy levels for the various columns in the dataset. Direct identifiers will be redacted from the dataset. Next, models will be created using different values for K-anonymity, l-diversity, and t-closeness. The values will be analyzed, and the best values selected, such as, the values at point b in the graph. The dataset will then be anonymized using the values determined to complete the anonymization request.
The user can specify the values that must be used, if required. Protegrity Anonymization will consider the values specified by the user and continue to auto generate the remaining values accordingly.
Note: The auto anonymization runs the same request using different values, the anonymization request will take more time to complete compared to a regular anonymization request.
You can use measure, mode, and Infer for Auto Anonymization.
For more information about the measure API, refer to Measure API.
The difference between using mode and Infer is provided in the following table.
| Mode | Infer |
|---|---|
| Analyzes the dataset and performs the anonymization job. | Only analyzes the dataset. |
| The result set is the output. | Updates the models used for performing the anonymization job. |
| You cannot retrieve the attributes for the job. | You can view the auto generated job attribute values, such as, K-anonymity, that will be used for performing the job using the describe method. |
| You can specify target variables for focusing the anonymization job with the anonymization function. | You can specify target variables for focus before performing the anonymization job or even modify the model after performing the anonymization job. |
6.1 - Using mode to Auto Anonymize
Set the mode to Auto to auto anonymize. The auto anonymization auto-detects the data-domain, classification type, hierarchies, and anonymization configuration in Protegrity Anonymization.
Any user-defined configuration, such as, QI attribute assignments, hierarchy, and K value, are retained and considered while performing the auto anonymization. You can also specify the targetVariable that must be considered for obtaining the best possible result set in terms of quality data while performing the anonymization job.
Ensure that you complete the following checks before starting the anonymization job:
- Verify that the destination file is not in use and that the required permissions are set for creating and modifying the destination file.
- Ensure that the disk is not full and enough free space is available for saving the destination file.
- Verify that you have imported the Pythonic SDK, for example, import anonsdk as asdk.
The folowing table shows the auto anonymization information.
| Using mode to Auto Anonymize Information | Description |
|---|---|
| Function | job = asdk.anonymize(e, targetVariable="targetVariable", mode=“Auto”) |
| Parameters | targetVariable: The field specified here is used as a focus point for performing the anonymization. |
| Return Type | It returns the result set after performing the anonymization job. |
| Sample Request | job = asdk.anonymize(e, targetVariable=“date”, mode=“Auto”) |
For more sample requests that you can use, refer to Sample Requests for Protegrity Anonymization.

Note: You can use e.measure() to modify the request and view different outcomes of the result set.
For more information about the measure API, refer to Measure API.
6.2 - Using Infer to Anonymize
Use the Infer API to start auto-detecting the data-domain, classification type, hierarchies, and anonymization configuration in Protegrity Anonymization.
Any user-defined configuration, such as, QI attribute assignments, hierarchy, and K value, are retained and considered while performing the auto anonymization.
Ensure that you complete the following checks before starting the anonymization job:
- Verify that the destination file is not in use and that the required permissions are set for creating and modifying the destination file.
- Ensure that the disk is not full and enough free space is available for saving the destination file.
- Verify that you have imported the Pythonic SDK, for example, import anonsdk as asdk.
The folowing table shows the auto anonymization information.
| Using Infer to Anonymize Information | Description |
|---|---|
| Function | infer(targetVariable) |
| Parameters | targetVariable: The field specified here is used as a focus point for performing the anonymization. |
| Return Type | It returns an anon element with all the detected classifications and hierarchies generated. |
| Sample Request | e.infer(targetVariable=‘income’) |
For more sample requests that you can use, refer to Sample Requests for Protegrity Anonymization.
Note: You can use e.measure() to modify the request and view different outcomes of the result set.
For more information about the measure API, refer to Measure API.
7 - Using Sample Anonymization Jobs
Sample anonymization jobs that you can use for working with and testing Protegrity Anonymization.
7.1 - Sample Data Sets
Use the following dataset to test Protegrity Anonymization. This dataset is comprehensive and can give you thorough insights about working with Protegrity Anonymization.
Adult Dataset: Here is an extract of the dataset, the complete dataset can be found in the adult.csv file in the samples directory. Adult Dataset: Here is an extract of the dataset, the complete dataset can be found in the adult.csv file in the samples directory.
sex;age;race;marital-status;education;native-country;citizenSince;weight;workclass;occupation;salary-class
Male;39;White;Never-married;Bachelors;United-States;08-01-1971;185.38;State-gov;Adm-clerical;<=50K
Male;50;White;Married-civ-spouse;Bachelors;United-States;19-04-1960;176.32;Self-emp-not-inc;Exec-managerial;<=50K
Male;38;White;Divorced;HS-grad;United-States;07-12-1971;159.13;Private;Handlers-cleaners;<=50K
Male;53;Black;Married-civ-spouse;11th;United-States;22-05-1957;170.45;Private;Handlers-cleaners;<=50K
Female;28;Black;Married-civ-spouse;Bachelors;Cuba;03-02-1982;178.79;Private;Prof-specialty;<=50K
Female;37;White;Married-civ-spouse;Masters;United-States;06-12-1972;161.65;Private;Exec-managerial;<=50K
Female;49;Black;Married-spouse-absent;9th;Jamaica;18-04-1961;162.73;Private;Other-service;<=50K
Male;52;White;Married-civ-spouse;HS-grad;United-States;21-05-1958;171.75;Self-emp-not-inc;Exec-managerial;>50K
Female;31;White;Never-married;Masters;United-States;31-12-1978;164.03;Private;Prof-specialty;>50K
Male;42;White;Married-civ-spouse;Bachelors;United-States;11-02-1968;186.33;Private;Exec-managerial;>50K
Male;37;Black;Married-civ-spouse;Some-college;United-States;06-12-1972;189.49;Private;Exec-managerial;>50K
Male;30;Asian-Pac-Islander;Married-civ-spouse;Bachelors;India;01-02-1980;178.70;State-gov;Prof-specialty;>50K
Female;23;White;Never-married;Bachelors;United-States;08-04-1987;183.22;Private;Adm-clerical;<=50K
Male;32;Black;Never-married;Assoc-acdm;United-States;01-01-1978;156.63;Private;Sales;<=50K
Male;34;Amer-Indian-Eskimo;Married-civ-spouse;7th-8th;Mexico;03-12-1975;173.41;Private;Transport-moving;<=50K
Male;25;White;Never-married;HS-grad;United-States;06-03-1985;170.72;Self-emp-not-inc;Farming-fishing;<=50K
Male;32;White;Never-married;HS-grad;United-States;01-01-1978;174.91;Private;Machine-op-inspct;<=50K
Male;38;White;Married-civ-spouse;11th;United-States;07-12-1971;176.47;Private;Sales;<=50K
Female;43;White;Divorced;Masters;United-States;12-02-1967;179.88;Self-emp-not-inc;Exec-managerial;>50K
Male;40;White;Married-civ-spouse;Doctorate;United-States;09-01-1970;170.80;Private;Prof-specialty;>50K
Female;54;Black;Separated;HS-grad;United-States;23-06-1956;171.61;Private;Other-service;<=50K
Male;35;Black;Married-civ-spouse;9th;United-States;04-12-1974;183.71;Federal-gov;Farming-fishing;<=50K
Male;43;White;Married-civ-spouse;11th;United-States;12-02-1967;158.63;Private;Transport-moving;<=50K
Female;59;White;Divorced;HS-grad;United-States;28-07-1951;181.64;Private;Tech-support;<=50K
Male;56;White;Married-civ-spouse;Bachelors;United-States;25-06-1954;171.80;Local-gov;Tech-support;>50K
Male;19;White;Never-married;HS-grad;United-States;12-05-1991;172.74;Private;Craft-repair;<=50K
Male;39;White;Divorced;HS-grad;United-States;08-01-1971;159.41;Private;Exec-managerial;<=50K
Male;49;White;Married-civ-spouse;HS-grad;United-States;18-04-1961;176.76;Private;Craft-repair;<=50K
Male;23;White;Never-married;Assoc-acdm;United-States;08-04-1987;164.43;Local-gov;Protective-serv;<=50K
Male;20;Black;Never-married;Some-college;United-States;11-05-1990;157.60;Private;Sales;<=50K
Male;45;White;Divorced;Bachelors;United-States;14-03-1965;176.38;Private;Exec-managerial;<=50K
Male;30;White;Married-civ-spouse;Some-college;United-States;01-02-1980;160.60;Federal-gov;Adm-clerical;<=50K
Male;22;Black;Married-civ-spouse;Some-college;United-States;09-04-1988;173.41;State-gov;Other-service;<=50K
Male;48;White;Never-married;11th;Puerto-Rico;17-04-1962;189.50;Private;Machine-op-inspct;<=50K
Male;21;White;Never-married;Some-college;United-States;10-05-1989;162.76;Private;Machine-op-inspct;<=50K
Female;19;White;Married-AF-spouse;HS-grad;United-States;12-05-1991;158.42;Private;Adm-clerical;<=50K
Male;48;White;Married-civ-spouse;Assoc-acdm;United-States;17-04-1962;160.75;Self-emp-not-inc;Prof-specialty;<=50K
Male;31;White;Married-civ-spouse;9th;United-States;31-12-1978;172.10;Private;Machine-op-inspct;<=50K
Male;53;White;Married-civ-spouse;Bachelors;United-States;22-05-1957;189.74;Self-emp-not-inc;Prof-specialty;<=50K
Male;24;White;Married-civ-spouse;Bachelors;United-States;07-04-1986;170.08;Private;Tech-support;<=50K
Female;49;White;Separated;HS-grad;United-States;18-04-1961;173.71;Private;Adm-clerical;<=50K
Male;25;White;Never-married;HS-grad;United-States;06-03-1985;160.52;Private;Handlers-cleaners;<=50K
Male;57;Black;Married-civ-spouse;Bachelors;United-States;26-07-1953;178.12;Federal-gov;Prof-specialty;>50K
Male;53;White;Married-civ-spouse;HS-grad;United-States;22-05-1957;186.11;Private;Machine-op-inspct;<=50K
Female;44;White;Divorced;Masters;United-States;13-02-1966;162.80;Private;Exec-managerial;<=50K
Male;41;White;Married-civ-spouse;Assoc-voc;United-States;10-01-1969;172.39;State-gov;Craft-repair;<=50K
Male;29;White;Never-married;Assoc-voc;United-States;02-02-1981;168.83;Private;Prof-specialty;<=50K
Female;25;Other;Married-civ-spouse;Some-college;United-States;06-03-1985;179.12;Private;Exec-managerial;<=50K
Female;47;White;Married-civ-spouse;Prof-school;Honduras;16-03-1963;163.02;Private;Prof-specialty;>50K
Male;50;White;Divorced;Bachelors;United-States;19-04-1960;172.18;Federal-gov;Exec-managerial;>50K
7.2 - Sample Requests for Protegrity Anonymization
Modify and use the sample requests provided here for anonymizing your dataset. Use these requests as a template or as a guideline for building the required request.
Tree-based Aggregation for Attributes with k-Anonymity
This sample uses the following attributes:
- Source: Local file system
- Target: Amazon S3 bucket
- Data set: 1 Quasi Identifier
- Suppression: 0.01
- Privacy Model: K-Anonimity with k value as 50
In this example, the data has custom delimiters.
{
    "source": {
        "type": "File",
        "file": {
            "name": "samples/adult.csv",
            "props": {
                "sep": ";"
            }
        }
    },
    "attributes": [
        {
            "name": "age",
            "dataType": "String",
            "classificationType": "Quasi Identifier",
            "dataTransformationType": "Generalization",
            "generalization": {
                "type": "Masking Based",
                "hierarchyType": "Rule",
                "rule": {
                    "masking": {
                        "maskOrder": "Right To Left",
                        "maskChar": "*",
                        "maxDomainSize": 2
                    }
                }
            }
        }
    ],
    "privacyModel": {
        "k": {
            "kValue": 50
        }
    },
    "config": {
        "maxSuppression": 0.01
    },
    "target": {
        "type": "File",
        "file": {
            "name": "s3://<Your-S3-BucketName>/anon-adult-e1.csv",
            "props": {
                "lineterminator": "\n"
            },
            "accessOptions": {
                "key": "<Your-S3-API Key>",
                "secret": "<Your-S3-API Secret>"
            }
        }
    }
}
#import  the anonsdk library
import anonsdk as asdk
import pandas as pd

# s3 bucket credentials
s3_key = <AWS_Key>
s3_secret = <AWS_Secret>

#set the source path for anonymization
# dataset path
source_csv_path = "adult.csv"
# create Store Object source_datastore
source_datastore = asdk.FileDataStore(source_csv_path)

#Set the target path for anonymized result
# anonymized file path
target_csv_path = "s3://target/anon-adult-e1.csv"
# create Store Object target_datastore
target_datastore = asdk.FileDataStore(target_csv_path, access_options={"key": s3_key,"secret": s3_secret})

# Create connection Object with Rest API server
conn = asdk.Connection("https://anon.protegrity.com/")
df = pd.read_csv(source_csv_path,sep=";")
df.head()

# create AnonObject with connection, dataframe metadata and source path
anon_object = asdk.AnonElement(conn, df, source_datastore)
# configure masking of string datatype
anon_object["age"] = asdk.Gen_Mask(maskchar="*",maskOrder="R",maxLength=2)

#Configure K-anonymity , suppression in the dataset allowed
anon_object.config.k = asdk.K(50)
anon_object.config['maxSuppression'] = 0.01

# Send Anonymization request with Transformation Configuration with the target store
job = asdk.anonymize(anon_object,target_datastore ,force=True)

# check the status of the job <check the status iteratively until  'status': 'Completed' >
job.status()

# check the comparative risk statistics from the source and result dataset
job.riskStat()

# check the comparative utility statistics from the source and result dataset
job.utilityStat()
Tree-based Aggregation for Attributes with k-Anonymity, l-Diversity, and t-Closeness
This sample uses the following attributes:
- Source: Local file system
- Target: Amazon S3 bucket
- Data set: 4 Quasi Identifiers, 2 Sensitive Attributes
- Suppression: 0.10
- Privacy Model: K with value 3, T-closeness with value 0.2, and L-diversity with value 2
In this example, for an attribute, the generalization hierarchy is a part of the request.
{
    "source": {
        "type": "File",
        "file": {
            "name": "samples/adult.csv",
            "props": {
                "sep": ";",
                "decimal": ",",
                "quotechar": "\"",
                "escapechar": "\\",
                "encoding": "utf-8"
            }
        }
    },
    "attributes": [
        {
            "name": "marital-status",
            "dataType": "String",
            "classificationType": "Quasi Identifier",
            "dataTransformationType": "Generalization",
            "generalization": {
                "type": "Tree Based",
                "hierarchyType": "Data Store",
                "dataStore": {
                    "type": "File",
                    "format": "CSV",
                    "file": {
                        "name": "samples/hierarchy/adult_hierarchy_marital-status.csv",
                        "props": {
                            "delimiter": ";",
                            "quotechar": "\"",
                            "header": null
                        }
                    }
                }
            }
        },
        {
            "name": "native-country",
            "dataType": "String",
            "classificationType": "Quasi Identifier",
            "dataTransformationType": "Generalization",
            "generalization": {
                "type": "Tree Based",
                "hierarchyType": "Data Store",
                "dataStore": {
                    "type": "File",
                    "format": "CSV",
                    "file": {
                        "name": "samples/hierarchy/adult_hierarchy_native-country.csv",
                        "props": {
                            "delimiter": ";",
                            "quotechar": "\"",
                            "header": null
                        }
                    }
                }
            }
        },
        {
            "name": "occupation",
            "dataType": "String",
            "classificationType": "Quasi Identifier",
            "dataTransformationType": "Generalization",
            "generalization": {
                "type": "Tree Based",
                "hierarchyType": "Data Store",
                "dataStore": {
                    "type": "File",
                    "format": "CSV",
                    "file": {
                        "name": "samples/hierarchy/adult_hierarchy_occupation.csv",
                        "props": {
                            "delimiter": ";",
                            "quotechar": "\"",
                            "header": null
                        }
                    }
                }
            }
        },
        {
            "name": "race",
            "dataType": "String",
            "classificationType": "Quasi Identifier",
            "dataTransformationType": "Generalization",
            "generalization": {
                "type": "Tree Based",
                "hierarchyType": "Data",
                "data": {
                    "hierarchy": [
                        [
                            "White",
                            "*"
                        ],
                        [
                            "Asian-Pac-Islander",
                            "*"
                        ],
                        [
                            "Amer-Indian-Eskimo",
                            "*"
                        ],
                        [
                            "Black",
                            "*"
                        ]
                    ],
                    "defaultHierarchy": [
                        "Other",
                        "*"
                    ]
                }
            }
        },
        {
            "name": "sex",
            "dataType": "String",
            "classificationType": "Sensitive Attribute"
        },
        {
            "name": "salary-class",
            "dataType": "String",
            "classificationType": "Sensitive Attribute"
        }
    ],
    "config": {
        "maxSuppression": 0.10
    },
    "privacyModel": {
        "k": {
            "kValue": 3
        },
        "tcloseness": [
            {
                "name": "salary-class",
                "emdType": "EMD with equal ground distance",
                "tFactor": 0.2
            }
        ],
        "ldiversity": [
            {
                "name": "sex",
                "lFactor": 2,
                "lType": "Distinct-l-diversity"
            }
        ]
    },
    "target": {
        "type": "File",
        "file": {
            "name": "s3://<Your-S3-BucketName>/anon-adult_klt.csv",
            "props": {
                "lineterminator": "\n"
            },
            "accessOptions": {
                "key": "<Your-S3-API Key>",
                "secret": "<Your-S3-API Secret>"
            }
        }
    }
}
#import the anonsdk library
import anonsdk as asdk
import pandas as pd

# s3 bucket credentials
s3_key = <AWS_Key>
s3_secret = <AWS_Secret>

#set the source path for anonymization
# dataset path
source_csv_path = "adult.csv"
# create Store Object source_datastore
source_datastore = asdk.FileDataStore(source_csv_path)

#Set the target path for anonymized result
# anonymized file path
target_csv_path = "s3://target/anon-adult_klt.csv"

# create Store Object target_datastore
target_datastore = asdk.FileDataStore(target_csv_path, access_options={"key": s3_key,"secret": s3_secret})

# Create connection Object with Rest API server
conn = asdk.Connection("https://anon.protegrity.com/")

# create AnonObject with connection, dataframe metadata and source path
df = pd.read_csv(source_csv_path,sep=";")
df.head()
anon_object = asdk.AnonElement(conn, df, source_datastore)

# configuration
hierarchy_marital_status_path = "samples/hierarchy/adult_hierarchy_marital-status.csv"
df_ms = pd.read_csv(hierarchy_marital_status_path,sep=";").compute()
print(df_ms)
anon_object['marital-status']=asdk.Gen_Tree(df_ms)

hierarchy_native_country_path = "samples/hierarchy/adult_hierarchy_native-country.csv"
df_nc = pd.read_csv(hierarchy_native_country_path,sep=";").compute()
print(df_nc)
anon_object['nativecountry']=asdk.Gen_Tree(df_nc)

hierarchy_occupation_path = "hierarchy/adult_hierarchy_occupation.csv"
df_occ = pd.read_csv(hierarchy_occupation_path).compute()
print(df_occ)
anon_object['occupation']=asdk.Gen_Tree(df_occ)

df_race = pd.DataFrame(data={"lvl0":["White","Asian-Pac-Islander","Amer-Indian","Black","Other"], "lvl1":["*","*","*","*","*"]})
anon_object['race']=asdk.Gen_Tree(df_race)

#Configure K-anonymity , suppression allowed in the dataset
anon_object.config.k = asdk.K(3)
anon_object.config['maxSuppression'] = 0.10

#Configure L-diversity and T-closeness
anon_object["sex"]=asdk.LDiv(lfactor=2)
anon_object["salary-class"]=asdk.TClose(tfactor=0.2)

# Send Anonymization request with Transformation Configuration with the target store
job = asdk.anonymize(anon_object,target_datastore ,force=True)

# check the status of the job
job.status()

# check the comparative risk statistics from the source and result dataset
job.riskStat()

# check the comparative utility statistics from the source and result dataset
job.utilityStat()
Micro-Aggregation and Generalization with Aggregates
This sample uses the following attributes:
- Source: Local file system
- Target: Amazon S3 bucket
- Data set: 2 Quasi Identifiers, 1 Aggregation-based Quasi Identifier, 2 Micro Aggregations, and 2 Sensitive Attributes
- Suppression: 0.50
- Privacy Model: K with value 5, T-closeness with value 0.2, and L-diversity with value 2
{
    "source": {
        "type": "File",
        "file": {
            "name": "samples/adult.csv",
            "props": {
                "sep": ";"
            }
        }
    },
    "attributes": [
        {
            "name": "age",
            "dataType": "Integer",
            "classificationType": "Quasi Identifier",
            "dataTransformationType": "Micro Aggregation",
            "aggregateFn": "GMean"
        },
        {
            "name": "marital-status",
            "dataType": "String",
            "classificationType": "Quasi Identifier",
            "dataTransformationType": "Micro Aggregation",
            "aggregateFn": "Mode"
        },
        {
            "name": "native-country",
            "dataType": "String",
            "classificationType": "Quasi Identifier",
            "dataTransformationType": "Generalization",
            "generalization": {
                "type": "Tree Based",
                "hierarchyType": "Data Store",
                "dataStore": {
                    "type": "File",
                    "format": "CSV",
                    "file": {
                        "name": "samples/hierarchy/adult_hierarchy_native-country.csv",
                        "props": {
                            "delimiter": ";",
                            "quotechar": "\"",
                            "header": null
                        }
                    }
                }
            }
        },
        {
            "name": "occupation",
            "dataType": "String",
            "classificationType": "Quasi Identifier",
            "dataTransformationType": "Generalization",
            "generalization": {
                "type": "Tree Based",
                "hierarchyType": "Data Store",
                "dataStore": {
                    "type": "File",
                    "format": "CSV",
                    "file": {
                        "name": "samples/hierarchy/adult_hierarchy_occupation.csv",
                        "props": {
                            "delimiter": ";",
                            "quotechar": "\"",
                            "header": null
                        }
                    }
                }
            }
        },
        {
            "name": "race",
            "dataType": "String",
            "classificationType": "Quasi Identifier",
            "dataTransformationType": "Generalization",
            "generalization": {
                "type": "Aggregation Based",
                "hierarchyType": "Aggregate",
                "aggregateFn": "Mode"
            }
        },
        {
            "name": "sex",
            "classificationType": "Sensitive Attribute",
            "dataType": "String"
        },
        {
            "name": "salary-class",
            "classificationType": "Sensitive Attribute",
            "dataType": "String"
        }
    ],
    "config": {
        "maxSuppression": 0.50
    },
    "privacyModel": {
        "k": {
            "kValue": 5
        },
        "tcloseness": [
            {
                "name": "salary-class",
                "emdType": "EMD with equal ground distance",
                "tFactor": 0.2
            }
        ],
        "ldiversity": [
            {
                "name": "sex",
                "lType": "Distinct-l-diversity",
                "lFactor": 2
            }
        ]
    },
    "target": {
        "type": "File",
        "file": {
            "name": "s3://<Your-S3-BucketName>/anon-adult_micro.csv",
            "props": {
                "lineterminator": "\n"
            },
            "accessOptions": {
                "key": "<Your-S3-API Key>",
                "secret": "<Your-S3-API Secret>"
            }
        }
    }
}
#import the anonsdk library
import anonsdk as asdk
import pandas as pd

# s3 bucket credentials
s3_key = <AWS_Key>
s3_secret = <AWS_Secret>

#set the source path for anonymization
# dataset path
source_csv_path = "adult.csv"
# create Store Object source_datastore
source_datastore = asdk.FileDataStore(source_csv_path)

#Set the target path for anonymized result
# anonymized file path
target_csv_path = "s3://target/anon-adult_micro.csv"
# create Store Object target_datastore
target_datastore = asdk.FileDataStore(target_csv_path, access_options={"key": s3_key,"secret": s3_secret})

# Create connection Object with Rest API server
conn = asdk.Connection("https://anon.protegrity.com/")
df = pd.read_csv(source_csv_path,sep=";")
df.head()

# create AnonObject with connection, dataframe metadata and source path
anon_object = asdk.AnonElement(conn, df, source_datastore)

# configuration
hierarchy_native_country_path = "hierarchy/adult_hierarchy_native-country.csv"
df_nc = pd.read_csv(hierarchy_native_country_path,sep=";")
print(df_nc)
anon_object['nativecountry']=asdk.Gen_Tree(df_nc)

hierarchy_occupation_path = "samples/hierarchy/adult_hierarchy_occupation.csv"
df_occ = pd.read_csv(hierarchy_occupation_path)
print(df_occ)
anon_object['marital-status']=asdk.Gen_Tree(df_occ)

# applying aggregation rules
anon_object['age']=asdk.MicroAgg(asdk.AggregateFunction.GMean)
anon_object['race']=asdk.Gen_Agg(asdk.AggregateFunction.Mode)

# applying micro-aggregation rule
anon_object['marital-status']=asdk.MicroAgg(asdk.AggregateFunction.Mode)

#Configure K-anonymity , suppression in the dataset allowed
anon_object.config.k = asdk.K(5)
anon_object.config['maxSuppression'] = 0.50

#Configure L-diversity and T-closeness
anon_object["sex"]=asdk.LDiv(lfactor=2)
anon_object["salary-class"]=asdk.TClose(tfactor=0.2)

# Send Anonymization request with Transformation Configuration with the target store
job = asdk.anonymize(anon_object,target_datastore ,force=True)

# check the status of the job
job.status()

# check the comparative risk statistics from the source and result dataset
job.riskStat()

# check the comparative utility statistics from the source and result dataset
job.utilityStat()
Parquet File Format
This sample uses the following attributes:
- Source: Local file system
- Target: Amazon S3 bucket in the Parquet format
- Data set: 4 Quasi Identifiers, 1 Aggregation-based Quasi Identifier, 1 Micro Aggregation, and 1 Sensitive Attribute
- Suppression: 0.4
- Privacy Model: K with value 350 and L-diversity with value 2
In this example, for an attribute, the generalization hierarchy is part of the request.
    {
        "source": {
            "type": "File",
            "file": {
                "name": "samples/adult.csv",
                "props": {
                    "sep": ";",
                    "decimal": ",",
                    "quotechar": "\"",
                    "escapechar": "\\",
                    "encoding": "utf-8"
                }
            }
        },
        "attributes": [
            {
                "name": "age",
                "dataType": "Integer",
                "classificationType": "Quasi Identifier",
                "dataTransformationType": "Generalization",
                "generalization": {
                    "hierarchyType": "Rule",
                    "type": "Rounding",
                    "rule": {
                        "interval": {
                            "levels": [
                                "5",
                                "10",
                                "50",
                                "100"
                            ],
                            "lowerBound":"5",
                            "upperBound":"100"
                        }
                    }
                }
            },
            {
                "name": "marital-status",
                "dataType": "String",
                "classificationType": "Quasi Identifier",
                "dataTransformationType": "Micro Aggregation",
                "aggregateFn": "Mode"
            },
            {
                "name": "citizenSince",
                "dataType": "Date",
                "classificationType": "Quasi Identifier",
                "dataTransformationType": "Generalization",
                "generalization": {
                    "type": "Rounding",
                    "hierarchyType": "Rule",
                    "rule": {
                        "daterange": {
                            "levels": [
                                "WD.M.Y",
                                "FD.M.Y",
                                "QTR.Y",
                                "Y"
                            ]
                        }
                    }
                },
                "props": {
                    "dateformat": "dd-mm-yyyy"
                }
            },
            {
                "name": "occupation",
                "dataType": "String",
                "classificationType": "Quasi Identifier",
                "dataTransformationType": "Generalization",
                "generalization": {
                    "type": "Tree Based",
                    "hierarchyType": "Data Store",
                    "dataStore": {
                        "type": "File",
                        "format": "CSV",
                        "file": {
                            "name": "samples/hierarchy/adult_hierarchy_occupation.csv",
                            "props": {
                                "delimiter": ";",
                                "quotechar": "\"",
                                "header": null
                            }
                        }
                    }
                }
            },
            {
                "name": "race",
                "classificationType": "Quasi Identifier",
                "dataTransformationType": "Generalization",
                "dataType": "String",
                "generalization": {
                    "type": "Aggregation Based",
                    "hierarchyType": "Aggregate",
                    "aggregateFn": "Mode"
                }
            },
            {
                "name": "salary-class",
                "dataType": "String",
                "classificationType": "Quasi Identifier",
                "dataTransformationType": "Generalization",
                "generalization": {
                    "type": "Masking Based",
                    "hierarchyType": "Rule",
                    "rule": {
                        "masking": {
                            "maskOrder": "Left To Right",
                            "maskChar": "*",
                            "maxDomainSize": 3
                        }
                    }
                }
            },
            {
                "name": "sex",
                "dataType": "String",
                "classificationType": "Sensitive Attribute"
            }
        ],
        "config": {
            "maxSuppression": 0.4,
            "redactOutliers": true,
            "suppressionData": "Any"
        },
        "privacyModel": {
            "k": {
                "kValue": 350
            },
            "ldiversity": [
                {
                    "name": "sex",
                    "lType": "Distinct-l-diversity",
                    "lFactor": 2
                }
            ]
        },
        "target": {
            "type": "File",
            "file": {
                "name": "s3://<Your-S3-BucketName>/anon-adult-rules",
                "format": "Parquet",
                "accessOptions": {
                    "key": "<Your-S3-API Key>",
                    "secret": "<Your-S3-API Secret>"
                }
            }
        }
    }
It is not applicable for SDK functions.
Retaining and Redacting
This sample uses the following attributes:
- Source: Local file system
- Target: Amazon S3 bucket in the Parquet format
- Data set: 2 Quasi Identifiers, 1 Aggregation-based Quasi Identifier, 1 Micro Aggregation, 1 Non-Sensitive Attribute, 1 Identifying Attribute, and 2 Sensitive Attributes
- Suppression: 0.10
- Privacy Model: K with value 200 and L-diversity with value 2
In this example, for an attribute, the generalization hierarchy is part of the request.
    {
        "source": {
            "type": "File",
            "file": {
                "name": "samples/adult.csv",
                "props": {
                    "sep": ";",
                    "decimal": ",",
                    "quotechar": "\"",
                    "escapechar": "\\",
                    "encoding": "utf-8"
                }
            }
        },
        "attributes": [
            {
                "name": "age",
                "dataType": "Integer",
                "classificationType": "Quasi Identifier",
                "dataTransformationType": "Generalization",
                "generalization": {
                    "type": "Rounding",
                    "hierarchyType": "Rule",
                    "rule": {
                        "interval": {
                            "levels": [
                                "5",
                                "10",
                                "50",
                                "100"
                            ]
                        }
                    }
                }
            },
            {
                "name": "marital-status",
                "dataType": "String",
                "classificationType": "Quasi Identifier",
                "dataTransformationType": "Micro Aggregation",
                "aggregateFn": "Mode"
            },
            {
                "name": "occupation",
                "dataType": "String",
                "classificationType": "Quasi Identifier",
                "dataTransformationType": "Generalization",
                "generalization": {
                    "type": "Tree Based",
                    "hierarchyType": "Data Store",
                    "dataStore": {
                        "type": "File",
                        "format": "CSV",
                        "file": {
                            "name": "samples/hierarchy/adult_hierarchy_occupation.csv",
                            "props": {
                                "delimiter": ";",
                                "quotechar": "\"",
                                "header": null
                            }
                        }
                    }
                }
            },
            {
                "name": "race",
                "dataType": "String",
                "classificationType": "Quasi Identifier",
                "dataTransformationType": "Generalization",
                "generalization": {
                    "type": "Aggregation Based",
                    "hierarchyType": "Aggregate",
                    "aggregateFn": "Mode"
                }
            },
            {
                "name": "citizenSince",
                "dataType": "Date",
                "classificationType": "Identifying Attribute"
            },
            {
                "name": "education",
                "dataType": "String",
                "classificationType": "Non-Sensitive Attribute"
            },
            {
                "name": "salary-class",
                "dataType": "String",
                "classificationType": "Sensitive Attribute"
            },
            {
                "name": "sex",
                "dataType": "String",
                "classificationType": "Sensitive Attribute"
            }
        ],
        "config": {
            "maxSuppression": 0.10,
            "suppressionData": "Any"
        },
        "privacyModel": {
            "k": {
                "kValue": 200
            },
            "ldiversity": [
                {
                    "name": "sex",
                    "lType": "Distinct-l-diversity",
                    "lFactor": 2
                },
                {
                    "name": "salary-class",
                    "lType": "Distinct-l-diversity",
                    "lFactor": 2
                }
            ]
        },
        "target": {
            "type": "File",
            "file": {
                "name": "s3://<Your-S3-BucketName>/anon-adult_retd",
                "format": "Parquet",
                "accessOptions": {
                    "key": "<Your-S3-API Key>",
                    "secret": "<Your-S3-API Secret>"
                }
            }
        }
    }
# import the anonsdk library
import anonsdk as asdk
import pandas as pd

# s3 bucket credentials
s3_key = < AWS_Key >
s3_secret = < AWS_Secret >

# set the source path for anonymization
# dataset path
source_csv_path = "adult.csv"
# create Store Object source_datastore
source_datastore = asdk.FileDataStore(source_csv_path)

# Set the target path for anonymized result
# anonymized file path
target_csv_path = "s3://target/anon-adult_retd"

# create Store Object target_datastore
target_datastore = asdk.FileDataStore(target_csv_path, access_options={"key": s3_key, "secret": s3_secret})

# Create connection Object with Rest API server
conn = asdk.Connection("https://anon.protegrity.com/")
df = pd.read_csv(source_csv_path, sep=";")
df.head()

# create AnonObject with connection, dataframe metadata and source path
anon_object = asdk.AnonElement(conn, df, source_datastore)

# configuration
hierarchy_occupation_path = "samples/hierarchy/adult_hierarchy_occupation.csv"
df_occ = pd.read_csv(hierarchy_occupation_path, sep=";")
print(df_occ)
anon_object['marital-status'] = asdk.Gen_Tree(df_occ)
anon_object['marital-status'] = asdk.MicroAgg(asdk.AggregateFunction.Mode)
anon_object['race'] = asdk.Gen_Agg(asdk.AggregateFunction.Mode)
anon_object['age'] = asdk.Gen_Interval([5, 10, 50, 100])
anon_object['citizenSince'] = asdk.Preserve()
anon_object['education'] = asdk.Preserve()
anon_object['salary-class'] = asdk.Redact()
anon_object['sex'] = asdk.Redact()

# Configure K-anonymity , suppression in the dataset allowed
anon_object.config.k = asdk.K(200)
anon_object.config['maxSuppression'] = 0.10

# Configure L-diversity
anon_object["sex"] = asdk.LDiv(lfactor=2)
anon_object["salary-class"] = asdk.LDiv(lfactor=2)

# Send Anonymization request with Transformation Configuration with the target store
job = asdk.anonymize(anon_object, target_datastore, force=True)

# check the status of the job
job.status()

# check the comparative risk statistics from the source and result dataset
job.riskStat()

# check the comparative utility statistics from the source and result dataset
job.utilityStat()
7.3 - Samples for cloud-related source and destination files
Code for specifying the source and destination for AWS and Azure.
"source": {
      "type": "File",
      "file": {
        "name": "s3://<path_to_dataset>",
        "accessOptions": {
            "key": "API Key",
            "secret": "Secret Key"
        }
      }
    }
"source": {
      "type": "File",
      "file": {
        "name": "adl://<path-to-dataset>",
        "accessOptions":{
            "tenant_id": Tenant_ID,
            "client_id": Client_ID,
            "client_secret": Client_Secret_Key
        }
      }
    }
"source": {
    "type": "File",
    "file": {
      "name": "abfs://<path_to_source_file>",
      "accessOptions":{
        "account_name": "<account_name>",
        "account_key": "<Account_key>”
      }
    },
    "format": "CSV"
  }
8 - Additional Information
Additional information to help you using the product.
8.1 - Best practices when using Protegrity Anonymization
Suggestions for using Protegrity Anonymization efficiently.
Ensure that the source file is clean based on the following checks:
- A column contains correct data values. For example, a field with numbers, such as, salary, must not contain text values.
- Appropriate text as per the coding selected is present in the files. Special characters or characters that cannot be processed must not be present in the source file.
Move the anonymized data file and the logs generated to a different system before deleting your environment.
The maximum dataframe size that can attach to an anonymization job is 100MB.
For processing a larger dataset size, users can use the different cloud storages available.
Run a maximum of 5 anonymization jobs in Protegrity Anonymization: A maximum of 5 jobs can be put on the Protegrity Anonymization queue for adequate utilization of resources. If more jobs are raised, then the job after the initial 5 jobs are rejected and are not processed. If required, increase the maximum limit for the JOB_QUEUE_SIZE parameter in the config.yaml file. For Docker, update the config-docker.yaml file.
Protegrity Anonymization accepts a maximum of 60 requests per minute: Protegrity Anonymizationcan accept a maximum of 60 request per minute. If more than 60 requests are raised, then the excess requests are rejected and are not processed. If required, increase the maximum limit for the DEFAULT_API_RATE_LIMIT parameter in the config.yaml file. For Docker, update the config-docker.yaml file.
8.2 - Protegrity Anonymization Risk Metrics
This section describes how the risk metrics are derived. It details the descriptions and the equations used to calculate the risk.
Definitions
The following definitions are used for risk calculations:
- Data Provider or Custodian: The custodian of the data, responsible for controlling the process of sharing by anonymizing the data as well as putting in place other controls which prevents data from being misused and or re-identified.
- Data Recipient: Person or institution who receives the data from the data provider.
- Dataset: The collection of all records containing the data on subjects.
- Adversary: Data recipient who has the motives to attempt and means to succeed the re-identification of the data and intends to use the data in ways which may be harmful to individuals contained in the dataset.
- Target: Person whose details are in the dataset who has been selected by the adversary to focus the re-identification attempt on.
Types of risks
Protegrity Anonymizationuses the Prosecutor, Journalist and Marketer risk models to access probability of re-identification attacks. A description of these risks are provided here.
- Prosecutor Risk: If the adversary can know that the target is in the dataset, then it is called Prosecutor Risk. The fact that target is part of dataset increases the risk of successful re-identification.
- Journalist Risk: When the adversary doesn’t know for certain that the target is in the dataset then it is called Journalist Risk.
- Marketer Risk: Under Marketer Risk, the adversary attempts to re-identify as many subjects in the dataset as possible. If the risk of re-identifying an individual subject is possible, then the risk of multiple subjects being re-identified is also possible.
Relationship between the three risks
Prosecutor Risk >= Journalist Risk >= Marketer Risk
If the dataset is protected against the prosecutor and the journalist risk, depending on the adversary’s knowledge of target’s participation, then by default it is also protected against the marketer risk.
Measuring Risks
This section details the strategy used by Protegrity Anonymization to calculate risks.
For calculating risks, the population is the entire pool from which the sample dataset is drawn. In the current calculation of risk metrics, the population considered is the same as the sample. In case of journalist calculation, it is good to consider the population from a larger dataset from which the sample is drawn.
The following annotations are used in the calculations:
- Ra is the proportion of records with risk above the threshold which is at highest risk.
- Rb is the maximum probability of re-identification which is at maximum risk.
- Rc is the proportion of records that can be re-identified on an average which is the success rate of re-identification.
As part of the risk calculations, anonymization API calculates the following metrics:
- pRa is the highest prosecutor risk.
- pRb is the maximum prosecutor risk.
- pRc is the success rate of prosecutor risk.
- jRa is the highest journalist risk.
- jRb is the maximum journalist risk.
- jRc is the success rate of journalist risk.
- mRc is the success rate of marketer risk.
Risk Type | Equation | Notes |
|---|---|---|
Prosecutor | pRa = 1/n pRc = |J| / n |
|
Journalist | jRa = 1/n jRc = max ( |J| / |
|
Marketer | mRc = 1/n |
|
Measuring Journalist Risk
For Journalist Risk to be applied, the published dataset should be a specific sample.
There are two general types of re-identification attacks under journalist risk:
- The adversary is targeting a specific individual.
- The adversary is targeting any individual.
In case of journalist attack, the adversary will match the published dataset with another identification dataset, such as, voter registry, all patient data in hospital, and so on.
Identification of the dataset represents the population of which the published dataset is a sample.
For example, the sample published dataset is drawn from the identification dataset.

| Derived Risk Metrics | Equation | Risk Value |
|---|---|---|
| jRa | 1/n  fj x l(1 / FJ > T) fj x l(1 / FJ > T) | 0 |
| jRb | 1 / min(FJ) | 0.25 |
| jRc | max ( |J| /  FJ) , 1 /n fj / FJ) FJ) , 1 /n fj / FJ) | 0.13 |
Calculation of jRa:
- T value is 0.33. Size of equivalence classes in the identity dataset are 10, 8, 14, 4, 2.
- Identity function returns 0 when value 1/F is less than τ value else 1.
- Identify function returns 0, 0, 0, 0, 1.
- Equivalence sizes in samples are 4, 3, 2, 1.
- Values of equivalence size / number of records are 0.4, 0.3, 0.2, 0.1.
- Product of above value with identity function values are 0, 0, 0, 0.
- Value of jRa is 0.
Calculation of jRb:
- Minimum of equivalence size of identification dataset is 4
- Value of jRb is 0.25.
Calculation of jRc:
- Number of equivalence classes in 5 in identification dataset.
- Total records in identification dataset 38.
- Number of equivalence classes / total records = 5/38 = 0.131.
- Equivalence classes in sample / equivalence classes in identification dataset are 0.4, 0.375, 0/142857, 0/25.
- Total of above values 1.16.
- Above value / total records in sample = 1/16 / 10 = 0.116.
- Max (0.131, 0.116) = 0.131.
Measuring Marketer Risk
The use case for deriving the marketer risk is shown here.
| Derived Risk Metrics | Equation | Risk Value |
|---|---|---|
| mRc | 1/n fj /FJ | 0.116 |
Calculation of mRc:
- Equivalence classes in sample / equivalence classes in identification dataset are 0.4, 0.375, 0/142857, 0/25.
- Total of above values 1.16.
- Above value / total records in sample = 1/16 / 10 = 0.116.
- Value of marketer risk is 0.116.