This is the multi-page printable view of this section. Click here to print.
Installing Protegrity Anonymization
- 1: Prerequisites for Deploying the Protegrity Anonymization API
- 2: Using Cloud Services
- 2.1: Anonymizing Using Amazon Elastic Kubernetes Service (EKS)
- 2.1.1: Verifying the Prerequisites
- 2.1.2: Preparing the Base Machine
- 2.1.3: Creating the EKS Cluster
- 2.1.4: Accessing the EKS Cluster
- 2.1.5: Uploading the Image to AWS Container Registry (ECR)
- 2.1.6: Setting up NGINX Ingress Controller
- 2.1.7: Using Custom Certificates in Ingress
- 2.1.8: Updating the Configuration Files
- 2.1.9: Deploying the Protegrity Anonymization API to the EKS Cluster
- 2.1.10: Viewing Protegrity Anonymization API Using REST
- 2.1.11: Creating Kubernetes Service Accounts and Kubeconfigs for Anonymization Cluster
- 2.2: Anonymizing Using Azure Kubernetes Service (AKS)
- 2.2.1: Set up Anonymization API on Azure Kubernetes Service (AKS)
- 2.2.2: Preparing the Base Machine
- 2.2.3: Creating a Kubernetes Cluster
- 2.2.4: Accessing the AKS Cluster
- 2.2.5: Uploading the Image to the Azure Container Registry
- 2.2.6: Creating an Azure Disk
- 2.2.7: Setting up NGINX Ingress Controller
- 2.2.8: Using Custom Certificates in Ingress
- 2.2.9: Updating the Configuration Files
- 2.2.10: Deploying the Protegrity Anonymization API to the AKS Cluster
- 2.2.11: Viewing Protegrity Anonymization API Using REST
- 3: Installing Using Docker Containers
1 - Prerequisites for Deploying the Protegrity Anonymization API
The Protegrity Anonymization API is provided as a Docker image. Prepare your system to run commands for processing the basic Kubernetes services for setting up the Protegrity Anonymization API. Additionally, ensure that the following prerequisites are met to install the Protegrity Anonymization REST API in your Cloud environment.
The user should be well versed with using container orchestration service like Kubernetes in different cloud services.
Access as an Admin user is available for the cloud service used.
A minimum of 2 nodes with the following minimum configuration:
- RAM: 16 GB
- CPU: 8 core
- Hard Disk: Unlimited
Verify the contents of the package after extracting the
ANON-API_DEB-ALL-64_x86-64_Docker-ALL-64_1.4.0.x.tgzandANON-SDK_ALL-ALL-64_x86-64_PY-3-64_1.4.0.x.tgzfiles from the.tgzarchive.ANON-REST-API_1.4.0.x.tgz– Installation package for the Protegrity Anonymization API. This package contains the following files:
Files Description ANON-API_1.4.0.x.tar.gzThis image is used to create the Protegrity Anonymization API Docker Container. cluster-aws.yamlThis is the template configuration file for creating the cluster in the AWS Cloud environment. ANON-API_HELM_1.4.0.x.tgzThis contains the Helm chart, which is used to deploy the Protegrity Anonymization API application on the Kubernetes cluster. Anon_logs.shThis is the script for extracting the logs from the Protegrity Anonymization API container. README.txtThis readme contains information about the Protegrity Anonymization API. Contractual.csvThis contains the list of libraries used in the Protegrity Anonymization API. docker/docker-compose.yamlThis file is used to deploy the API in Docker containers. docker/nginx.confThis file is used to configure nginx for Docker. docker/cert/cert.pemThis is the default self-signed certificate for the Docker container. docker/cert/key.pemThis is the key for the Docker container. aws-terraform/main.tfThis template file is used to deploy the API in AWS using Terraform. aws-terraform/vars.tfThis file is used for specifying the cluster configuration information. rbac/kubconfigcmd.txtThis file contains the commands for working with RBAC. rbac/anon-service-account.yamlThis template file contains the RBAC namespace configuration information. rbac/anon-role-and-rolebinding.yamlThis template file contains the RBAC configuration information for the roles and role binding. rbac/anon-clusterrolebinding.yamlThis file contains the RBAC configuration information for binding the roles to the cluster. rbac/kubconfigcmd.txtThis file contains the RBAC commands for retrieving tokens and assigning access to the service account. ANON-NOTEBOOK_1.4.0.x.x.tgz- Docker image for the Protegrity Anonymization API Notebook workstation. Do not extract or modify the contents of this file.ANON-SDK_ALL-ALL-64_x86-64_PY-3-64_1.4.0.x.tgz- Contains theAnonsdk-wheelfile that is used to installanonsdkin the Python environment.If required, then a REST client to access the REST services, such as Postman.
2 - Using Cloud Services
The Protegrity Anonymization API can be hosted in the Kubernetes service provided by various cloud platforms, such as AWS and Azure.
- Anonymizing Using Amazon Elastic Kubernetes Service (EKS)
- Anonymizing Using Azure Kubernetes Service (AKS)
Note: Protegrity Anonymization API is compatible for use with other Cloud providers. However, the compatibility has not been tested.
2.1 - Anonymizing Using Amazon Elastic Kubernetes Service (EKS)
2.1.1 - Verifying the Prerequisites
Ensure that the following prerequisites are met:
Base machine - This might be a Linux machine instance that is used to communicate with the Kubernetes cluster. This instance can be on-premise or on AWS. Ensure that Helm is installed on this Linux instance. You must also install Docker on this Linux instance to communicate with the Container Registry, where you want to upload the Docker images.
For more information about the minimum hardware requirements, refer to the section Prerequisites for Deploying the Protegrity Anonymization API.
Access to an AWS account.
Permissions to create a Kubernetes cluster.
IAM user:
Required to create the Kubernetes cluster. This user requires the following policy permissions managed by AWS:
- AmazonEC2FullAccess
- AmazonEKSClusterPolicy
- AmazonS3FullAccess
- AmazonSSMFullAccess
- AmazonEKSServicePolicy
- AmazonEKS_CNI_Policy
- AWSCloudFormationFullAccess
- Custom policy that allows the user to create a new role and an instance profile, retrieve information regarding a role and an instance profile, attach a policy to the specified IAM role, and so on. The following actions must be permitted on the IAM service:
- GetInstanceProfile
- GetRole
- AddRoleToInstanceProfile
- CreateInstanceProfile
- CreateRole
- PassRole
- AttachRolePolicy
- Custom policy that allows the user to delete a role and an instance profile, detach a policy from a specified role, delete a policy from the specified role, remove an IAM role from the specified EC2 instance profile, and so on. The following actions must be permitted on the IAM service:
- GetOpenIDConnectProvider
- CreateOpenIDConnectProvider
- DeleteInstanceProfile
- DeleteRole
- RemoveRoleFromInstanceProfile
- DeleteRolePolicy
- DetachRolePolicy
- PutRolePolicy
- Custom policy that allows the user to manage EKS clusters. The following actions must be permitted on the EKS service:
- ListClusters
- ListNodegroups
- ListTagsForResource
- ListUpdates
- DescribeCluster
- DescribeNodegroup
- DescribeUpdate
- CreateCluster
- CreateNodegroup
- DeleteCluster
- DeleteNodegroup
- UpdateClusterConfig
- UpdateClusterVersion
- UpdateNodegroupConfig
- UpdateNodegroupVersion
For more information about creating an IAM user, refer to Creating an IAM User in Your AWS Account. Contact your system administrator for creating the IAM users.
For more information about the AWS-specific permissions, refer to API Reference document for Amazon EKS.
Access to the Amazon Elastic Kubernetes Service (EKS) to create a Kubernetes cluster.
Access to the AWS Elastic Container Registry (ECR) to upload the Protegrity Anonymization API image.
2.1.2 - Preparing the Base Machine
The steps provided here installs the software required for running the various EKS commands for setting up and working with the Protegrity Anonymization API cluster.
Log in to your system as an administrator.
Open a command prompt with administrator.
Install the following tools to get started with creating the EKS cluster.
Install AWS CLI 2, which provides a set of command line tools for the AWS Cloud Platform.
For more information about installing the AWS CLI 2, refer to Installing or updating to the latest version of the AWS CLI.
Configure AWS CLI on your machine by running the following command.
aws configureYou are prompted to enter the AWS Access Key ID, Secret Access Key, AWS Region, and the default output format where these results are formatted.
For more information about configuring AWS CLI, refer to Configuring settings for the AWS CLI.
You need to specify the credentials of IAM User created in the section Verifying the Prerequisites to create the Kubernetes cluster.
AWS Access Key ID [None]: <AWS Access Key ID of the IAM User 1>
AWS Secret Access Key [None]: <AWS Secret Access Key of the IAM User 1>
Default region name [None]: <Region where you want to deploy the Kubernetes cluster>
Default output format [None]: json
Install Kubectl version 1.22, which is the command line interface for Kubernetes.
Kubectl enables you to run commands from the Linux instance so that you can communicate with the Kubernetes cluster.
For more information about installing
kubectl, refer to Set up kubectl and eksctl in the AWS documentation.Install one of the following command line tools for creating the Kubernetes cluster on AWS (EKS):
eksctl: Install eksctl which is a command line utility to create and manage Kubernetes clusters on Amazon Elastic Kubernetes Service (Amazon EKS).
For more information about installing eksctl on the Linux instance, refer to Set up to use Amazon EKS.
Terraform/OpenTofu: Optionally, install Terraform or OpenTofu which is the command line to create and manage Kubernetes clusters. Use the terraform version command in the CLI to verify that Terraform or OpenTofu is installed.
For more information about installing Terraform or OpenTofu, refer to Install Terraform.
Install the Helm client version 3.8.2 for working with Kubernetes clusters.
For more information about installing the Helm client, refer to Installing Helm.
2.1.3 - Creating the EKS Cluster
Complete the steps provided here to create the EKS cluster by running commands on the machine for the Protegrity Anonymization API.
Note: The steps listed in this procedure for creating the EKS cluster are for reference use. If you have an existing EKS cluster or want to create an EKS cluster based on your own requirements, then you can directly navigate to the section Accessing the EKS Cluster to connect your EKS cluster and the Linux instance.
To create an EKS cluster:
Log in to the Linux machine.
Obtain and extract the Protegrity Anonymization API files to a directory on your system.
- Download and extract the
ANON-API_DEB-ALL-64_x86-64_Docker-ALL-64_1.4.0.x.tgzfile. - Verify that the following files are available in the package:
ANON-REST-API_1.4.0.x.tgz: The files for working with Protegrity Anonymization REST API.ANON-NOTEBOOK_1.4.0.x.tgz: This file contains the image for the Anon-workstation.
- Extract the contents of the
ANON-REST-API_1.4.0.x.tgzandANON-NOTEBOOK_1.4.0.x.tgzfiles to a directory.
- Download and extract the
Add the Cloud-related settings in the configuration files using one of the following options:
Note: Use the checklist at AWS Checklist to update the
YAMLfiles.For eksctl: Update the
cluster-aws.yamltemplate file with the EKS authentication values for creating the EKS cluster.Update the following placeholder information in the
cluster-aws.yamlfile.apiVersion: eksctl.io/v1alpha5 kind: ClusterConfig metadata: name: <cluster_name> #(provide an appropriate name for your cluster) region: <Region where you want to deploy Kubernetes Cluster> #(specify the region to be used) version: "1.27" vpc: id: "#Update_vpc_here# # (enter the vpc id to be used) subnets: # (In this section specify the subnet region and subnet id accordingly) private: <Availability zone for the region where you want to deploy your Kubernetes cluster>: id: "#Update_id_here#" <Availability zone for the region where you want to deploy your Kubernetes cluster>: id: "#Update_id_here#" nodeGroups: - name: <Name of your Node Group> instanceType: t3a.xlarge minSize: 2 maxSize: 4 # (Set max node size according to load to be processed, for cluster-autoscaling) desiredCapacity: 3 privateNetworking: true iam: attachPolicyARNs: - "arn:aws:iam::aws:policy/AmazonEKS_CNI_Policy" - "arn:aws:iam::aws:policy/AmazonEKSWorkerNodePolicy" - "arn:aws:iam::aws:policy/AmazonEC2ContainerRegistryReadOnly" withAddonPolicies: autoScaler: true awsLoadBalancerController: true ebs: true securityGroups: withShared: true withLocal: true attachIDs: ['#Update_security_group_id_linked_to_your_VPC_here#'] tags: #Add required tags (Product, name, etc.) here k8s.io/cluster-autoscaler/<cluster_name>: "owned" # (Update your cluster name in this line) ## These tags are required for k8s.io/cluster-autoscaler/enabled: "true" ## cluster-autoscaling Product: "Anonymization" ssh: publicKeyName: '<EC2 Key Pair>' rgba(4, 4, 4, 1) SSH key to login to Nodes in the cluster if needed.</ns:clipboardNote: In the
ssh/publicKeyNameparameter, you must specify the name of the key pair that you have created.For more information about creating the EC2 key pair, refer to Amazon EC2 key pairs and Amazon EC2 instances.
The AmazonEKSWorkerNodePolicy policy allows Amazon EKS worker nodes to connect to Amazon EKS Clusters. For more information about the policy, refer to Amazon EKS Worker Node Policy.
For more information about the attached role arn:aws:iam::aws:policy/AmazonEKSWorkerNodePolicy in the nodegroup, refer to Amazon EKS node IAM role.
The ARN of the AmazonEKS_CNI_Policy policy is a default AWS policy that enables the Amazon VPC CNI Plugin to modify the IP address configuration on your EKS nodes. For more information about this policy, refer to Amazon EKS CNI Policy.
For more information about the attached role arn:aws:iam::aws:policy/AmazonEKS_CNI_Policy in the nodegroup, refer to Configure Amazon VPC CNI plugin to use IRSA.
For Terraform: Update the following placeholder information in the aws-terraform/vars.tf file with the Terraform values for creating the cluster.
variable "cluster_name" {
default = "<Cluster_name>" ## Supply the name for your EKS cluster.
}
variable "cluster_version" {
default = "1.27"
}
variable "aws_region" {
default = "<Region>" ## The region in which EKS cluster will be
created.
}
variable "role_arn" {
default = "<Specify Role_arn>" ## Amazon Resource Name (ARN) of the IAM
role that provides permissions for the Kubernetes control plane to make calls to AWS
API operations on your behalf.
}
variable "security_group_id" {
default = ["<Specify security group id>"] ## The Security Group ID for your VPC.
}
variable "subnet_ids" {
default = ["<subnet-1 id>", "<subnet-2 id>"] ## Supply the subnet ID's. Ensure the
subnets should be in different Availability Zone.
}
variable "node_group_name" {
default = "<Nodegroup Name>" ## Name of the nodegroup that will join the
EKS cluster.
}
variable "node_role_arn" { ## Amazon Resource Name (ARN) of the IAM
Role that provides permissions for the EKS Node Group.
default = "<IAM-Node ROLE ARN>" ## Refer
}
variable "instance_type" {
default = ["<instance_type>"] ## Type of Nodes in EKS cluster. Eg:
t3a.xlarge.
}
variable "desired_nodes_count" {
default = "<Desired node count>" ## Desired number of Nodes Running in EKS
cluster.
}
variable "max_nodes" {
default = "<Max node count>" ## Maximum number of Nodes in EKS cluster
can Autoscale to.
}
variable "min_nodes" {
default = "<Min node count>" ## Minimum number of Nodes in EKS cluster.
}
variable "ssh_key" {
default = "<EC2-SSH-key>" ## EC2-SSH Key Pair to SSH to Nodes of
cluster.
}
output "endpoint" {
value = aws_eks_cluster.eks_Anon.endpoint
}
Run one of the the following commands to create the Kubernetes cluster. This process might take time to complete. You might need to wait for 10 to 15 minutes for the cluster creation process to complete:
For eksctl:
eksctl create cluster -f cluster-aws.yamlFor Terraform:
terraform init terraform plan terraform apply
Deploy the Cluster Autoscaler component to enable the autoscaling of nodes in the EKS cluster.
For more information about deploying the Cluster Autoscaler, refer to the Deploy the Cluster Autoscaler section in the Amazon EKS documentation.
Install the Metrics Server to enable the horizontal autoscaling of pods in the Kubernetes cluster.
For more information about installing the Metrics Server, refer to the Horizontal Pod Autoscaler section in the Amazon EKS documentation.
2.1.4 - Accessing the EKS Cluster
Connect to the cloud service using the steps in this section.
Run the following command to connect your Linux instance to the Kubernetes cluster.
aws eks update-kubeconfig --name <Name of Kubernetes cluster> --region <Region in which the cluster is created>Run the following command to verify that the nodes are deployed.
kubectl get nodesNote: You can also verify that the nodes are deployed in AWS from the EKS Kubernetes Cluster dashboard.
2.1.5 - Uploading the Image to AWS Container Registry (ECR)
Use the information in this section to upload the Protegrity Anonymization API image to the AWS container registry (ECR) for running the Protegrity Anonymization API in EKS.
Ensure that you have set up your Container Registry.
Note: The steps listed in this section for uploading the container images to the Amazon Elastic Container Repository (ECR) are for reference use. You can choose to use a different Container Registry for uploading the container images.
For more information about setting up Amazon ECR, refer to Moving an image through its lifecycle in Amazon ECR.
To install the Protegrity Anonymization API:
Log in to the machine as an administrator to install the Protegrity Anonymization API.
Install Docker using the steps provided at https://docs.docker.com/engine/install/.
Configure Docker to push the Protegrity Anonymization API images to the AWS Container Registry (ECR) by running following command:
aws ecr get-login-password --region <Region> | docker login --username AWS --password-stdin <AWS_account_ID>.dkr.ecr.<Region>.amazonaws.comObtain and extract the Protegrity Anonymization files to a directory on your system.
Download and extract the
ANON-API_DEB-ALL-64_x86-64_Docker-ALL-64_1.4.0.x.tgzfile.Extract the contents of the
ANON-REST-API_1.4.0.x.tgzandANON-NOTEBOOK_1.4.0.x.tgzfiles to a directory.Note: Do not extract the
ANON-API_1.4.0.x.tar.gzpackage obtained in the directory after performing the extraction. You need to run thedocker loadcommand on the package obtained in the directory.
Navigate to the directory where the
ANON-API_1.4.0.x.tar.gzfile is saved.Load the Docker image into Docker by using the following command:
docker load < ANON-API_1.4.0.x.tar.gzList the images that are loaded by using the following command:
docker imagesTag the image to the ECR repository by using the following command:
docker tag <Container image>:<Tag> <Container registry path>/<Container image>:<Tag>For example:
docker tag ANON-API_1.4.0.x:anon_EKS <account_name>.dkr.ecr.region.amazonaws.com/anon:anon_EKSPush the tagged image to the ECR by using the following command:
docker push <Container_regitry_path>/<Container_image>:<Tag>For example:
docker push <account_name>.dkr.ecr.region.amazonaws.com/anon:anon_EKSExtract
ANON-NOTEBOOK_1.4.0.x.tgzto obtain theANON-NOTEBOOK_1.4.0.x.tar.gzfile and then repeat the steps 5 to 9 forANON-NOTEBOOK_1.4.0.x.tar.gz.The images are loaded to the ECR and are ready for deployment.
For more information about pushing container images to the ECR, refer to Moving an image through its lifecycle in Amazon ECR.
2.1.6 - Setting up NGINX Ingress Controller
Complete the steps provided here for installing the NGINX Ingress Controller on the base machine.
Login to the base machine and open a command prompt.
Create a namespace where the NGINX Ingress Controller needs to be deployed using the following command.
kubectl create namespace <Namespace name>For example,
kubectl create namespace nginxAdd the repository from where the Helm charts for installing the NGINX Ingress Controller must be fetched using the following command.
helm repo add stable https://charts.helm.sh/stable
helm repo add ingress-nginx https://kubernetes.github.io/ingress-nginx
Install the NGINX Ingress Controller using Helm charts using the following command.
helm install nginx-ingress --namespace <Namespace name> --set controller.replicaCount=1 --set controller.nodeSelector."beta\.kubernetes\.io/os"=linux --set defaultBackend.nodeSelector."beta\.kubernetes\.io/os"=linux ingressnginx/ingress-nginx --set controller.publishService.enabled=true --set controller.ingressClassResource.name=<NGINX ingress class name> --set podSecurityPolicy.enabled=true --set rbac.create=true --set controller.extraArgs.enablessl-passthrough="true" --set controller.service.annotations."service\.beta\.kubernetes\.io/aws-load-balancer-internal"=\"true\" --set controller.service.annotations."service\\.beta\\.kubernetes\\.io/aws-load-balancer-connection-idle-timeout"=\\"300\\" --version 4.3.0For example,
helm install nginx-ingress --namespace nginx --set controller.replicaCount=1 --set controller.extraArgs.enable-ssl-passthrough="true" --set controller.nodeSelector."beta\\.kubernetes\\.io/os"=linux --set defaultBackend.nodeSelector."beta\\.kubernetes\\.io/os"=linux ingress-nginx/ingress-nginx --set controller.publishService.enabled=true --setcontroller.ingressClassResource.name=nginx-anon --set podSecurityPolicy.enabled=true --set rbac.create=true --set controller.service.annotations."service\\.beta\\.kubernetes\\.io/aws-load-balancer-internal"=\\"true\\" --set controller.service.annotations."service\\.beta\\.kubernetes\\.io/aws-load-balancer-connection-idle-timeout"=\\"300\\" --version 4.3.0For more information about the various configuration parameters for installing the NGINX Ingress Helm charts, refer to
values.yamlfile.Check the status of the nginx-ingress release and verify that all the deployments are running accurately using the following command.
kubectl get pods -n <Namespace name>For example,
kubectl get pods -n nginxNote: The pod name should be noted. It is required as a parameter in the next step.
View the logs on the Ingress pod using the following command.
kubectl logs pod/<pod-name> -n <Namespace name>Obtain the external IP of the nginx service by executing the following command.
kubectl get service --namespace <Namespace name>For example,
kubectl get service -n nginxNote: The IP should be noted. It is required for communicating the Protegrity Anonymization API.
2.1.7 - Using Custom Certificates in Ingress
Protegrity Anonymization API uses certificates for secure communication with the client. You can use the certificates provided by Protegrity or use your own certificates. Complete the configurations provided in this section to use your custom certificates with the Ingress Controller.
Ensure that the certificates and keys are in the .pem format.
Note: Skip the steps provided in this section if you want to use the default Protegrity certificates for the Protegrity Anonymization API.
Login to the Base Machine where Ingress in configured and open a command prompt.
Copy your certificates to the Base Machine.
Note: Verify the certificates using the commands provided in the section Working with Certificates.
Create a Kubernetes secret of the server certificate using the following command. The namespace used must be the same where the Protegrity Anonymization API application is to be deployed.
kubectl create secret --namespace <namespace-name> generic <secret-name> --from-file=tls.crt=<path_to_certificate>/<certificate-name> --from-file=tls.key=<path_to_certificate>/<certificate-key>For example,
kubectl create secret --namespace anon-ns generic anon-protegrity-tls --from-file=tls.crt=/tmp/cust_cert/anon-server-cert.pem --from-file=tls.key=/tmp/cust_cert/anon-server-key.pemCreate a Kubernetes secret of the CA certificate using the following command. The namespace used must be the same where the Protegrity Anonymization API application is to be deployed.
kubectl create secret --namespace <namespace-name> generic <secret-name> --from-file=ca.crt=<path_to_certificate>/<certificate-name>For example,
kubectl create secret --namespace anon-ns generic ca-protegrity --from-file=ca.crt=/tmp/cust_cert/anon-ca-cert.pemOpen the
values.yamlfile.Add the following host and secret code for the Ingress configuration at the end of the
values.yamlfile.## Refer section in documentation for setting up and configuring NGINX-INGRESS before deploying the application. ingress: ## Add host section with the hostname used as CN while creating server certificates. ## While creating the certificates you can use *.protegrity.com as CN and SAN used in below example host: **anon.protegrity.com** # Update the host according to your server certificates. ## To terminate TLS on the Ingress Controller Load Balancer. ## K8s TLS Secret containing the certificate and key must also be provided. secret: **anon-protegrity-tls** # Update the secretName according to your secretName. ## To validate the client certificate with the above server certificate ## Create the secret of the CA certificate used to sign both the server and client certificate as shown in example below ca_secret: **ca-protegrity** # Update the ca-secretName according to your secretName. ingress_class: nginx-anonNote: Ensure that you replace the
host,secret, andca_secretattributes in thevalues.yamlfile with the values as per your certificate.For more information about using custom certificates, refer to Updating the Configuration Files.
2.1.8 - Updating the Configuration Files
Use the template files provided to specify the EKS settings for the Protegrity Anonymization API.
Extract and update the files in the
ANON-API_HELM_1.4.0.x.tgzpackage.The
ANON-API_HELM_1.4.0.x.tgzpackage contains thevalues.yamlfile that must be modified as per your requirements. It also contains the templates directory withyamlfiles.Note: Ensure that the necessary permissions for updating the files are assigned to the
.yamlfiles.Navigate to the
<path_to_helm>/templatesdirectory and delete theanon-db-storage-aws.yamlfile.Update the
values.yamlfile.Note: For more information about the
values.yamlfile, refer to values.yaml.Specify a namespace for the pods.
namespace:
  name: **anon-ns**
Specify the node name and zone information for the node as a prerequisite for the database pod and the Anon-Storage(MinIO) pod. Use the node name which is running in the same zone where the EBS is created.
## Prerequisite for setting up Database and Minio Pod.
## This is to handle any new DB pod getting created that uses the same persistence storage in case the running Database pod gets disrupted.
## This persistence also helps persist Anon-storage data.
persistence:
  ## 1. Get the list of nodes in the cluster. CMD: kubectl get nodes
  ## 2. Get the node name which is running in the same zone where the external-storage is created. CMD: kubectl describe nodes
  nodename: "**<Node_name>**"                    # Update the Node name

  ## Fetch the zone in which the node is running using the `kubectl describe node/nodename` command or the following command.
  ## CMD: ` kubectl describe node/<nodename> | grep topology.kubernetes.io/zone | grep -oP 'topology.kubernetes.io/zone=K[^ ]+' `
  zone: "**<Zone in which above Node is running>**"

  ## For EKS cluster, supply the volumeID of the aws-ebs
  ## For AKS cluster, supply the subscriptionID of the azure-disk
  dbstorageId: "**<Provide dbstorage ID>**"           # To persist database schemas.
  anonstorageId: "**<Provide anonstorage ID>**"       # To persist Anonymized data.
Update the repository information in the file. The Anon-Storage pod uses the MinIO Docker image
quay.io/minio/minio:RELEASE.2022-10-29T06-21-33Z, which is pulled from the Public repository.image: minio_repo: quay.io/minio/minio # Public repo path for Minio Image. minio_tag: RELEASE.2022-10-29T06-21-33Z # Tag name for Minio image. repository: **<Repo_path>** # Repo path for the Container Registry in Azure, GCP, AWS. anonapi_tag: **<AnonImage_tag>** # Tag name of the ANON-API Image. anonworkstation_tag: **<WorkstationImage_tag>** # Tag name of the ANON-Workstation Image. pullPolicy: AlwaysNote: Ensure that you update the repository, anonapi_tag, and anonworkstation_tag according to your container registry.
MinIO uses access keys and secret for performing file operations. Protegrity provides a default set of credentials that are stored as part of the secret storage-creds. If you are creating your own secret, then, update the existingSecret parameter.
anonstorage:
  ## Refer the following command for creating your own secret.
  ## CMD: kubectl create secret generic my-minio-secret --from-literal=rootUser=foobarbaz --from-literal=rootPassword=foobarbazqux
  existingSecret: ""                # Supply your secret Name for ignoring below default credentials.
  bucket_name: "anonstorage"        # Default bucket name for minio
  secret:
    name: "storage-creds"           # Secret to access minio-server
    access_key: "anonuser"          # Access key for minio-server
    secret_key: "protegrity"        # Secret key for minio-server
2.1.9 - Deploying the Protegrity Anonymization API to the EKS Cluster
Complete the following steps to deploy the Protegrity Anonymization API on the EKS cluster.
Navigate to the
<path_to_helm>/templatesdirectory and delete theanon-dbpvc-azure.yamland theanon-storagepvc-azure.yamlfiles.Create the Protegrity Anonymization API namespace using the following command.
kubectl create namespace <name>Note: Update and use the
from the values.yamlfile that is present in the Helm chart that you used in the previous section.Run the following command to deploy the pods.
helm install <helm-name> /<path_to_helm> -n <namespace>Verify that the necessary pods and services are configured and running.
Run the following command to verify the information for accessing the Protegrity Anonymization API externally on the cluster. The port mapping for accessing the UI is displayed after running the command.
kubectl get service -n <namespace>Run the following command to verify the deployment.
kubectl get deployment -n <namespace>Run the following command to verify the pods created.
kubectl get pods -n <namespace>Run the following command to verify the pods.
kubectl get pods -o wide -n <namespace>
If you customize the
values.yaml, then update the configuration using the following command.helm upgrade <helm name> /path/to/helmchart -n <namespace>If required, configure logging using the steps provided in the section Setting Up Logging for the Protegrity Anonymization API.
Execute the following command to obtain the IP address of the service.
kubectl get ingress -n <namespace>
2.1.10 - Viewing Protegrity Anonymization API Using REST
Use the URLs provided here for viewing the Protegrity Anonymization API service and pod details after you have successfully deployed the Protegrity Anonymization API.
You need to map the IP address of Ingress in the hosts file with the host name set in the Ingress configuration.
For more information about updating the hosts file, refer to step 2 of the section Enabling Custom Certificates From SDK.
Optionally, update the hostname of the Elastic Load Balancer (ELB) that is created by the NGINX Ingress Controller using the section Creating a DNS Entry for the ELB Hostname in Route53.
For more information about configuring the DNS, refer to the section Creating a DNS Entry for the ELB Hostname in Route53.
Open a web browser.
Use the following URL to view basic information about the Protegrity Anonymization API.
Use the following URL to view the Swagger UI. The various Protegrity Anonymization APIs are visible on this page.
Use the following URL to view the contractual information for the Protegrity Anonymization API.
2.1.11 - Creating Kubernetes Service Accounts and Kubeconfigs for Anonymization Cluster
A service account in the anonymization cluster namespace has access to the anonymization namespace. It might also have access to the whole cluster. These permissions for the service account allow the user to create, read, update, and delete objects in the anonymization Kubernetes cluster or the namespace. Additionally, the kubeconfig is required to access the service account using a token.
In this section, you create a Kubernetes service account and the role-based access control (RBAC) configuration manually using kubectl.
Ensure that the user has access to permissions for creating and updating the following resources in the Kubernetes cluster:
Kubernetes Service Accounts
Kubernetes Roles and Rolebindings
Optional: Kubernetes ClusterRoles and Rolebindings
Use the steps provided in the followng link to create the namespace and assign the required permissions to the cluster.
Creating the Service AccountComplete the steps provided in the following link to retrieve the tokens for the Protegrity Anonymization API service account and to create a kubeconfig with access to the service account.
Obtaining the Tokens for the Service Account
Obtaining the Tokens for the Service Account
Complete the steps provided int his section to retrieve the tokens for the Protegrity Anonymization API service account and to create a kubeconfig with access to the service account.
Open a command line interface on the base machine for running the configuration commands.
Note: A copy of the commands is available in the
kubconfigcmd.txtfile in therbacdirectory of the Protegrity Anonymization API package. Use the code form the file to run the commands.Set the environment variables for running the configuration commands using the following command.
SERVICE_ACCOUNT_NAME=anon-service-account CONTEXT=$(kubectl config current-context) NAMESPACE=anon-namespace NEW_CONTEXT=anon-context SECRET_NAME=$(kubectl get serviceaccount ${SERVICE_ACCOUNT_NAME} -n ${NAMESPACE} --context ${CONTEXT} --namespace ${NAMESPACE} -o jsonpath='{.secrets[0].name}') TOKEN_DATA=$(kubectl get secret ${SECRET_NAME} -n ${NAMESPACE} --context ${CONTEXT} --namespace ${NAMESPACE} -o jsonpath='{.data.token}') TOKEN=$(echo ${TOKEN_DATA} | base64 -d)Note: Ensure that you use the appropriate values as per your configuration in the above command.
Set the token in the config credentials using the following command.
kubectl config set-credentials <username> --token=$TOKENFor example,
kubectl config set-credentials test-user --token=$TOKENRetrieve the cluster name using the following command.
kubectl config get-clustersSet the context in kubeconfig using the following command.
kubectl config set-context ${NEW_CONTEXT} --cluster=<name of your cluster> --user=test-userSet the current context to to use the new anonymization config using the following command.
kubectl config use-context ${NEW_CONTEXT}Verify the new context using the following command.
kubectl config current-contextVerify the status of the pods using the following command.
kubectl get pods -n <name space>
Creating the Service Account
Use the steps provided in this section to create the namespace and assign the required permissions to the cluster.
Create the Kubernetes Service Account using the following steps.
Navigate to the
rbacdirectory of the extracted Protegrity Anonymization API package.Open the
anon-service-account.yamlfile using a text editor.Update the namespace as per your configuration in the
anon-service-account.yamlfile.Save and close the file.
From a command prompt, navigate to the
rbacdirectory and run the following command to create the service account.kubectl apply -f anon-service-account.yaml
Grant the appropriate permission to the service account using any one of the following two steps.
Grant cluster-admin permissions for the service account to all the namespaces using the following steps.
Note: You need to run this step only if you want to grant the service account access to all namespaces in your cluster.
A Kubernetes ClusterRoleBinding is available at the cluster level, but the subject of the ClusterRoleBinding exists in a single namespace. Hence, you must specify the namespace for the service account.
Navigate to the
rbacdirectory of the extracted Protegrity Anonymization API package.Open the
anon-clusterrolebinding.yamlfile using a text editor.Update the namespace as per your configuration in the
anon-clusterrolebinding.yamlfile.Save and close the file.
From a command prompt, navigate to the
rbacdirectory and run the following command to assign the appropriate permissions.kubectl apply -f anon-clusterrolebinding.yaml
Grant namespace-specific permissions to the service account using the following steps.
Note: You need to run this step only if you want to grant the service account access to just the Protegrity Anonymization API namespace.
Ensure that you create a role with a set of permissions and rolebinding for attaching the role to the service account.
Navigate to the
rbacdirectory of the extracted Protegrity Anonymization API package.Open the
anon-role-and-rolebinding.yamlfile using a text editor.Update the namespace, role, and service account name as per your configuration in the
anon-role-and-rolebinding.yamlfile.Save and close the file.
From a command prompt, navigate to the
rbacdirectory and run the following command to assign the appropriate permissions.kubectl apply -f anon-role-and-rolebinding.yaml
2.2 - Anonymizing Using Azure Kubernetes Service (AKS)
2.2.1 - Set up Anonymization API on Azure Kubernetes Service (AKS)
To set up and use the Protegrity Anonymization API on Azure, follow the steps provided in this section.
Use the following link to upload the Docker image to the Azure container registry (ACR) for running the Protegrity Anonymization API in AKS.
Uploading the Image to the Azure Container RegistryComplete the steps provided in the following link to create an Azure disk and obtain the subscription ID.
Creating an Azure DiskComplete the steps provided in the following link for installing the NGINX Ingress Controller on the base machine.
Setting up NGINX Ingress ControllerProtegrity Anonymization API uses certificates for secure communication with the client. You can use the certificates provided by Protegrity or use your own certificates. Complete the configurations provided in the following link to use your custom certificates with the Ingress Controller.
Using Custom Certificates in IngressUse the template files provided in the following link to specify the AKS settings for the Protegrity Anonymization API.
Updating the Configuration FilesDeploy the pods using the steps in the following link.
Deploying the Protegrity Anonymization API to the AKS ClusterUse the following link for viewing the Protegrity Anonymization API service and pod details after you have successfully deployed the Protegrity Anonymization API.
Viewing Protegrity Anonymization API Using REST
2.2.2 - Preparing the Base Machine
Install the Azure CLI and login to your account to work with Protegrity Anonymization API on the Azure Cloud.
Install and initialize the Azure CLI on your system.
For more information about the installation steps, refer to How to install the Azure CLI.
Login to your account using the following command from a command prompt.
az loginSign in to your account.
The configuration complete message appears.

Install Kubectl version 1.22, which is the command line interface for Kubernetes.
Kubectl enables you to run commands from the Linux instance so that you can communicate with the Kubernetes cluster.
For more information about installing kubectl, refer to Set up Kubernetes tools on your computer.
Install the Helm client version 3.8.2 for working with Kubernetes clusters.
For more information about installing the Helm client, refer to Installing Helm.
2.2.3 - Creating a Kubernetes Cluster
This section describes how to create a Kubernetes Cluster on Azure.
Note: The steps listed in this procedure for creating a Kubernetes cluster are for reference use. If you have an existing Kubernetes cluster or want to create a Kubernetes cluster based on your own requirements, then you can directly navigate to the section Accessing the AKS Cluster to connect your Kubernetes cluster and the Linux instance.
To create a Kubernetes cluster:
Login to the Azure environment.
Click the Portal menu icon.
The Portal menu appears.
Navigate to All Services > Kubernetes services.
The Kubernetes Services screen appears.

Click Add.
The Create Kubernetes cluster screen appears.
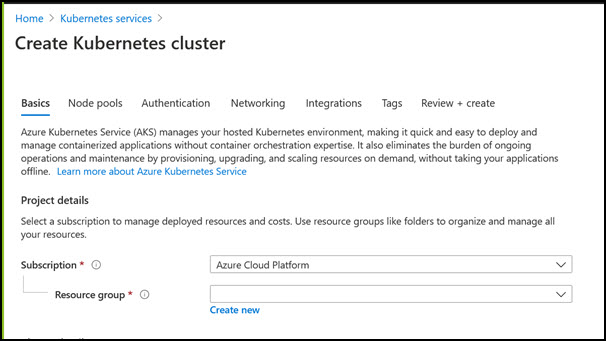
In the Resource group field, select the required resource group.
In the Kubernetes cluster name field, specify a name for your Kubernetes cluster.
Retain the default values for the remaining settings.
Click Review + create to validate the configuration.
Click Create to create the Kubernetes cluster.
The Kubernetes cluster is created.
2.2.4 - Accessing the AKS Cluster
Connect to the cloud service using the steps in this section.
Login to the Linux instance, and run the following command to connect your Base machine to the Kubernetes cluster.
az aks get-credentials --resource-group <Name_of _Resource_group> --name <Name_of Kubernetes_Cluster>The Base machine is now connected with the Kubernetes cluster. You can now run commands using the Kubernetes command line interface (
kubectl) to control the nodes on the Kubernetes cluster.Validate whether the cluster is up by running the following command.
kubectl get nodesThe command lists the Kubernetes nodes available in your cluster.
2.2.5 - Uploading the Image to the Azure Container Registry
Use the information in this section to upload the Docker image to the Azure Container Registry (ACR) for running the Protegrity Anonymization API in AKS.
Note: For more information about creating the Azure Container Registry, refer to Create an Azure container registry using the Azure portal.
To install the Protegrity Anonymization API:
Login to the machine as an administrator to install the Protegrity Anonymization API.
Install Docker using the steps provided at https://docs.docker.com/engine/install/.
Configure Docker to push the Protegrity Anonymization API images to the Azure Container Registry (ACR) by running following command:
docker login <Container_registry_name>.azurecr.ioObtain and extract the Protegrity Anonymization API files to a directory on your system.
Download and extract the
ANON-API_DEB-ALL-64_x86-64_Docker-ALL-64_1.4.0.x.tgzfile.Open the directory and extract the
ANON-API_DEB-ALL-64_x86-64_Docker-ALL-64_1.4.0.x.tarfile.Extract the contents of the
ANON-REST-API_1.4.0.x.tgzfile to a directory.Note: Do not extract the
ANON-API_1.4.0.x.tar.gzpackage obtained in the directory after performing the extraction. You need to run thedocker loadcommand on the package obtained in the directory.
Navigate to the directory where the
ANON-API_1.4.0.x.tar.gzfile is saved.Load the Docker image into Docker by using the following command:
docker load < ANON-API_1.4.0.x.tar.gzList the images that are loaded by using the following command:
docker imagesTag the image to the ACR repository by using the following command:
docker tag <Container image>:<Tag> <Container registry path>/<Container image>:<Tag>For example:
docker tag ANON-API_1.4.0.x:anon_AZ <container_registry_name>.azurecr.io/anon:anon_AZPush the tagged image to the ACR by using the following command:
docker push <Container_regitry_path>/<Container_image>:<Tag>For example:
docker push <container_registry_name>.azurecr.io/anon:anon_AZNote: Ensure that the appropriate path for the image registry along with the tag is updated in the
values.yamlfile.Extract
ANON-NOTEBOOK_1.4.0.x.tgzto obtain theANON-NOTEBOOK_1.4.0.x.tar.gzfile and then repeat the steps 5 to 9 for theANON-NOTEBOOK_1.4.0.x.tar.gzfile.
The image is loaded to the ACR and is ready for deployment.
2.2.6 - Creating an Azure Disk
Complete the steps provided here to create an Azure disk and obtain the subscription ID.
To create the Azure disk:
Refer to Create and use a volume with Azure Disks in Azure Kubernetes Service (AKS) and complete the steps provided in the section Create an Azure disk.
The command for creating the Azure disk is provided here, update the values according to your setup:
az disk create \ --resource-group **<Resource Group Name>** \ --name **<Disk Name>** \ --size-gb 20 \ --location **<Location of any node in cluster>** \ --zone **<Zone of the node in cluster>** \ --query id --output tsvNote: Ensure that you create two disks, one for database persistence and one for Anon-Storage.
The subscription ID of the Azure disk that you created should be noted. The subscription IDs are required later for configuring the persistent disks.
2.2.7 - Setting up NGINX Ingress Controller
Complete the steps provided here for installing the NGINX Ingress Controller on the base machine.
Login to the base machine and open a command prompt.
Create a namespace where the NGINX Ingress Controller needs to be deployed using the following command.
kubectl create namespace <Namespace name>For example,
kubectl create namespace nginxAdd the repository from where the Helm charts for installing the NGINX Ingress Controller must be fetched using the following command.
helm repo add stable https://charts.helm.sh/stable
helm repo add ingress-nginx https://kubernetes.github.io/ingress-nginx
Install the NGINX Ingress Controller using Helm charts using the following command.
helm install nginx-ingress --namespace <Namespace name> --set controller.replicaCount=1 --set controller.nodeSelector."beta\.kubernetes\.io/os"=linux --set defaultBackend.nodeSelector."beta\.kubernetes\.io/os"=linux ingress-nginx/ingress-nginx --set controller.publishService.enabled=true --set controller.ingressClassResource.name=<NGINX ingress class name> --set podSecurityPolicy.enabled=true --set rbac.create=true --set controller.extraArgs.enable-ssl-passthrough="true" --set controller.service.annotations."service\.beta\.kubernetes\.io/azure-load-balancer-internal"=\"true\" --version 4.3.0For example,
helm install nginx-ingress --namespace nginx --set controller.replicaCount=1 --set controller.extraArgs.enable-ssl-passthrough="true" --set controller.nodeSelector."beta\\.kubernetes\\.io/os"=linux --set defaultBackend.nodeSelector."beta\\.kubernetes\\.io/os"=linux ingress-nginx/ingress-nginx --set controller.publishService.enabled=true --set controller.ingressClassResource.name=nginx-anon --set podSecurityPolicy.enabled=true --set rbac.create=true --set controller.service.annotations."service\\.beta\\.kubernetes\\.io/azure-load-balancer-internal"=\\"true\\" --version 4.3.0For more information about the various configuration parameters for installing the NGINX Ingress Helm charts, refer to
values.yamlfile.Check the status of the nginx-ingress release and verify that all the deployments are running accurately using the following command.
kubectl get pods -n <Namespace name>For example,
kubectl get pods -n nginxNote: The pod name should be noted. It is required as a parameter in the next step.
View the logs on the Ingress pod using the following command.
kubectl logs pod/<pod-name> -n <Namespace name>Obtain the external IP of the nginx service by executing the following command.
kubectl get service --namespace <Namespace name>For example,
kubectl get service -n nginxNote: The IP should be noted. It is required for configuring the Protegrity Anonymization API SDK.
2.2.8 - Using Custom Certificates in Ingress
Protegrity Anonymization API uses certificates for secure communication with the client. You can use the certificates provided by Protegrity or use your own certificates. Complete the configurations provided in this section to use your custom certificates with the Ingress Controller.
Ensure that the certificates and keys are in the .pem format.
Note: Skip the steps provided in this section if you want to use the default Protegrity certificates for the Protegrity Anonymization API.
Login to the Base Machine where Ingress in configured and open a command prompt.
Copy your certificates to the Base Machine.
Note: Verify the certificates using the commands provided in the section Working with Certificates.
Create a Kubernetes secret of the server certificate using the following command. The namespace used must be the same where the Protegrity Anonymization API application is to be deployed.
kubectl create secret --namespace <namespace-name> generic <secret-name> --from-file=tls.crt=<path_to_certificate>/<certificate-name> --from-file=tls.key=<path_to_certificate>/<certificate-key>For example,
kubectl create secret --namespace anon-ns generic anon-protegrity-tls --from-file=tls.crt=/tmp/cust_cert/anon-server-cert.pem --from-file=tls.key=/tmp/cust_cert/anon-server-key.pemCreate a Kubernetes secret of the CA certificate using the following command. The namespace used must be the same where the Protegrity Anonymization API application is to be deployed.
kubectl create secret --namespace <namespace-name> generic <secret-name> --from-file=ca.crt=<path_to_certificate>/<certificate-name>For example,
kubectl create secret --namespace anon-ns generic ca-protegrity --from-file=ca.crt=/tmp/cust_cert/anon-ca-cert.pemOpen the
values.yamlfile.Add the following
hostandsecretcode for the Ingress configuration at the end of thevalues.yamlfile.## Refer section in documentation for setting up and configuring NGINX-INGRESS before deploying the application. ingress: ## Add host section with the hostname used as CN while creating server certificates. ## While creating the certificates you can use *.protegrity.com as CN and SAN used in below example host: **anon.protegrity.com** # Update the host according to your server certificates. ## To terminate TLS on the Ingress Controller Load Balancer. ## K8s TLS Secret containing the certificate and key must also be provided. secret: **anon-protegrity-tls** # Update the secretName according to your secretName. ## To validate the client certificate with the above server certificate ## Create the secret of the CA certificate used to sign both the server and client certificate as shown in example below ca_secret: **ca-protegrity** # Update the ca-secretName according to your secretName. ingress_class: nginx-anonNote: Ensure that you replace the
host,secret, andca_secretattributes in thevalues.yamlfile with the values as per your certificate.For more information about using custom certificates, refer to Updating the Configuration Files.
2.2.9 - Updating the Configuration Files
Use the template files provided to specify the AKS settings for the Protegrity Anonymization API.
Create the Protegrity Anonymization API namespace using the following command.
kubectl create namespace <name>Note: Update and use the
from the values.yamlfile that is present in the Helm chart.Extract and update the files in the
ANON-API_HELM_1.4.0.x.tgzpackage.The
ANON-API_HELM_1.4.0.x.tgzpackage contains thevalues.yamlfile that must be modified as per your requirements. It also contains thetemplatesdirectory withyamlfiles.Note: Ensure that the necessary permissions for updating the files are assigned to the
.yamlfiles.Navigate to the
<path_to_helm>/templatesdirectory and delete theanon-dbpvc-aws.yamland theanon-storagepvc-aws.yamlfiles.Update the
values.yamlfile.Note: For more information about the
values.yamlfile, refer to values.yaml.Specify a namespace for the pods.
namespace:
  name: **anon-ns**
Specify the node name and zone information for the node as a prerequisite for the database pod and the Anon-Storage(MinIO) pod. Use the node name which is running in the same zone where the AKS is created.
## Prerequisite for setting up Database and Minio Pod.
## This is to handle any new DB pod getting created that uses the same persistence storage in case the running Database pod gets disrupted.
## This persistence also helps persist Anon-storage data.
persistence:
  ## 1. Get the list of nodes in the cluster. CMD: kubectl get nodes
  ## 2. Get the node name which is running in the same zone where the external-storage is created. CMD: kubectl describe nodes
  nodename: "**<Node_name>**"                    # Update the Node name

  ## Fetch the zone in which the node is running using the `kubectl describe node/nodename` command or the following command.
  ## CMD: ` kubectl describe node/<nodename> | grep topology.kubernetes.io/zone | grep -oP 'topology.kubernetes.io/zone=K[^ ]+' `
  zone: "**<Zone in which above Node is running>**"

  ## For EKS cluster, supply the volumeID of the aws-ebs
  ## For AKS cluster, supply the subscriptionID of the azure-disk
  dbstorageId: "**<Provide dbstorage ID>**"           # To persist database schemas.
  anonstorageId: "**<Provide anonstorage ID>**"       # To persist Anonymized data.
Update the repository information in the file. The Anon-Storage pod uses the MinIO Docker image
quay.io/minio/minio:RELEASE.2022-10-29T06-21-33Z, which is pulled from the Public repository.image: minio_repo: quay.io/minio/minio # Public repo path for Minio Image. minio_tag: RELEASE.2022-10-29T06-21-33Z # Tag name for Minio image. repository: **<Repo_path>** # Repo path for the Container Registry in Azure, GCP, AWS. anonapi_tag: **<AnonImage_tag>** # Tag name of the ANON-API Image. anonworkstation_tag: **<WorkstationImage_tag>** # Tag name of the ANON-Workstation Image. pullPolicy: AlwaysNote: Ensure that you update the
repository,anonapi_tag, andanonworkstation_tagaccording to your container registry.MinIO uses access keys and secret for performing file operations. Protegrity provides a default set of credentials that are stored as part of the secret storage-creds. If you are creating your own secret, then, update the existingSecret section.
anonstorage:
  ## Refer the following command for creating your own secret.
  ## CMD: kubectl create secret generic my-minio-secret --from-literal=rootUser=foobarbaz --from-literal=rootPassword=foobarbazqux
  existingSecret: ""                # Supply your secret Name for ignoring below default credentials.
  bucket_name: "anonstorage"        # Default bucket name for minio
  secret:
    name: "storage-creds"           # Secret to access minio-server
    access_key: "anonuser"          # Access key for minio-server
    secret_key: "protegrity"        # Secret key for minio-server
Extract the
values.yamlHelm chart from the package.Uncomment the following parameters and update the secret name in the
values.yamlfile.## This section is required if the image is getting pulled from the Azure Container Registry ## create image pull secrets and specify the name here. ## remove the [] after 'imagePullSecrets:' once you specify the secrets #imagePullSecrets: [] # - name: regcredPerform the following steps for the communication between the Kubernetes cluster and the Azure Container Registry.
Run the following command from a command prompt to login.
docker loginSpecify your ACR access credentials.
Create the secret for Azure by using the following command.
kubectl create secret generic regcred --from-file=.dockerconfigjson=<PATH_TO_DOCKER_CONFIG>/config.json --type=Kubernetes.io/dockerconfigjson --namespace <NAMESPACE>
2.2.10 - Deploying the Protegrity Anonymization API to the AKS Cluster
Deploy the pods using the steps in the following section.
Run the following command to deploy the pods.
helm install <helm-name> /<path_to_helm> -n <namespace>Verify that the necessary pods and services are configured and running.
Run the following command to verify the information for accessing the Protegrity Anonymization API externally on the cluster. The port mapping for accessing the UI is displayed after running the command.
kubectl get service -n <namespace>Run the following command to verify the deployment.
kubectl get deployment -n <namespace>Run the following command to verify the pods created.
kubectl get pods -n <namespace>Run the following command to verify the pods.
kubectl get pods -o wide -n <namespace>
Execute the following command to obtain the IP address of the service.
kubectl get ingress -n <namespace>
The container is now ready to process Protegrity Anonymization API requests.
2.2.11 - Viewing Protegrity Anonymization API Using REST
Use the URLs provided here for viewing the Protegrity Anonymization API service and pod details after you have successfully deployed the Protegrity Anonymization API.
You need to map the IP address of Ingress in the hosts file with the host name set in the Ingress configuration.
For more information about updating the hosts file, refer to step 2 of the section Enabling Custom Certificates From SDK.
Open a web browser.
Use the following URL to view basic information about the Protegrity Anonymization API.
Use the following URL to view the Swagger UI. The various Protegrity Anonymization APIs are visible on this page.
Use the following URL to view the contractual information for the Protegrity Anonymization API.
3 - Installing Using Docker Containers
Complete the following steps to run the Protegrity Anonymization API on a host machine.
Ensure that you have completed the following prerequisites before deploying the Protegrity Anonymization API.
- Install Docker using the steps provided at https://docs.docker.com/engine/install/.
- Install Docker Compose using the steps provided at https://docs.docker.com/compose/install/.
To install the Protegrity Anonymization API:
Login to the machine as an administrator to install the Protegrity Anonymization API.
Obtain and extract the Protegrity Anonymization API files to a directory on your system.
- Download and extract the
ANON-API_DEB-ALL-64_x86-64_Docker-ALL-64_1.4.0.x.tgzfile. - Verify that the following files are available in the package:
ANON-REST-API_1.4.0.x.tgz: The files for working with the Protegrity Anonymization REST API.ANON-NOTEBOOK_1.4.0.x.tgz: The files for the Protegrity Anonymization API notebook.
- Download and extract the
Extract the
ANON-REST-API_1.4.0.x.tgzfile.Run the following command to load the API container:
docker load < ANON-API_1.4.0.x.tar.gzVerify that the image is successfully loaded using the following command:
docker imagesNavigate to the directory where the
ANON-NOTEBOOK_1.4.0.x.tgzfile is saved.Extract the
ANON-NOTEBOOK_1.4.0.x.tgzfile.Run the following command to load the container:
docker load < ANON-NOTEBOOK_1.4.0.x.tar.gzVerify that the image is successfully loaded using the following command:
docker imagesNote the image ID for the ANON-API and ANON-NOTEBOOK containers.
Navigate to the directory where the contents of the
ANON-REST-API_1.4.0.x.tgzfile are extracted.Update the
docker/docker-compose.yamlfile for the configuration that you require, such as the image ID.Update the
imagetags forscheduler,anon,anondb, andpty-workerwith the details of the Anon API Image.Update the
imagetags forminiowith the details of the Anon-Storage Image and workstation with the details of the Anon Workstation Image.Note: If required, then navigate to pty-worker and increase the
replicasparameter.An extract of the
docker-compose.yamlfile with the details updated is provided here as an example. Update the file based on your configuration.version: "3.1" services: anonstorage: image: quay.io/minio/minio:RELEASE.2022-10-29T06-21-33Z # Minio Image pulled from Public repo . . <existing configuration> . environment: # Protegrity default credentials for communicating with MinIO MINIO_ROOT_USER: anonuser MINIO_ROOT_PASSWORD: protegrity . . <existing configuration> . scheduler: image: **anonapi-1.4.0.x:latest** . . <existing configuration> . anon: image: **anonapi-1.4.0.x:latest** . . <existing configuration> . pty-worker: image: **anonapi-1.4.0.x:latest** . . <existing configuration> . anondb: image: **anonapi-1.4.0.x:latest** . . <existing configuration> . nginx-proxy: image: nginx:1.20.1 . . <existing configuration> . workstation: image: **anonworkstation-1.4.0.x:latest** restart: unless-stopped hostname: workstation container_name: pty-workstation # extra_hosts: #### Uncomment and edit this section for using jupyter-workstation to send request to Protegrity Anonymization-API # - "anon.protegrity.com: <IP_of_host_machine>" . . <existing configuration> .Note: You can specify the
IMAGE IDinstead of theREPOSITORY:TAGfor theimageattribute.Configure the Protegrity Anonymization API to use your custom SSL certificates, if required.
Note: The Protegrity Anonymization API provides its own set of certificates for SSL communication. Complete this step only to use custom certificates. Ensure you have the trusted CA
.pemfile, server certificate, and server key. The server certificate must be signed by the trusted CA.Only
.pemfiles are supported by the Protegrity Anonymization API.Docker Compose mounts the certificate files from the current directory in the compose file, under the nginx-proxy section, as shown here.
./cert:/.cert/:ZYou can mount the directory where you have obtained the trusted CA files or you can replace the certificates in the default directory.
Deploy the Protegrity Anonymization API to Docker using the following command.
docker-compose -f /path/to/docker-compose.yaml up -dVerify that the Docker containers are running using the following command.
docker psUpdate the
hostsfile with an entry of the IP address toanon.protegrity.com.Alternatively, update the server_name in the
Nginx.confproperty.server_name anon.protegrity.com;Update the host name as provided in the nginx-proxy config host name and as per your certificate.
Update the
hostsfile with the following code.<IP of Docker Host> <host name as of nginx.conf>For example,
192.168.1.120 anon.protegrity.com
The Protegrity Anonymization API is now visible using the Swagger UI. Use the URLs provided here to view the Protegrity Anonymization API using REST.
Use the following URL to view basic information about the Protegrity Anonymization API.
https://
/ Note: The default Hostname is
anon.protegrity.com. Ensure that you use the Hostname that you provided to access the Protegrity Anonymization API.Use the following URL to view the Swagger UI. The various Protegrity Anonymization APIs are visible on this page.
https://
/anonymization/api/v1/ui Use the following URL to view the contractual information for the Protegrity Anonymization API.
https://
/about