This is the multi-page printable view of this section. Click here to print.
Anonymizing Using Azure Kubernetes Service (AKS)
- 1: Set up Anonymization API on Azure Kubernetes Service (AKS)
- 2: Preparing the Base Machine
- 3: Creating a Kubernetes Cluster
- 4: Accessing the AKS Cluster
- 5: Uploading the Image to the Azure Container Registry
- 6: Creating an Azure Disk
- 7: Setting up NGINX Ingress Controller
- 8: Using Custom Certificates in Ingress
- 9: Updating the Configuration Files
- 10: Deploying the Protegrity Anonymization API to the AKS Cluster
- 11: Viewing Protegrity Anonymization API Using REST
1 - Set up Anonymization API on Azure Kubernetes Service (AKS)
To set up and use the Protegrity Anonymization API on Azure, follow the steps provided in this section.
Use the following link to upload the Docker image to the Azure container registry (ACR) for running the Protegrity Anonymization API in AKS.
Uploading the Image to the Azure Container RegistryComplete the steps provided in the following link to create an Azure disk and obtain the subscription ID.
Creating an Azure DiskComplete the steps provided in the following link for installing the NGINX Ingress Controller on the base machine.
Setting up NGINX Ingress ControllerProtegrity Anonymization API uses certificates for secure communication with the client. You can use the certificates provided by Protegrity or use your own certificates. Complete the configurations provided in the following link to use your custom certificates with the Ingress Controller.
Using Custom Certificates in IngressUse the template files provided in the following link to specify the AKS settings for the Protegrity Anonymization API.
Updating the Configuration FilesDeploy the pods using the steps in the following link.
Deploying the Protegrity Anonymization API to the AKS ClusterUse the following link for viewing the Protegrity Anonymization API service and pod details after you have successfully deployed the Protegrity Anonymization API.
Viewing Protegrity Anonymization API Using REST
2 - Preparing the Base Machine
Install the Azure CLI and login to your account to work with Protegrity Anonymization API on the Azure Cloud.
Install and initialize the Azure CLI on your system.
For more information about the installation steps, refer to How to install the Azure CLI.
Login to your account using the following command from a command prompt.
az loginSign in to your account.
The configuration complete message appears.

Install Kubectl version 1.22, which is the command line interface for Kubernetes.
Kubectl enables you to run commands from the Linux instance so that you can communicate with the Kubernetes cluster.
For more information about installing kubectl, refer to Set up Kubernetes tools on your computer.
Install the Helm client version 3.8.2 for working with Kubernetes clusters.
For more information about installing the Helm client, refer to Installing Helm.
3 - Creating a Kubernetes Cluster
This section describes how to create a Kubernetes Cluster on Azure.
Note: The steps listed in this procedure for creating a Kubernetes cluster are for reference use. If you have an existing Kubernetes cluster or want to create a Kubernetes cluster based on your own requirements, then you can directly navigate to the section Accessing the AKS Cluster to connect your Kubernetes cluster and the Linux instance.
To create a Kubernetes cluster:
Login to the Azure environment.
Click the Portal menu icon.
The Portal menu appears.
Navigate to All Services > Kubernetes services.
The Kubernetes Services screen appears.

Click Add.
The Create Kubernetes cluster screen appears.
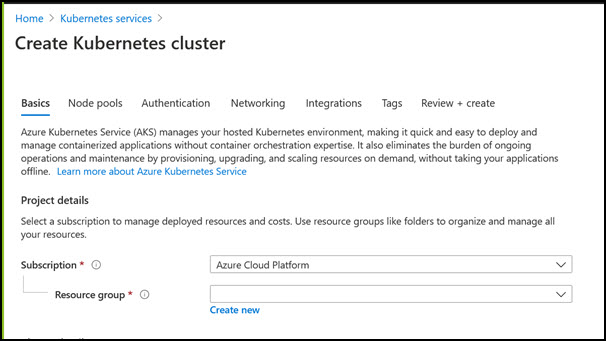
In the Resource group field, select the required resource group.
In the Kubernetes cluster name field, specify a name for your Kubernetes cluster.
Retain the default values for the remaining settings.
Click Review + create to validate the configuration.
Click Create to create the Kubernetes cluster.
The Kubernetes cluster is created.
4 - Accessing the AKS Cluster
Connect to the cloud service using the steps in this section.
Login to the Linux instance, and run the following command to connect your Base machine to the Kubernetes cluster.
az aks get-credentials --resource-group <Name_of _Resource_group> --name <Name_of Kubernetes_Cluster>The Base machine is now connected with the Kubernetes cluster. You can now run commands using the Kubernetes command line interface (
kubectl) to control the nodes on the Kubernetes cluster.Validate whether the cluster is up by running the following command.
kubectl get nodesThe command lists the Kubernetes nodes available in your cluster.
5 - Uploading the Image to the Azure Container Registry
Use the information in this section to upload the Docker image to the Azure Container Registry (ACR) for running the Protegrity Anonymization API in AKS.
Note: For more information about creating the Azure Container Registry, refer to Create an Azure container registry using the Azure portal.
To install the Protegrity Anonymization API:
Login to the machine as an administrator to install the Protegrity Anonymization API.
Install Docker using the steps provided at https://docs.docker.com/engine/install/.
Configure Docker to push the Protegrity Anonymization API images to the Azure Container Registry (ACR) by running following command:
docker login <Container_registry_name>.azurecr.ioObtain and extract the Protegrity Anonymization API files to a directory on your system.
Download and extract the
ANON-API_DEB-ALL-64_x86-64_Docker-ALL-64_1.4.0.x.tgzfile.Open the directory and extract the
ANON-API_DEB-ALL-64_x86-64_Docker-ALL-64_1.4.0.x.tarfile.Extract the contents of the
ANON-REST-API_1.4.0.x.tgzfile to a directory.Note: Do not extract the
ANON-API_1.4.0.x.tar.gzpackage obtained in the directory after performing the extraction. You need to run thedocker loadcommand on the package obtained in the directory.
Navigate to the directory where the
ANON-API_1.4.0.x.tar.gzfile is saved.Load the Docker image into Docker by using the following command:
docker load < ANON-API_1.4.0.x.tar.gzList the images that are loaded by using the following command:
docker imagesTag the image to the ACR repository by using the following command:
docker tag <Container image>:<Tag> <Container registry path>/<Container image>:<Tag>For example:
docker tag ANON-API_1.4.0.x:anon_AZ <container_registry_name>.azurecr.io/anon:anon_AZPush the tagged image to the ACR by using the following command:
docker push <Container_regitry_path>/<Container_image>:<Tag>For example:
docker push <container_registry_name>.azurecr.io/anon:anon_AZNote: Ensure that the appropriate path for the image registry along with the tag is updated in the
values.yamlfile.Extract
ANON-NOTEBOOK_1.4.0.x.tgzto obtain theANON-NOTEBOOK_1.4.0.x.tar.gzfile and then repeat the steps 5 to 9 for theANON-NOTEBOOK_1.4.0.x.tar.gzfile.
The image is loaded to the ACR and is ready for deployment.
6 - Creating an Azure Disk
Complete the steps provided here to create an Azure disk and obtain the subscription ID.
To create the Azure disk:
Refer to Create and use a volume with Azure Disks in Azure Kubernetes Service (AKS) and complete the steps provided in the section Create an Azure disk.
The command for creating the Azure disk is provided here, update the values according to your setup:
az disk create \ --resource-group **<Resource Group Name>** \ --name **<Disk Name>** \ --size-gb 20 \ --location **<Location of any node in cluster>** \ --zone **<Zone of the node in cluster>** \ --query id --output tsvNote: Ensure that you create two disks, one for database persistence and one for Anon-Storage.
The subscription ID of the Azure disk that you created should be noted. The subscription IDs are required later for configuring the persistent disks.
7 - Setting up NGINX Ingress Controller
Complete the steps provided here for installing the NGINX Ingress Controller on the base machine.
Login to the base machine and open a command prompt.
Create a namespace where the NGINX Ingress Controller needs to be deployed using the following command.
kubectl create namespace <Namespace name>For example,
kubectl create namespace nginxAdd the repository from where the Helm charts for installing the NGINX Ingress Controller must be fetched using the following command.
helm repo add stable https://charts.helm.sh/stable
helm repo add ingress-nginx https://kubernetes.github.io/ingress-nginx
Install the NGINX Ingress Controller using Helm charts using the following command.
helm install nginx-ingress --namespace <Namespace name> --set controller.replicaCount=1 --set controller.nodeSelector."beta\.kubernetes\.io/os"=linux --set defaultBackend.nodeSelector."beta\.kubernetes\.io/os"=linux ingress-nginx/ingress-nginx --set controller.publishService.enabled=true --set controller.ingressClassResource.name=<NGINX ingress class name> --set podSecurityPolicy.enabled=true --set rbac.create=true --set controller.extraArgs.enable-ssl-passthrough="true" --set controller.service.annotations."service\.beta\.kubernetes\.io/azure-load-balancer-internal"=\"true\" --version 4.3.0For example,
helm install nginx-ingress --namespace nginx --set controller.replicaCount=1 --set controller.extraArgs.enable-ssl-passthrough="true" --set controller.nodeSelector."beta\\.kubernetes\\.io/os"=linux --set defaultBackend.nodeSelector."beta\\.kubernetes\\.io/os"=linux ingress-nginx/ingress-nginx --set controller.publishService.enabled=true --set controller.ingressClassResource.name=nginx-anon --set podSecurityPolicy.enabled=true --set rbac.create=true --set controller.service.annotations."service\\.beta\\.kubernetes\\.io/azure-load-balancer-internal"=\\"true\\" --version 4.3.0For more information about the various configuration parameters for installing the NGINX Ingress Helm charts, refer to
values.yamlfile.Check the status of the nginx-ingress release and verify that all the deployments are running accurately using the following command.
kubectl get pods -n <Namespace name>For example,
kubectl get pods -n nginxNote: The pod name should be noted. It is required as a parameter in the next step.
View the logs on the Ingress pod using the following command.
kubectl logs pod/<pod-name> -n <Namespace name>Obtain the external IP of the nginx service by executing the following command.
kubectl get service --namespace <Namespace name>For example,
kubectl get service -n nginxNote: The IP should be noted. It is required for configuring the Protegrity Anonymization API SDK.
8 - Using Custom Certificates in Ingress
Protegrity Anonymization API uses certificates for secure communication with the client. You can use the certificates provided by Protegrity or use your own certificates. Complete the configurations provided in this section to use your custom certificates with the Ingress Controller.
Ensure that the certificates and keys are in the .pem format.
Note: Skip the steps provided in this section if you want to use the default Protegrity certificates for the Protegrity Anonymization API.
Login to the Base Machine where Ingress in configured and open a command prompt.
Copy your certificates to the Base Machine.
Note: Verify the certificates using the commands provided in the section Working with Certificates.
Create a Kubernetes secret of the server certificate using the following command. The namespace used must be the same where the Protegrity Anonymization API application is to be deployed.
kubectl create secret --namespace <namespace-name> generic <secret-name> --from-file=tls.crt=<path_to_certificate>/<certificate-name> --from-file=tls.key=<path_to_certificate>/<certificate-key>For example,
kubectl create secret --namespace anon-ns generic anon-protegrity-tls --from-file=tls.crt=/tmp/cust_cert/anon-server-cert.pem --from-file=tls.key=/tmp/cust_cert/anon-server-key.pemCreate a Kubernetes secret of the CA certificate using the following command. The namespace used must be the same where the Protegrity Anonymization API application is to be deployed.
kubectl create secret --namespace <namespace-name> generic <secret-name> --from-file=ca.crt=<path_to_certificate>/<certificate-name>For example,
kubectl create secret --namespace anon-ns generic ca-protegrity --from-file=ca.crt=/tmp/cust_cert/anon-ca-cert.pemOpen the
values.yamlfile.Add the following
hostandsecretcode for the Ingress configuration at the end of thevalues.yamlfile.## Refer section in documentation for setting up and configuring NGINX-INGRESS before deploying the application. ingress: ## Add host section with the hostname used as CN while creating server certificates. ## While creating the certificates you can use *.protegrity.com as CN and SAN used in below example host: **anon.protegrity.com** # Update the host according to your server certificates. ## To terminate TLS on the Ingress Controller Load Balancer. ## K8s TLS Secret containing the certificate and key must also be provided. secret: **anon-protegrity-tls** # Update the secretName according to your secretName. ## To validate the client certificate with the above server certificate ## Create the secret of the CA certificate used to sign both the server and client certificate as shown in example below ca_secret: **ca-protegrity** # Update the ca-secretName according to your secretName. ingress_class: nginx-anonNote: Ensure that you replace the
host,secret, andca_secretattributes in thevalues.yamlfile with the values as per your certificate.For more information about using custom certificates, refer to Updating the Configuration Files.
9 - Updating the Configuration Files
Use the template files provided to specify the AKS settings for the Protegrity Anonymization API.
Create the Protegrity Anonymization API namespace using the following command.
kubectl create namespace <name>Note: Update and use the
from the values.yamlfile that is present in the Helm chart.Extract and update the files in the
ANON-API_HELM_1.4.0.x.tgzpackage.The
ANON-API_HELM_1.4.0.x.tgzpackage contains thevalues.yamlfile that must be modified as per your requirements. It also contains thetemplatesdirectory withyamlfiles.Note: Ensure that the necessary permissions for updating the files are assigned to the
.yamlfiles.Navigate to the
<path_to_helm>/templatesdirectory and delete theanon-dbpvc-aws.yamland theanon-storagepvc-aws.yamlfiles.Update the
values.yamlfile.Note: For more information about the
values.yamlfile, refer to values.yaml.Specify a namespace for the pods.
namespace:
  name: **anon-ns**
Specify the node name and zone information for the node as a prerequisite for the database pod and the Anon-Storage(MinIO) pod. Use the node name which is running in the same zone where the AKS is created.
## Prerequisite for setting up Database and Minio Pod.
## This is to handle any new DB pod getting created that uses the same persistence storage in case the running Database pod gets disrupted.
## This persistence also helps persist Anon-storage data.
persistence:
  ## 1. Get the list of nodes in the cluster. CMD: kubectl get nodes
  ## 2. Get the node name which is running in the same zone where the external-storage is created. CMD: kubectl describe nodes
  nodename: "**<Node_name>**"                    # Update the Node name

  ## Fetch the zone in which the node is running using the `kubectl describe node/nodename` command or the following command.
  ## CMD: ` kubectl describe node/<nodename> | grep topology.kubernetes.io/zone | grep -oP 'topology.kubernetes.io/zone=K[^ ]+' `
  zone: "**<Zone in which above Node is running>**"

  ## For EKS cluster, supply the volumeID of the aws-ebs
  ## For AKS cluster, supply the subscriptionID of the azure-disk
  dbstorageId: "**<Provide dbstorage ID>**"           # To persist database schemas.
  anonstorageId: "**<Provide anonstorage ID>**"       # To persist Anonymized data.
Update the repository information in the file. The Anon-Storage pod uses the MinIO Docker image
quay.io/minio/minio:RELEASE.2022-10-29T06-21-33Z, which is pulled from the Public repository.image: minio_repo: quay.io/minio/minio # Public repo path for Minio Image. minio_tag: RELEASE.2022-10-29T06-21-33Z # Tag name for Minio image. repository: **<Repo_path>** # Repo path for the Container Registry in Azure, GCP, AWS. anonapi_tag: **<AnonImage_tag>** # Tag name of the ANON-API Image. anonworkstation_tag: **<WorkstationImage_tag>** # Tag name of the ANON-Workstation Image. pullPolicy: AlwaysNote: Ensure that you update the
repository,anonapi_tag, andanonworkstation_tagaccording to your container registry.MinIO uses access keys and secret for performing file operations. Protegrity provides a default set of credentials that are stored as part of the secret storage-creds. If you are creating your own secret, then, update the existingSecret section.
anonstorage:
  ## Refer the following command for creating your own secret.
  ## CMD: kubectl create secret generic my-minio-secret --from-literal=rootUser=foobarbaz --from-literal=rootPassword=foobarbazqux
  existingSecret: ""                # Supply your secret Name for ignoring below default credentials.
  bucket_name: "anonstorage"        # Default bucket name for minio
  secret:
    name: "storage-creds"           # Secret to access minio-server
    access_key: "anonuser"          # Access key for minio-server
    secret_key: "protegrity"        # Secret key for minio-server
Extract the
values.yamlHelm chart from the package.Uncomment the following parameters and update the secret name in the
values.yamlfile.## This section is required if the image is getting pulled from the Azure Container Registry ## create image pull secrets and specify the name here. ## remove the [] after 'imagePullSecrets:' once you specify the secrets #imagePullSecrets: [] # - name: regcredPerform the following steps for the communication between the Kubernetes cluster and the Azure Container Registry.
Run the following command from a command prompt to login.
docker loginSpecify your ACR access credentials.
Create the secret for Azure by using the following command.
kubectl create secret generic regcred --from-file=.dockerconfigjson=<PATH_TO_DOCKER_CONFIG>/config.json --type=Kubernetes.io/dockerconfigjson --namespace <NAMESPACE>
10 - Deploying the Protegrity Anonymization API to the AKS Cluster
Deploy the pods using the steps in the following section.
Run the following command to deploy the pods.
helm install <helm-name> /<path_to_helm> -n <namespace>Verify that the necessary pods and services are configured and running.
Run the following command to verify the information for accessing the Protegrity Anonymization API externally on the cluster. The port mapping for accessing the UI is displayed after running the command.
kubectl get service -n <namespace>Run the following command to verify the deployment.
kubectl get deployment -n <namespace>Run the following command to verify the pods created.
kubectl get pods -n <namespace>Run the following command to verify the pods.
kubectl get pods -o wide -n <namespace>
Execute the following command to obtain the IP address of the service.
kubectl get ingress -n <namespace>
The container is now ready to process Protegrity Anonymization API requests.
11 - Viewing Protegrity Anonymization API Using REST
Use the URLs provided here for viewing the Protegrity Anonymization API service and pod details after you have successfully deployed the Protegrity Anonymization API.
You need to map the IP address of Ingress in the hosts file with the host name set in the Ingress configuration.
For more information about updating the hosts file, refer to step 2 of the section Enabling Custom Certificates From SDK.
Open a web browser.
Use the following URL to view basic information about the Protegrity Anonymization API.
Use the following URL to view the Swagger UI. The various Protegrity Anonymization APIs are visible on this page.
Use the following URL to view the contractual information for the Protegrity Anonymization API.