Understanding the Protegrity Browser Protector UI Components
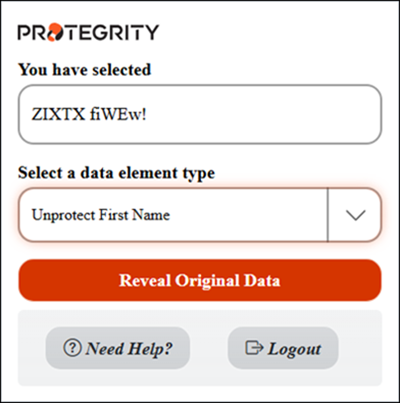
The following figure illustrates the components of the browser extension pop-up window.
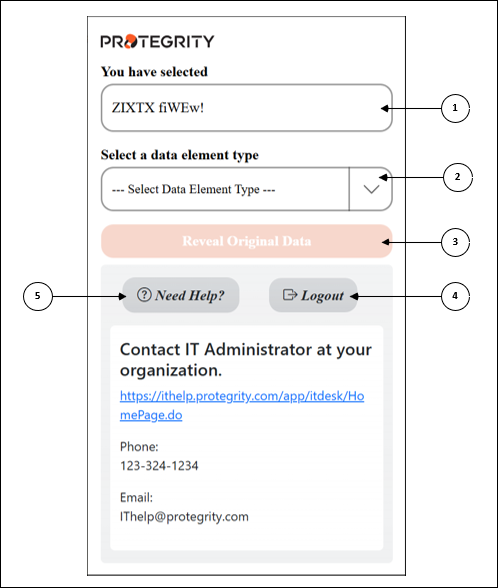
| Callout | Description |
|---|---|
| 1 | Displays the selected tokenized data. |
| 2 | Select the appropriate data element name to detokenize the data. |
| 3 | Select the appropriate operation “Unprotect or Protect”. |
| 4 | Click the Unprotect Data button to retrieve the original data. |
| 5 | Click the Logout button to end your SSO login session. |
| 6 | Click the Need Help button to provide you with additional IT contact details. |
How to use Protegrity Browser Protector Extension
Once installed, the Browser Extension should appear in the list of available extensions next to the browser’s address bar.
Follow these steps to use the Browser Protector extension in Chrome.
Open the Chrome browser displaying the tokenized data.
Highlight the tokenized data that you want to convert back to its original form.
Right-click the selected data and choose the Browser Protector extension.
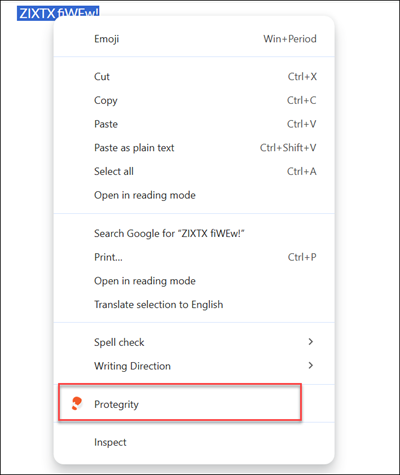
A pop-up window will appear from the extension showing the selected data along with the SSO sign-in option.
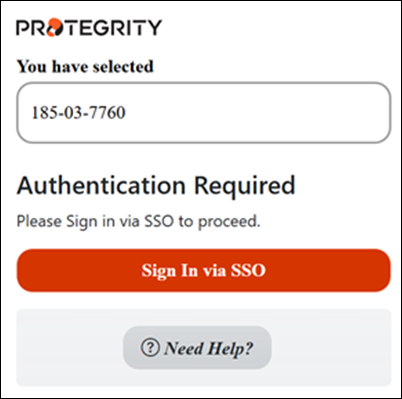
Enter the correct sign-in information and proceed.
After completing the sign-in process, the following screen appears.

The selected data is loaded onto the screen.
Select the Data Element Type that was used to protect the sensitive data.
Extension Screen with Value as deName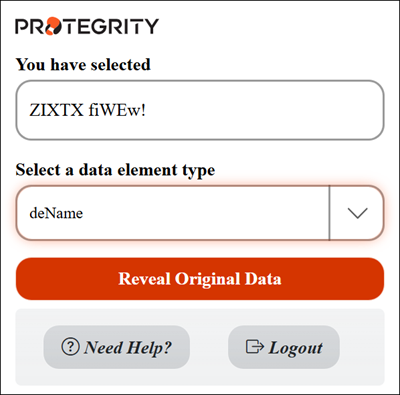
Extension Screen with Label as Unprotect First Name
Select the operation “Unprotect or Protect”.
Click Unprotect Data.
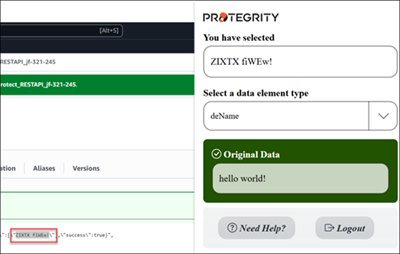
The original data is displayed on the screen.